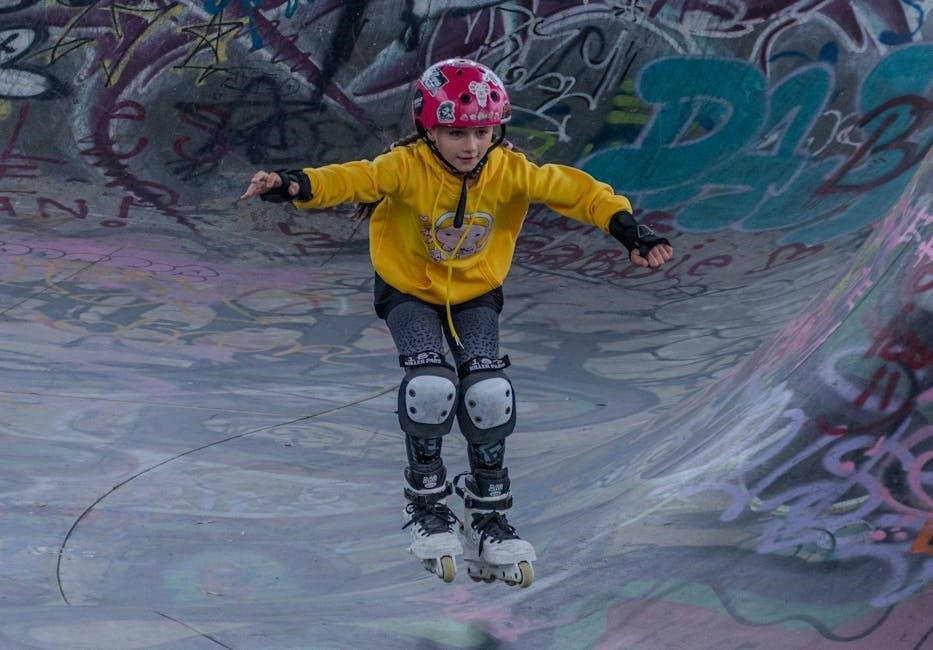
how to rent guide october 2023

The How to Rent Guide, updated in October 2023, is a vital resource for tenants and landlords in England and Wales.

It provides essential information on rights, responsibilities, and the rental process, ensuring clarity and compliance for all parties involved in private renting.

Overview of the Updated Guide

The October 2023 update to the How to Rent Guide introduces key enhancements to support tenants and landlords in the private rental sector.

It includes new sections on the Housing Loss Prevention Advice Service and access to free legal aid, ensuring renters receive timely support to avoid eviction.

The guide also clarifies the rental process, from finding a property to understanding tenancy agreements, while emphasizing the importance of compliance with legal requirements.

By balancing tenant and landlord needs, the updated guide aims to foster a fair and transparent rental market in England and Wales.

Importance of the Guide for Tenants and Landlords

The How to Rent Guide is a crucial document for both tenants and landlords, providing clarity on their respective rights and responsibilities.

For tenants, it offers detailed insights into the rental process, legal protections, and steps to avoid housing loss, empowering them to make informed decisions.

Landlords benefit by ensuring compliance with legal obligations, such as serving the guide and adhering to deposit protection schemes, which are essential for maintaining valid tenancy agreements.

By fostering mutual understanding, the guide promotes a balanced and fair relationship between tenants and landlords, reducing potential disputes and ensuring a smoother rental experience for all parties involved.

Key Updates in the October 2023 Version

The October 2023 update introduces the Housing Loss Prevention Advice Service, expands access to free legal aid, and revises regulations for landlords to ensure compliance and fairness.

New Housing Loss Prevention Advice Service

The October 2023 update introduces the Housing Loss Prevention Advice Service, a new initiative designed to provide tenants with legal advice and support to prevent eviction and housing loss. This service aims to help tenants understand their rights and options, ensuring they can access the assistance they need to maintain stable housing. It also offers guidance on navigating legal processes and court procedures, making it a critical resource for those at risk of losing their home. The service is part of the government’s effort to promote housing security and fairness in the private rental sector. Tenants can now seek professional advice to address disputes or threats of eviction effectively.

Access to Free Legal Aid Services

The October 2023 update of the How to Rent Guide emphasizes access to free legal aid services, ensuring tenants can seek professional advice without financial barriers. This initiative supports tenants facing housing disputes, eviction threats, or legal challenges, providing them with the resources to understand their rights and obligations. The guide highlights where and how to access these services, enabling tenants to navigate complex legal processes confidently. This addition underscores the government’s commitment to fairness and equality in housing, helping tenants avoid unfair evictions and ensuring landlords comply with legal requirements. By promoting awareness of free legal aid, the guide empowers tenants to resolve issues effectively and maintain stable housing.

Revised Regulations for Landlords

The October 2023 update of the How to Rent Guide introduces revised regulations for landlords, ensuring compliance with current legal standards. Key changes include stricter requirements for serving the updated guide to tenants, which is now mandatory for any new or renewed tenancy. Landlords must provide the most recent version to avoid penalties, such as fines or the inability to serve a Section 21 eviction notice. Additionally, the guide emphasizes the importance of adhering to deposit protection schemes and maintaining proper documentation. These revisions aim to create a fair and transparent rental process, balancing the interests of both tenants and landlords. By following these regulations, landlords can ensure they meet all legal obligations and maintain a positive tenancy relationship.

Rights and Responsibilities of Tenants

The How to Rent Guide outlines tenants’ rights, such as fair treatment and legal protections, while detailing their responsibilities, like paying rent and maintaining the property.

Understanding Tenant Rights

Tenants have specific rights protected under the law, including fair treatment, protection from illegal eviction, and the right to a safe living environment. The updated guide emphasizes these rights, ensuring tenants are aware of their entitlements, such as receiving written tenancy agreements and being informed about deposits and their protection schemes. It also highlights access to new services, like the Housing Loss Prevention Advice Service, which provides legal support to help tenants avoid eviction. Understanding these rights empowers tenants to navigate the rental process confidently and address any disputes effectively. The guide serves as a clear reference point for tenants to assert their rights responsibly within the rental agreement.

Obligations of Tenants in a Tenancy Agreement

Obligations of Tenants in a Tenancy Agreement

Tenants are required to meet specific obligations under a tenancy agreement, ensuring the rental process runs smoothly. These include paying rent and utility bills on time, maintaining the property in good condition, and avoiding any illegal activities on the premises. Tenants must also refrain from making unauthorized changes to the property and ensure they do not breach the terms of the agreement. Additionally, tenants are responsible for promptly reporting repairs and maintaining proper hygiene standards. Fulfilling these obligations helps protect the tenant’s rights and ensures a positive relationship with the landlord. Failure to meet these responsibilities may result in legal consequences or termination of the tenancy agreement.

Rights and Responsibilities of Landlords

Landlords have rights and responsibilities under the October 2023 guide, including ensuring properties are safe, complying with regulations, and providing required documents like the How to Rent Guide.

Landlord Obligations Under the Updated Guide

Landlords must provide tenants with the updated How to Rent Guide at the start of a tenancy, ensuring compliance with the latest regulations. They are required to protect deposits in a government-approved scheme and serve prescribed information. Landlords must also maintain the property’s safety, including gas and electrical checks, and ensure it meets minimum energy efficiency standards. Additionally, they must handle eviction processes legally, including serving valid Section 21 notices only when all requirements are met. Failure to comply can result in financial penalties or inability to evict tenants. The guide emphasizes transparency and fairness in all dealings, protecting both parties’ interests effectively.

Consequences of Non-Compliance

Non-compliance with the updated How to Rent Guide can result in severe penalties for landlords, including fines and legal repercussions. Failure to provide the guide or protect deposits properly may invalidate a Section 21 eviction notice, hindering landlords from regaining possession of their property. Additionally, breaches of safety regulations, such as gas and electrical standards, can lead to significant financial penalties. Landlords who fail to meet these obligations risk legal action from tenants, further complicating the rental process. Compliance is crucial to avoid these consequences and ensure a smooth tenancy experience for both parties.

The Rental Process for Tenants

The rental process for tenants involves finding a property, securing it with a deposit, and signing a tenancy agreement, with the guide ensuring a smooth experience.

Steps to Find a Rental Property

Finding a rental property involves researching areas, checking online listings, and contacting agents or landlords. Tenants should assess safety, proximity to amenities, and transport links. Viewing properties is crucial to evaluate condition and suitability. It’s important to act quickly in competitive markets, ensuring all legal and safety standards are met. Tenants should prepare by budgeting for deposits, fees, and rent. Understanding the tenancy agreement and seeking advice if needed is also key. The guide emphasizes the importance of documenting property condition before moving in to avoid disputes. By following these steps, tenants can secure a suitable rental property confidently and responsibly.

What to Do Once a Property is Found

Once a rental property is found, tenants should secure it by paying a holding deposit and reviewing the tenancy agreement. Ensure all terms, including rent, deposit, and duration, are understood. Request copies of safety certificates like Gas Safety and EPC. Verify the property’s condition and document any issues. Landlords must provide a How to Rent guide and protect deposits in a government-approved scheme. Tenants should confirm the start date and keys handover. It’s crucial to check if the property is licensed and meets HMO standards if applicable. Before signing, ensure all queries are addressed to avoid future disputes. This step ensures a smooth transition into the tenancy. Proper documentation protects both parties’ interests and ensures legal compliance.

Legal Requirements for Landlords

Landlords must provide the How to Rent guide, protect deposits in approved schemes, and ensure properties meet safety standards. Compliance with these duties is legally mandatory.

Serving the How to Rent Guide

Serving the How to Rent Guide is a legal requirement for landlords in England and Wales. The updated October 2023 version must be provided to tenants at the start of a new tenancy or renewal. Failure to serve the guide can result in penalties, including fines and the inability to issue a Section 21 eviction notice. The guide outlines the rights and responsibilities of both tenants and landlords, ensuring clarity on key aspects such as deposit protection, property maintenance, and eviction processes. It serves as a crucial resource for tenants to understand their entitlements and for landlords to comply with legal obligations.

Deposit Protection Schemes

Deposit Protection Schemes are a legal requirement for landlords in England and Wales to safeguard tenants’ deposits. The updated How to Rent Guide emphasizes the importance of these schemes, ensuring deposits are securely held and returned when the tenancy ends. Landlords must use one of the approved schemes, such as MyDeposits, Deposit Protection Service, or Tenancy Deposit Scheme, within 30 days of receiving a deposit. Failure to comply can result in penalties, including fines and the inability to serve a Section 21 eviction notice. Tenants are also entitled to claim compensation if their deposit is not protected. This system ensures transparency and fairness for both parties, protecting tenants’ funds and encouraging responsible landlord practices.

Section 21 Notices and Evictions

Section 21 Notices are a legal process landlords in England and Wales can use to regain possession of a property. The updated How to Rent Guide outlines the strict requirements for serving a valid Section 21 Notice, ensuring landlords comply with legal obligations. A Section 21 Notice must be in the prescribed form and cannot be served within the first four months of a tenancy. Landlords must also provide tenants with the How to Rent Guide and an Energy Performance Certificate (EPC) before serving the notice. Failure to follow proper procedures can render the eviction process invalid. Tenants have rights, and courts can reject unfair eviction attempts. Understanding these rules is crucial for both landlords and tenants to navigate the eviction process legally and fairly.

Practical Tips for Tenants

The October 2023 How to Rent Guide offers practical advice for tenants, including understanding rights, documenting property condition, and reviewing tenancy agreements to ensure legal protections.

How to Review a Tenancy Agreement

Reviewing a tenancy agreement is crucial to ensure tenants understand their rights and obligations. Start by carefully reading the document to identify key terms, such as rent, duration, and responsibilities. Ensure the agreement is in writing and signed by both parties. Check for specific clauses, including deposit requirements, repair responsibilities, and notice periods. Tenants should verify that the agreement complies with the latest legal standards, as outlined in the October 2023 How to Rent Guide. Pay attention to any restrictions, such as pet policies or subletting rules. If unclear, seek legal advice or clarification from the landlord. This step ensures transparency and protects both parties throughout the tenancy. The guide emphasizes the importance of a clear, legally binding agreement for a smooth rental experience.

Importance of Documenting the Property Condition

Documenting the property condition is essential for both tenants and landlords to avoid disputes. Tenants should take photos or videos of the property before moving in, noting any damage or issues. This creates a clear record of the property’s state at the start of the tenancy. Landlords should also maintain detailed records to ensure transparency. This documentation helps protect both parties when it comes to deposit returns or repair claims. The October 2023 How to Rent Guide emphasizes the importance of a thorough inventory to clarify responsibilities and prevent potential conflicts. Accurate documentation ensures a fair and smooth process for all involved.

gbc ultima 65 laminator manual

Welcome to the GBC Ultima 65 Laminator Manual, your essential guide to understanding and operating this advanced laminating system. Designed for efficiency and durability, this manual provides detailed instructions to ensure safe and optimal use of the laminator. Covering installation, operation, and troubleshooting, it is a must-read for achieving professional results with your GBC Ultima 65 laminator.

1.1 Overview of the GBC Ultima 65 Laminator

The GBC Ultima 65 Laminator is a high-performance roll laminator designed for professional use. It features EZload film technology, front and back stop buttons, and a footage counter for efficient operation. With its robust design and user-friendly interface, it is ideal for laminating documents with GBC’s Ultima 1 mil film, ensuring high-quality results. This laminator is perfect for offices and businesses seeking reliable, long-lasting lamination solutions.

1.2 Importance of the Manual for Proper Usage

The GBC Ultima 65 Laminator Manual is crucial for ensuring safe and effective operation. It provides detailed instructions for setup, usage, and troubleshooting, helping users avoid errors and maintain the machine. Adhering to the manual prevents damage, ensures optimal performance, and prolongs the laminator’s lifespan. It also outlines safety guidelines, warranty terms, and proper maintenance procedures, making it an indispensable resource for achieving professional results and protecting your investment.

Key Features of the GBC Ultima 65 Laminator

The GBC Ultima 65 Laminator features EZload Film Technology for easy loading, front and back stop buttons for easy control, and a footage counter for tracking film usage. It is compatible with 1 mil film rolls, ensuring smooth lamination and efficient performance. Designed for durability, it offers a user-friendly interface and reliable operation, making it ideal for professional and high-volume laminating needs.

2.1 Design and Build Quality

The GBC Ultima 65 Laminator boasts a robust and user-friendly design, built with high-quality materials for durability and reliability. Its compact yet sturdy frame ensures stability during operation, while the intuitive control panel simplifies navigation. The laminator features a sleek, professional design that fits seamlessly into office environments. Its EZload Film Technology and front/back stop buttons enhance convenience, making it a reliable choice for high-volume laminating tasks. The overall construction ensures long-lasting performance and minimal maintenance.

2.2 Technical Specifications

The GBC Ultima 65 Laminator features a 25-inch film width capacity, accommodating various document sizes. It includes adjustable temperature and speed settings for precise control. Equipped with EZload Film Technology, it ensures easy and quick film replacement. The laminator also comes with a footage counter for monitoring film usage. Built for efficiency, it supports both standard and thermal laminating processes, making it versatile for different office needs. Its technical specifications ensure consistent, high-quality lamination results.

2.3 Unique Features like EZload Film Technology

The GBC Ultima 65 stands out with its innovative EZload Film Technology, designed to simplify film loading. This system ensures accurate alignment and eliminates film wastage. Additionally, the laminator features front and back stop buttons, allowing easy pausing for loading or cutting; A built-in footage counter tracks film remaining, enhancing efficiency. These features make the Ultima 65 user-friendly and reduce downtime, ensuring a seamless lamination experience for users of all skill levels. Its advanced design focuses on convenience and productivity.

Installation and Setup

Begin by carefully unboxing and positioning the laminator on a stable surface. Connect it to a power source and perform the initial calibration. A test run ensures everything functions smoothly, guaranteeing optimal performance from the start.

3.1 Unboxing and Initial Preparation

Start by carefully unboxing the GBC Ultima 65 laminator, ensuring all components are accounted for. Remove any packaging materials and protective covers. Place the laminator on a flat, stable surface in a well-ventilated area. Before plugging in, inspect the machine for any damage or debris from shipping. Refer to the manual for specific unpacking instructions to ensure proper preparation for first-time use.

3.2 Connecting the Laminator to Power

Plug the GBC Ultima 65 laminator into a grounded electrical outlet rated for its power requirements. Ensure the voltage matches the specifications in the manual to prevent damage; Avoid using extension cords unless necessary. The laminator should not be modified or tampered with for electrical connections. Keep the power cord away from heat sources and ensure the area is well-ventilated. Always unplug the laminator during maintenance or when not in use for safety.

3.3 Initial Calibration and Test Run

Power on the laminator and allow it to warm up. Load a test film using the EZload technology for alignment. Run a small batch to ensure smooth operation. Adjust temperature and speed settings as needed. Check for proper sealing and alignment. If issues arise, refer to troubleshooting guidelines. This step ensures optimal performance and prepares the laminator for regular use. Always follow safety precautions during calibration.

3.4 Troubleshooting Common Setup Issues

Common setup issues include power connectivity problems or improper film alignment. Ensure the laminator is correctly plugged into a stable power source. If the machine doesn’t power on, check the outlet and connections. For film misalignment, reload the roll according to the EZload guide. If temperature settings malfunction, reset the laminator and recalibrate. Refer to the manual for detailed solutions to resolve these issues efficiently and ensure smooth operation.

Loading Film into the GBC Ultima 65

Loading film into the GBC Ultima 65 is straightforward using EZload technology. Ensure the roll is properly threaded and aligned for smooth operation. Always use compatible film rolls for optimal performance and to prevent jams or damage to the machine. Proper film loading ensures high-quality lamination results every time.

4.1 Step-by-Step Guide to Loading Film

Turn off the laminator and ensure it is cool. 2. Remove any remaining film or debris. 3. Align the new film roll with the machine’s rollers. 4. Gently thread the film through the laminator’s path. 5. Secure the roll using the provided mounting brackets. 6. Adjust the tension to prevent slack or tightness. 7. Perform a test run to ensure proper alignment and smooth operation.

4.2 Understanding Film Types and Compatibility

Choosing the right laminating film is crucial for optimal results. The GBC Ultima 65 supports various film types, including thermal and pressure-sensitive options. Ensure compatibility by selecting films designed for roll laminators. Thermal films are ideal for high-volume use, while pressure-sensitive films are suitable for lighter applications. Always verify the film’s thickness and core size match the laminator’s specifications for smooth operation. This ensures consistent lamination quality and extends machine longevity.

4.3 Tips for Proper Film Alignment

Proper film alignment is essential for smooth operation and high-quality lamination. Always center the film roll on the laminator’s core to prevent uneven wrapping. Use the EZload Film Technology for effortless alignment. Ensure the film is taut and free from wrinkles before starting. Align the film’s edge with the machine’s guide to maintain consistency. Regularly inspect the film path to avoid misalignment issues, ensuring professional-grade results every time. Proper alignment extends film life and prevents machine wear.

  • Center the film roll on the laminator’s core for balanced operation.
  • Use EZload Film Technology for quick, accurate alignment.
  • Ensure the film is taut and wrinkle-free before use.

Operating the GBC Ultima 65 Laminator

Operating the GBC Ultima 65 Laminator is straightforward, with intuitive controls for temperature, speed, and film tracking. Start the process with the push of a button, monitor progress via the footage counter, and ensure safety with emergency stop features. Adjust settings as needed for optimal lamination results across various materials.

5.1 Starting the Lamination Process

To begin laminating, ensure the machine is powered on and preheated to the desired temperature. Load the film correctly using the EZload technology for a seamless process. Place your document or material between the film layers, aligning it properly for even laminating. Press the start button to initiate the process. The laminator will automatically feed the material through, ensuring a professional finish. Use the footage counter to monitor film usage and maintain efficiency during operation.

5.2 Adjusting Temperature and Speed Settings

Adjust the temperature based on the type of film and material being laminated. Use the control panel to set the ideal temperature, typically between 200°F and 300°F. For speed, choose from low, medium, or high settings depending on the thickness of your material. Monitor the footage counter to track film usage and ensure efficient lamination. Always refer to the film manufacturer’s guidelines for optimal temperature and speed combinations to achieve professional results.

5.3 Using the Footage Counter for Efficiency

The GBC Ultima 65 features a footage counter that tracks the remaining film, ensuring efficient laminating sessions; This tool allows users to monitor film usage accurately, reducing downtime and waste. By keeping track of film levels, operators can plan replenishment effectively, streamline workflow, and maintain productivity. The footage counter is a convenient feature that enhances overall efficiency and resource management.

5.4 Safety Precautions During Operation

Always follow safety guidelines when operating the GBC Ultima 65 laminator. Keep loose clothing and long hair tied back, and avoid touching hot surfaces. Never leave the laminator unattended during operation. Ensure the area is clear of debris and flammable materials. Use protective gloves when handling hot or sharp objects. Keep children away from the laminator. Refer to the manual for detailed safety instructions to prevent accidents and ensure safe usage.

Maintenance and Upkeep

Regular maintenance ensures optimal performance. Clean the laminator frequently to prevent dust buildup, lubricate moving parts, and store it properly when not in use for longevity.

6.1 Cleaning the Laminator Regularly

Regular cleaning is crucial for maintaining efficiency. Use a soft cloth to wipe down surfaces, removing dust and debris. Avoid harsh chemicals, as they may damage components. Ensure rollers are free from adhesive residue to prevent lamination issues. Cleaning after each use helps prolong the laminator’s lifespan and ensures consistent performance. Always unplug the device before cleaning for safety.

6.2 Lubricating Moving Parts

Lubricating moving parts ensures smooth operation and prevents wear. Use a high-quality, non-stick silicone-based lubricant on gears and rollers. Apply a small amount to friction points, avoiding over-lubrication to prevent residue buildup. Turn the laminator on briefly to distribute the lubricant evenly. Regular lubrication enhances performance and extends the lifespan of your GBC Ultima 65 laminator.

6.3 Storing the Laminator When Not in Use

When storing the GBC Ultima 65 laminator, ensure it is turned off and unplugged. Clean the machine thoroughly to prevent dust buildup. Cover it with a protective cover to shield from debris. Store in a dry, cool environment away from direct sunlight. Secure any loose parts to avoid damage. Proper storage maintains the laminator’s condition and ensures optimal performance when reused.

Troubleshooting Common Issues

Addressing common issues ensures optimal performance. Key problems include film jams, temperature malfunctions, and motor issues. Refer to specific sections for detailed solutions to resolve these effectively.

7.1 Resolving Film Jamming Problems

Film jams are common issues that can disrupt lamination processes. To resolve them, turn off the laminator and allow it to cool. Carefully remove any obstructed film without forcing it. Use the reverse function if available. Inspect rollers and guides for debris and clean them thoroughly. Ensure proper film alignment and tension before resuming operation. Regular maintenance can help prevent future jams and maintain efficiency.

7.2 Fixing Temperature Control Malfunctions

Temperature control malfunctions can disrupt lamination quality. Start by turning off the laminator and allowing it to cool. Check the thermostat for accuracy and ensure sensors are clean. If issues persist, reset the laminator or consult the manual for calibration steps. Verify power supply stability and avoid overheating by maintaining proper ventilation. If problems continue, contact GBC customer support for professional assistance or potential part replacement.

7.3 Addressing Motor and Gear Issues

If the motor or gears malfunction, stop the laminator immediately and unplug it; Inspect for debris or obstructions and clean thoroughly. Lubricate moving parts if recommended. Check for misalignment or wear. Replace worn gears or components promptly. Contact a professional if issues persist. Regular maintenance can prevent such problems, ensuring smooth operation and extending the laminator’s lifespan. Always follow safety guidelines when performing repairs.

Tips for Optimal Performance

Regular maintenance, proper film alignment, and using high-quality supplies ensure optimal performance. Adjust temperature settings for materials and keep the laminator clean to maintain efficiency and longevity.

8.1 Choosing the Right Lamination Film

Selecting the correct lamination film ensures optimal performance. The GBC Ultima 65 supports both standard films and the innovative Ultima 1 mil film. Always check the film thickness and type to match your material. Using compatible films prevents jams and ensures smooth operation. Refer to the manual for recommended specifications to achieve professional-grade lamination results consistently.

8.2 Enhancing Lamination Quality

To enhance lamination quality, ensure proper film alignment and maintain consistent temperature settings. Regular cleaning and lubrication of moving parts prevent dust buildup and wear. Use high-quality GBC films designed for the Ultima 65. Adjust speed settings according to material thickness and type. Properly align documents before lamination to avoid bubbles or wrinkles. Regular maintenance and adherence to guidelines ensure professional-grade results every time.

8.3 Working with Different Materials

The GBC Ultima 65 accommodates various materials, including papers, photos, and ID cards. For optimal results, adjust temperature and pressure based on material thickness. Use higher temperatures for thicker items and lower for delicate papers. Ensure materials are dry and free of dust. Compatible with pouches and rolls, the laminator handles sizes up to 9.5 inches wide. Experiment with settings to achieve the best outcome for your specific needs.

Warranty and Customer Support

The GBC Ultima 65 is backed by a comprehensive warranty. Contact customer support for assistance, and locate authorized service centers for professional maintenance and repairs.

9.1 Understanding the Warranty Terms

The GBC Ultima 65 laminator is covered by a limited warranty that protects against manufacturing defects. The warranty period typically lasts for one year from the date of purchase. It covers repair or replacement of defective parts, excluding damages caused by misuse or improper maintenance. For full details, refer to the official manual or contact GBC customer support directly. Proper documentation and proof of purchase are required for warranty claims.

9.2 Contacting GBC Customer Service

To contact GBC customer service, visit their official website or call their support hotline for assistance. You can also reach out via email for inquiries or troubleshooting. The support team is available to address questions about the Ultima 65 laminator, warranty claims, or technical issues. For more details, visit the GBC support page, where you can find contact information and additional resources to help you get the most out of your laminator.

9.3 Finding Authorized Service Centers

To locate an authorized service center for your GBC Ultima 65 laminator, visit the official GBC website and use their service locator tool. Enter your location to find nearby centers. Additionally, contact GBC customer service for recommendations or refer to the manual for a list of approved service providers. Ensuring your laminator is serviced by authorized centers guarantees compliance with warranty terms and maintains optimal performance.

The GBC Ultima 65 laminator manual serves as a comprehensive guide to unlock its full potential, ensuring efficient and safe operation for professional-grade lamination results.

10.1 Summary of Key Takeaways

The GBC Ultima 65 laminator manual emphasizes ease of use, efficient performance, and durability. Key features like EZload film technology simplify operation, while proper installation and maintenance ensure longevity. Troubleshooting guides and customer support options are provided for seamless issue resolution. The laminator excels with various materials, delivering consistent results when following the manual’s guidelines for optimal performance and safety.

10.2 Final Thoughts on the GBC Ultima 65

The GBC Ultima 65 laminator stands out as a reliable and efficient tool for professional lamination needs. Its user-friendly design, combined with advanced features like EZload film technology, ensures a seamless experience. With proper maintenance and adherence to the manual, it delivers consistent, high-quality results. Whether for office or industrial use, the Ultima 65 is a durable investment that meets demanding workflows with ease and precision.

References

Consult the official GBC Ultima 65 manual, GBC support website, and additional online resources for comprehensive guidance and troubleshooting tips specific to this laminator model.

11.1 Official GBC Ultima 65 Manual

The official GBC Ultima 65 manual is your primary resource for operating instructions, safety guidelines, and troubleshooting. Regularly updated, it ensures you have the latest information for optimal use. This comprehensive guide covers installation, maintenance, and best practices, making it indispensable for users seeking to maximize their laminator’s performance and longevity.

11.2 GBC Support Website

The GBC Support Website is a dedicated resource offering comprehensive assistance for the Ultima 65 laminator. It provides FAQs, repair guides, and software updates to ensure smooth operation. Users can download manuals, drivers, and firmware or access troubleshooting tips. The site also includes contact information for customer support and is regularly updated with new resources and service alerts, making it a valuable tool for maintaining your laminator.

11.3 Additional Online Resources

Beyond the official GBC resources, additional online materials are available to support Ultima 65 users. Websites like YouTube offer video tutorials and step-by-step guides, while forums provide user experiences and troubleshooting tips. Third-party repair guides and laminator communities help maintain and optimize the laminator’s performance for optimal results.

tv guide racine wi

Discover the ultimate guide to TV listings in Racine, WI, offering detailed schedules for cable, satellite, and over-the-air channels. Perfect for finding your favorite shows and movies.

Stay updated with local news, sports, and entertainment. Easily navigate channel lineups from providers like Spectrum and DirecTV, ensuring you never miss your must-watch programs.

1.1 Overview of TV Listings in Racine, WI

Racine, WI, offers a diverse range of TV listings catering to various viewer preferences. With options like Spectrum, DirecTV, and antenna TV, residents can access local news, sports, and entertainment. Cable TV provides extensive channel lineups, including premium networks, while satellite TV offers flexibility and wider coverage. Over-the-air channels, such as Milwaukee OTA broadcasts, ensure free access to popular shows and local programming. The TV guide for Racine includes detailed schedules, allowing viewers to plan their viewing experience. Whether you prefer live sports, movies, or educational content, the listings provide a comprehensive overview of what’s available. This makes it easy to discover new channels or stay updated on your favorite programs.

1.2 Importance of TV Guides for Local Viewers

TV guides are essential for local viewers in Racine, WI, as they provide a centralized platform to explore and navigate various TV channels and programs. Whether it’s cable, satellite, or over-the-air TV, these guides help viewers stay informed about schedules and programming. They enable users to discover new channels, track favorite shows, and plan their viewing experience. Additionally, TV guides highlight local content, ensuring residents stay connected to community news, sports, and events. By offering detailed listings, they empower viewers to make the most of their TV service, enhancing entertainment and information accessibility for the entire household.

Cable TV Listings in Racine, WI

Explore cable TV listings in Racine, WI, featuring a wide range of channels from Spectrum, including popular networks like NBC, FOX Business, and MotorTrend for diverse entertainment.

2.1 Spectrum Channel Lineup in Racine, WI

Spectrum offers an extensive channel lineup in Racine, WI, catering to diverse viewer preferences. Subscribers can enjoy popular networks such as NBC, FOX Business, and MotorTrend, ensuring a mix of news, entertainment, and lifestyle content. The lineup also includes sports channels like CNBC and local broadcasts, providing coverage of major events and community updates. With Spectrum, viewers in Racine can access a variety of premium and international channels, as well as Pay-Per-View options for special events and movies. This robust selection allows residents to customize their viewing experience, whether they prefer live sports, movies, or educational programming.

2.2 Popular Cable TV Channels in Racine

Racine, WI, offers a diverse range of popular cable TV channels catering to various viewer preferences. Channels like NBC, FOX Business, and MotorTrend provide a mix of news, entertainment, and lifestyle content. Sports enthusiasts can enjoy coverage from CNBC, while local broadcasts ensure community updates. Additionally, channels such as WTMJ ⸺ NBC and Spectrum’s exclusive offerings bring a blend of local and national programming. These channels collectively provide a rich viewing experience, ensuring there’s something for everyone in Racine. Whether it’s live sports, movies, or educational content, the variety of channels meets the diverse needs of the local audience.

2.3 How to Choose the Best Cable TV Provider

Selecting the right cable TV provider in Racine, WI, involves evaluating channel offerings, pricing, and additional features like HD and DVR services. Compare providers such as Spectrum, which offers a wide range of channels including local networks and premium options. Consider the variety of sports, news, and entertainment channels to suit your viewing habits. Check for HD capabilities and DVR storage to ensure a high-quality viewing experience. Also, review pricing plans to find the best value for your budget. Look for promotions or bundle deals that include internet and TV services. Finally, read reviews and assess customer service ratings to ensure reliability and satisfaction with your chosen provider.

Satellite TV Listings in Racine, WI

Explore satellite TV options like DirecTV in Racine, WI, offering extensive channel lineups, HD services, and reliable coverage for sports, news, and entertainment.

3.1 DirecTV Channel Offerings in Racine, WI

DirecTV provides a diverse range of channels in Racine, WI, including popular networks like NBC, FOX, and CBS, as well as premium options such as HBO and Showtime.

With DirecTV, viewers can access HD services, DVR capabilities, and exclusive sports packages. The lineup also features niche channels like the Sci Fi Channel and ShopNBC, catering to varied interests.

Additionally, DirecTV offers regional programming, ensuring local news and sports are easily accessible. The channel lineup is customizable, allowing users to tailor their viewing experience to their preferences.

Whether you’re a fan of movies, sports, or entertainment, DirecTV’s extensive offerings in Racine, WI, provide something for everyone, making it a top choice for satellite TV enthusiasts.

3.2 Satellite TV Providers and Their Features

Satellite TV providers in Racine, WI, such as DirecTV, offer a wide array of channels with HD quality and DVR capabilities for recording shows.

These providers often include premium channels like HBO and Showtime, along with exclusive sports packages, making them appealing to sports enthusiasts.

Some satellite TV services also provide regional programming, ensuring access to local news and events tailored to the Racine area.

Additionally, features like customizable channel lineups and on-demand content allow viewers to personalize their entertainment experience.

With competitive pricing and advanced technology, satellite TV remains a popular choice for residents seeking diverse and high-quality programming options.

3.3 Benefits of Satellite TV Over Cable

Satellite TV offers broader coverage and more channel options compared to cable, making it ideal for viewers in Racine, WI, who want extensive entertainment choices.

With satellite, users can access exclusive sports packages and premium channels, providing unparalleled variety for sports and movie enthusiasts.

Satellite TV often delivers better HD quality and fewer outages, ensuring a more reliable viewing experience.

Additionally, satellite providers frequently include advanced DVR features, allowing users to record multiple shows simultaneously.

Satellite TV also tends to have more flexible pricing plans, making it a cost-effective option for many households.

Overall, satellite TV combines wider availability, diverse programming, and cutting-edge technology, making it a preferred choice for viewers seeking high-quality entertainment.

Over-the-Air TV Listings in Racine, WI

Explore free over-the-air TV listings in Racine, WI, featuring local channels, news, and entertainment. Use an antenna to access channels like KRMS Info Channel and more, free of charge.

4.1 Milwaukee OTA Broadcast Channels

Milwaukee OTA broadcast channels offer a variety of free programming for Racine, WI viewers. Major networks like WBBM, WTMJ, and PBS Wisconsin provide local news, sports, and entertainment. Channels such as KRMS Info Channel broadcast community-focused content, airing shows like “KRMS Info Channel” at 5:00 PM, 5:30 PM, and 6:00 PM. These over-the-air channels are accessible with a simple antenna, ensuring free access to popular programs. Viewers can enjoy live sports, news, and entertainment without subscription fees. Milwaukee OTA channels are a cost-effective way to stay informed and entertained, offering a diverse range of content for all audiences in Racine, WI.

4.2 Antenna TV Schedule for Racine, WI

The antenna TV schedule for Racine, WI, provides a wide range of free over-the-air channels. Viewers can access popular networks like NBC, CBS, and PBS, offering local news, sports, and entertainment. Channels such as KRMS Info Channel broadcast community-focused programs, with air times including 5:00 PM to 5:30 PM and 6:00 PM to 6:30 PM. Other channels like WBBM-DT1 and WTMJ offer diverse programming, including shows like “The Munsters” and news broadcasts. With an antenna, residents can enjoy free access to these channels, ensuring they stay informed and entertained without subscription fees. The schedule varies daily, providing a mix of live events, movies, and series for all audiences in Racine, WI.

4.3 How to Set Up an Antenna for Free TV

Setting up an antenna for free TV in Racine, WI, is a straightforward process. Start by choosing the right antenna type, such as indoor or outdoor, based on your location and signal strength needs. Install the antenna in a location with minimal obstructions, ideally near a window or outdoors for better reception. Connect the antenna to your TV and scan for available channels using the TV’s built-in tuner. Ensure your antenna is HD-compatible to access high-definition channels. For optimal results, test different positions to maximize signal strength. Regularly check for software updates on your TV to maintain compatibility with over-the-air broadcasts. This setup allows you to enjoy free access to local channels like KRMS Info Channel and other Milwaukee-area broadcasts without subscription fees.

TV Schedule for Specific Dates

Check today’s and tonight’s TV schedules in Racine, WI, with detailed listings for popular channels like KRMS Info Channel and other local broadcasts.

5.1 Today’s TV Schedule in Racine, WI

Today’s TV schedule in Racine, WI, offers a variety of programming for all interests. KRMS Info Channel airs segments from 5:00 PM to 7:00 PM, providing local updates and community news. Meanwhile, channels like WBBM-DT1 and WBBM-DT2 feature a mix of daytime shows, including news broadcasts and classic series. Sports fans can catch live events on networks such as FOX Business Network and CNBC. For entertainment, Sci Fi Channel and ShopNBC offer a range of movies and shopping programs. With options for cable, satellite, and antenna viewers, there’s something for everyone to enjoy throughout the day.

Check your provider’s lineup for specific channel availability and times.

5.2 Tonight’s TV Schedule in Racine, WI

Tonight’s TV schedule in Racine, WI, features a diverse lineup of programming for viewers of all interests. KRMS Info Channel continues its evening broadcast with segments airing from 7:00 PM to 10:00 PM, offering local insights and updates. Sports enthusiasts can tune into FOX Business Network for live coverage of games, while entertainment seekers can explore movies and shows on channels like MotorTrend and DirecTV. Additionally, Milwaukee OTA Broadcast Listings provide access to prime-time shows and news programs for antenna users. With a mix of cable, satellite, and over-the-air options, tonight’s schedule ensures there’s something for everyone to enjoy.

Check your provider’s lineup for exact channel numbers and airing times to plan your viewing experience.

Technical Information for TV Viewers

Optimize your viewing experience with insights on DVR and HD services, antenna requirements, and troubleshooting tips for cable, satellite, and over-the-air TV setups in Racine, WI.

6.1 Antenna Requirements for Racine, WI

For optimal over-the-air TV reception in Racine, WI, an outdoor antenna is recommended due to the city’s proximity to Milwaukee’s broadcast towers. A high-quality UHF/VHF antenna with a range of at least 30 miles ensures access to local channels like NBC, CBS, and FOX. Indoor antennas can work but may experience signal interference. Ensure proper installation and aim the antenna towards Milwaukee for the strongest signal. Additionally, using an amplifier may improve reception in areas with weaker signals. Regularly check for channel updates and re-scan for available broadcasts to maximize your free TV experience.

6.2 DVR and HD Services in Racine, WI

In Racine, WI, DVR and HD services enhance your TV experience with crystal-clear resolution and advanced recording features. Providers like Spectrum and DirecTV offer HD channel lineups, including sports, movies, and local programming. DVR capabilities allow you to record multiple shows simultaneously and store hours of content.

HD services provide vibrant visuals and immersive sound, making movies and sports feel lifelike. Many plans include HD channels at no extra cost. DVR systems often come with large storage capacities, ensuring you never miss your favorite shows. These services are perfect for upgrading your viewing experience in Racine, WI.

6.3 Troubleshooting Common TV Issues

Experiencing issues with your TV in Racine, WI? Common problems include poor channel reception, connectivity issues, or DVR malfunctions. Start by checking your antenna or cable connections for loose wires. For over-the-air viewers, ensure your antenna is properly aligned and positioned for optimal signal strength. If using cable or satellite, restart your DVR or receiver to resolve temporary glitches. Check for firmware updates or reset your device to factory settings if issues persist. For HD channel problems, verify that your subscription includes HD services and that your equipment supports HD viewing. If troubleshooting fails, contact your provider for technical support to address signal outages or equipment failures.

Popular TV Channels in Racine, WI

Explore top channels in Racine, WI, including WTMJ (NBC), WISN (ABC), and Fox6 (FOX). Discover top sports, news, and entertainment options tailored to local preferences.

7.1 Local News Channels in Racine, WI

In Racine, WI, residents rely on trusted local news channels for updates. Major networks include WTMJ (NBC 4), WISN (ABC 12), and WITI (FOX 6), offering comprehensive coverage of regional news, weather, and sports.

WTMJ’s “TMJ4 News Today” and WISN’s “12 News This Morning” are popular for morning updates. Additionally, CBS 58 and Telemundo Wisconsin provide diverse perspectives, ensuring a well-rounded news experience for the community.

These channels cover local events, traffic, and breaking news, making them essential for staying informed in Racine, WI. Their dedication to quality journalism keeps viewers up-to-date on what matters most.

7.2 Sports Channels Available in Racine

Sports enthusiasts in Racine, WI, can enjoy a wide range of channels catering to their interests. Major networks like ESPN, FOX Sports, and NBC Sports provide extensive coverage of national and international events.

For local fans, Bally Sports Wisconsin airs Milwaukee Bucks (NBA), Brewers (MLB), and Admirals (AHL) games. Additionally, Big Ten Network is ideal for college sports, while NFL Network and MLB Network offer in-depth league coverage. These channels ensure viewers never miss a moment of their favorite sports action.

7.3 Entertainment and Movie Channels

Racine, WI, offers a diverse selection of entertainment and movie channels to suit every viewer’s taste. Premium networks like HBO, SHOWTIME, and Starz deliver blockbuster movies and original series. For film enthusiasts, channels such as TMC (The Movie Channel) and SundanceTV provide a curated selection of independent and classic films.

Additionally, entertainment hubs like E!, A&E, and Bravo offer reality TV, documentaries, and lifestyle programming. Streaming platforms like Netflix and Hulu are also accessible, featuring on-demand content. With such a wide range of options, viewers in Racine can enjoy endless entertainment choices tailored to their preferences.

How to Use the TV Guide Effectively

Master your TV viewing experience with personalized settings and smart features. Customize your guide with favorites, enable parental controls, and access closed captions for enhanced viewing.

  • Sync with DVR for easy recording.
  • Share show recommendations with friends.

8.1 Navigating the TV Guide Interface

Navigating the TV guide interface for Racine, WI, is straightforward and intuitive. The interface is designed to enhance your viewing experience with user-friendly features. Channel listings are organized alphabetically or by genre, making it easy to find your favorite shows. Use the search bar to quickly locate specific programs or channels. The guide also features a grid view with time slots, allowing you to scroll through the schedule for the day or week. Additional features include filtering options to view only HD channels or favorites. The interface also supports parental controls to restrict access to certain content. With clear categories and responsive navigation, you can efficiently explore and plan your TV watching experience.

8.2 Setting Reminders and Notifications

Setting reminders and notifications on the TV guide for Racine, WI, ensures you never miss your favorite shows. Users can easily customize alerts for upcoming programs, sports events, or movies. The interface allows you to filter reminders by channel, genre, or specific shows. For example, you can set a reminder for a live sports game or a new episode of your favorite series. Notifications can be delivered via email or in-app alerts. Additionally, you can schedule DVR recordings directly from the guide. This feature enhances your viewing experience by helping you stay organized and ensuring you catch every must-watch moment. Customize your reminders to suit your preferences and enjoy seamless entertainment planning.

8.3 Filtering Channels by Genre

Filtering channels by genre in the Racine, WI TV guide allows viewers to customize their experience. Users can select genres like sports, movies, or news to focus on relevant channels. This feature helps streamline browsing, ensuring quick access to preferred content. For instance, sports fans can easily find ESPN or FOX Sports, while movie enthusiasts can locate channels like HBO or AMC. The guide also supports creating custom genre lists, enhancing convenience. This functionality works across cable, satellite, and antenna channels, providing a tailored viewing experience. By filtering by genre, viewers save time and enjoy a more organized approach to finding their favorite shows or events, making the TV guide a powerful tool for personalized entertainment.

The Racine, WI TV Guide is your go-to source for comprehensive channel listings, helping you catch your favorite shows and discover new ones effortlessly.

9.1 Summary of TV Guide Racine, WI

The Racine, WI TV Guide provides a comprehensive overview of local television listings, covering cable, satellite, and over-the-air channels. It includes detailed schedules for popular channels like Spectrum, DirecTV, and Milwaukee OTA broadcasts. Viewers can access information on sports, news, and entertainment channels, as well as DVR and HD services. The guide also assists with antenna setup and troubleshooting, ensuring seamless TV experiences. By organizing listings by date and genre, it helps users plan their viewing effortlessly. Whether you prefer live sports or movies, the Racine TV Guide is an essential tool for maximizing your television experience.

9.2 Final Tips for Maximizing Your TV Experience

To enhance your viewing experience in Racine, WI, use the TV Guide to set reminders for your favorite shows and filter channels by genre. Explore DVR and HD services for better quality and convenience. Regularly check your antenna setup to ensure optimal reception for over-the-air channels. Stay updated on the latest channel lineups from providers like Spectrum and DirecTV. Consider combining cable or satellite services with free OTA channels for a diverse viewing options. Planning your schedule in advance and utilizing the guide’s features will help you make the most of your TV time. This approach ensures you never miss your favorite programs and enjoy a seamless entertainment experience.

divinely guided perosn

A divinely guided person embodies a profound spiritual connection‚ often reflecting wisdom‚ compassion‚ and alignment with a higher purpose. Historical figures like prophets and saints exemplify this‚ while modern interpretations emphasize inner guidance and ethical living‚ inspiring others through their presence and actions.

1.1 Definition of a Divinely Guided Person

A divinely guided person is someone who embodies a deep spiritual connection‚ living in alignment with a higher purpose or divine will. This individual often exhibits wisdom‚ compassion‚ and a strong moral compass‚ inspiring others through their actions and presence. Rooted in faith or inner wisdom‚ they navigate life’s challenges with grace and resilience‚ serving as a source of guidance and hope. Their decisions and behaviors reflect a commitment to ethical living and the greater good‚ fostering positive change in their communities and beyond.

Such individuals are often seen as mentors or role models‚ offering insight and support to those seeking their own path. Their journey is marked by a profound sense of purpose‚ as they fulfill their unique role in the world. This definition underscores the transformative power of living a life guided by divine principles‚ emphasizing the importance of both personal and collective growth.

1.2 Historical Context and Examples

Throughout history‚ divinely guided persons have played pivotal roles in shaping cultures‚ religions‚ and societies. Prophets like Moses‚ Jesus‚ and Muhammad are quintessential examples‚ as they are believed to have received divine revelations‚ guiding humanity toward moral and spiritual truths. Similarly‚ figures like Buddha and Gandhi exemplify divine guidance through their teachings and actions‚ even if not traditionally viewed as prophets. Their lives reflect a harmonious alignment with universal principles‚ inspiring millions to seek enlightenment and ethical living.

Saints and spiritual leaders‚ such as Mother Teresa‚ further illustrate this concept. Her selfless service to humanity‚ driven by a profound sense of divine purpose‚ embodies the essence of being guided by a higher power. These individuals often face trials and challenges‚ yet their unwavering faith and resilience serve as testimonies to the transformative power of divine guidance. Their legacies continue to influence generations‚ offering insights into how divine wisdom can manifest in human lives.

Historically‚ such individuals have been seen as bridges between the divine and the mundane‚ offering hope‚ wisdom‚ and direction to those seeking meaning and purpose. Their stories underscore the timeless relevance of divine guidance in shaping individual and collective destiny.

Characteristics of a Divinely Guided Person

A divinely guided person exhibits deep spiritual wisdom‚ compassion‚ and humility. They demonstrate resilience in adversity‚ embracing selflessness and unwavering faith. Their actions are rooted in ethical decisions‚ inspiring others to seek a higher purpose.

2.1 Spiritual Traits and Attributes

A divinely guided person often possesses profound spiritual traits‚ such as a deep connection to the divine‚ empathy‚ and a strong moral compass. They exhibit humility‚ recognizing their role as a vessel for higher wisdom. Their actions are guided by selflessness and a commitment to serving others‚ reflecting their belief in a greater purpose.

These individuals frequently demonstrate resilience in the face of adversity‚ maintaining faith and trust in their spiritual path. They may also show a heightened sense of intuition‚ allowing them to navigate life’s challenges with grace and discernment. Their presence often inspires others‚ fostering a sense of peace and hope.

Moreover‚ a divinely guided person may exhibit traits like gratitude‚ forgiveness‚ and compassion. These attributes not only strengthen their spiritual foundation but also create a ripple effect‚ positively influencing those around them. Their journey is marked by continuous growth and a deepening understanding of their divine purpose.

2.2 Role of Intuition and Inner Guidance

Intuition and inner guidance are cornerstone traits of a divinely guided person‚ serving as a compass for navigating life’s complexities. This inner wisdom often manifests as a quiet‚ discerning voice that transcends logic‚ providing clarity in uncertain situations. It enables them to make decisions aligned with their higher purpose‚ even when external circumstances are challenging.

This guidance is deeply rooted in their spiritual foundation‚ allowing them to sense divine direction. They may experience moments of profound insight or synchronicities that reaffirm their path. By trusting this inner wisdom‚ they cultivate a sense of peace and confidence‚ knowing they are aligned with a greater plan.

The role of intuition also extends to interpersonal relationships‚ helping them discern others’ intentions and respond with compassion. This inner guidance fosters a life of purpose and harmony‚ as they consistently seek to align their actions with divine will. Over time‚ their reliance on intuition becomes a source of strength and inspiration to others.

2.3 Emotional and Mental Resilience

Emotional and mental resilience are vital qualities of a divinely guided person‚ enabling them to navigate life’s challenges with grace and steadfastness. These individuals often exhibit a unique ability to remain calm and composed‚ even in the face of adversity‚ drawing strength from their deep spiritual connection.

This resilience stems from their unwavering faith in a higher purpose‚ allowing them to view trials as opportunities for growth rather than insurmountable obstacles. Their mental fortitude is bolstered by a profound understanding that they are not alone in their journey‚ but supported by divine guidance.

Emotionally‚ they practice empathy and self-awareness‚ fostering inner balance and harmony. Through mindfulness‚ meditation‚ and prayer‚ they cultivate the ability to recharge and maintain emotional equilibrium. This resilience not only sustains them personally but also inspires those around them‚ offering hope and encouragement in difficult times.

Ultimately‚ their resilience is rooted in the belief that divine support is ever-present‚ transforming challenges into pathways for spiritual and personal evolution. This mindset equips them to face life with courage‚ humility‚ and an unshakable trust in the divine plan.

The Journey of a Divinely Guided Person

The journey of a divinely guided person often involves a path of spiritual enlightenment‚ where they face challenges and undergo profound transformations‚ guided by a higher purpose and inner wisdom.

3.1 The Path to Spiritual Enlightenment

The path to spiritual enlightenment for a divinely guided person is a transformative journey marked by self-discovery‚ introspection‚ and alignment with a higher purpose. It often begins with a deep sense of questioning or seeking meaning‚ leading to the pursuit of spiritual practices such as meditation‚ prayer‚ or study of sacred texts. Historical examples‚ such as prophets and saints‚ illustrate this journey‚ where individuals surrender to a divine will‚ embracing humility and faith. Modern interpretations emphasize personal growth‚ where one cultivates qualities like compassion‚ wisdom‚ and gratitude. The process may involve mentorship or guidance from spiritual leaders‚ fostering a deeper understanding of one’s role in the world. Inner reflection and self-awareness are crucial‚ allowing individuals to discern their divine purpose and navigate life’s challenges with grace. This path is not without trials‚ but it ultimately leads to a state of harmony‚ peace‚ and fulfillment‚ where the individual becomes a beacon of light for others.

3.2 Challenges and Trials

The journey of a divinely guided person is often marked by significant challenges and trials that test their faith‚ resilience‚ and commitment. These trials may manifest as external obstacles‚ such as societal skepticism or opposition‚ or as internal struggles‚ like self-doubt and fear. Historical examples reveal that many divinely guided individuals faced isolation‚ persecution‚ or even physical hardship‚ yet they remained steadfast in their beliefs. Modern interpretations suggest that these trials serve as opportunities for growth‚ refining their character and deepening their connection to the divine. The role of mentors or spiritual guides becomes crucial during these times‚ offering wisdom and support to navigate difficult periods. Additionally‚ the process of surrendering personal will to a higher purpose can be a profound trial in itself‚ requiring immense courage and humility. Through these challenges‚ the individual is shaped into a vessel of divine guidance‚ emerging stronger and more aligned with their mission. The trials‚ while daunting‚ are essential for their transformation and ability to inspire others.

3.3 Key Milestones and Transformations

The journey of a divinely guided person is marked by transformative milestones that reshape their understanding‚ purpose‚ and relationship with the divine. One of the earliest milestones is often an awakening or a profound spiritual experience‚ which sets the foundation for their path. This may involve a moment of clarity‚ a vision‚ or a deep inner realization that shifts their perspective on life and their role in it. As they progress‚ they may encounter periods of intense spiritual practice‚ such as meditation‚ prayer‚ or introspection‚ which deepen their connection to the divine. Another significant milestone is the integration of their spiritual insights into their daily life‚ leading to a harmonious balance between the mystical and the mundane. Finally‚ the ultimate transformation occurs when they embody their divine purpose fully‚ becoming a source of inspiration and guidance for others. These milestones are often accompanied by the guidance of mentors or spiritual teachers‚ who play a crucial role in their growth and preparation for their mission. Through these transformations‚ the individual becomes a living testament to the power of divine guidance‚ radiating wisdom‚ compassion‚ and light.

Influence and Impact

A divinely guided person often inspires profound societal change‚ fostering unity and compassion. Their presence sparks positive transformation‚ influencing cultural norms and individual lives‚ leaving a lasting legacy of love‚ wisdom‚ and spiritual awakening.

4.1 Societal and Cultural Influence

A divinely guided person often leaves an indelible mark on society and culture‚ inspiring movements that promote unity‚ compassion‚ and higher consciousness. By embodying universal truths‚ they challenge societal norms and fostering environments where love and understanding prevail. Their influence extends beyond individual lives‚ shaping cultural narratives through art‚ literature‚ and philosophy. For instance‚ spiritual leaders have historically inspired revolutions in thought‚ encouraging people to pursue justice and equality. Their teachings often become cornerstones of cultural identity‚ guiding generations to strive for moral excellence. Moreover‚ their presence fosters a collective shift in values‚ emphasizing the importance of empathy and service to others. This societal transformation is further amplified by their ability to transcend boundaries‚ uniting diverse communities under a shared vision of harmony. Ultimately‚ the societal and cultural impact of a divinely guided person is profound‚ creating ripples that resonate long after their time on earth.

4.2 Personal and Interpersonal Impact

A divinely guided person profoundly influences both personal and interpersonal dynamics‚ fostering growth and harmony in relationships. By radiating love‚ wisdom‚ and authenticity‚ they inspire others to embrace their true potential‚ creating a ripple effect of positive change. Their presence often heals emotional wounds‚ resolves conflicts‚ and strengthens bonds‚ encouraging openness and understanding. On a personal level‚ their guidance helps individuals confront inner fears‚ align with their purpose‚ and cultivate self-love. Interpersonally‚ they model compassionate communication‚ bridging divides and fostering unity. Their ability to listen deeply and offer sage advice nurtures trust and mutual respect‚ transforming interactions into opportunities for shared growth. This impact extends beyond immediate circles‚ as their influence inspires others to become sources of light in their own communities‚ perpetuating a cycle of love and transformation. The personal and interpersonal legacy of a divinely guided person is one of profound healing‚ connection‚ and enduring inspiration.

Signs of Divine Guidance

Signs of divine guidance include intuition‚ synchronicities‚ and inner peace. These indicators help individuals recognize alignment with a higher purpose‚ fostering trust in their journey and decisions‚ and reassuring them of spiritual support and direction.

5.1 Recognizing Inner Signs

Recognizing inner signs of divine guidance involves tuning into intuition‚ calmness‚ and clarity. Many report feeling a deep sense of peace or certainty when aligned with their purpose. This inner knowing often manifests as a gentle nudge or persistent thought‚ guiding decisions without external validation. Emotional and mental resilience play a key role‚ as these signs help navigate life’s challenges with confidence. For instance‚ historical figures like saints and prophets often described hearing an inner voice or experiencing unwavering faith. Such experiences highlight the importance of introspection and self-awareness in discerning divine guidance. By cultivating mindfulness and trust in one’s inner wisdom‚ individuals can better recognize these subtle yet profound indicators of alignment with a higher purpose.

These inner signs are deeply personal and unique to each individual‚ reflecting their unique relationship with the divine. Over time‚ they become a trusted compass‚ offering reassurance and clarity in uncertain times.

5.2 External Indicators and Synchronicities

External indicators and synchronicities often serve as tangible signs of divine guidance‚ helping individuals recognize alignment with their higher purpose. These may include recurring symbolic patterns‚ such as seeing specific numbers or animals repeatedly‚ which carry personal or universal significance. Synchronicities‚ as described by Carl Jung‚ are meaningful coincidences that bridge the inner and outer worlds‚ offering reassurance or direction. For instance‚ meeting a mentor figure or stumbling upon a life-changing resource at the right moment can be seen as external confirmation of being on the right path. Additionally‚ unexpected events or challenges that ultimately lead to growth may also be interpreted as divine nudges. These external signs often complement inner guidance‚ creating a harmonious interplay between personal intuition and the world around them. By paying attention to these indicators‚ individuals can better navigate their journey and trust in the unfolding of their divine plan.

Nurturing the Quality of Divine Guidance

Nurturing divine guidance involves practices like meditation‚ prayer‚ and reflection‚ fostering a deeper connection with one’s inner self. Mentorship and community support also play a crucial role in enhancing intuition and aligning with a higher purpose.

6.1 Practices for Spiritual Growth

Spiritual growth for a divinely guided person involves consistent practices that deepen their connection to the divine. Meditation and reflection are essential‚ allowing individuals to quiet the mind and listen to inner wisdom. Prayer and mindfulness also play a significant role‚ fostering a sense of humility and gratitude. Engaging in acts of service and compassion helps cultivate a selfless heart‚ aligning one’s actions with divine will. Additionally‚ studying sacred texts and seeking guidance from mentors can provide clarity and strengthen spiritual foundations. These practices‚ when performed with sincerity‚ create a pathway for continuous growth and alignment with one’s higher purpose. By integrating these rituals into daily life‚ individuals can nurture their divine guidance and embody its wisdom in all aspects of their journey.

6.2 The Role of Mentorship and Community

Mentorship and community play a vital role in nurturing divine guidance‚ offering support and wisdom for the spiritual journey. Mentors‚ often experienced guides‚ provide invaluable insights‚ helping individuals navigate challenges and deepen their understanding of divine will. Their presence fosters accountability and encouragement‚ aiding in the refinement of spiritual practices. Similarly‚ community provides a collective space for shared growth‚ where individuals can learn from one another’s experiences and strengthen their faith. The bonds formed within these groups create a network of love and support‚ essential for maintaining balance and resilience. Through mentorship and community‚ individuals gain practical tools and emotional backing‚ enabling them to embrace their divine guidance more fully. These relationships act as a cornerstone‚ helping to sustain and enrich the journey of a divinely guided person.

economic and philosophic manuscripts pdf

The Economic and Philosophic Manuscripts are a pivotal work by Karl Marx, exploring themes of alienated labor, economic systems, and philosophical ideas. Written in 1844, these manuscripts lay the groundwork for Marxist theory, offering insights into worker exploitation and the human condition under capitalism. They remain a cornerstone of political economy and philosophy.

1.1 Overview of the Manuscripts

The Economic and Philosophic Manuscripts, composed by Karl Marx in 1844, represent a foundational work in Marxist thought. These manuscripts, though unpublished during Marx’s lifetime, provide profound insights into his early philosophical and economic ideas. They were first published in 1932 and have since become a cornerstone of Marxist theory, offering a critique of capitalism and exploring themes such as alienated labor, human emancipation, and the nature of economic systems. The manuscripts are divided into sections, each addressing specific aspects of political economy and its impact on workers. Marx critiques the dehumanizing effects of capitalism, arguing that it reduces workers to mere commodities, stripping them of their creative potential and dignity. The manuscripts also reflect Marx’s engagement with the ideas of Hegel and Feuerbach, blending philosophical inquiry with economic analysis. This work is not only a critique of existing systems but also a vision for a more equitable society. Its relevance extends beyond academic circles, influencing labor movements and social theories globally. The manuscripts remain a vital text for understanding Marx’s intellectual development and his enduring influence on political and economic thought.

1.2 Significance in Marxist Theory

The Economic and Philosophic Manuscripts hold a central place in Marxist theory, as they introduce key concepts that would later shape Marx’s critique of capitalism. These manuscripts are particularly significant because they outline Marx’s early ideas on alienated labor, which he argues is a defining feature of capitalist systems. Marx contends that under capitalism, workers are alienated from their labor, the products of their labor, their fellow workers, and their human potential. This concept of alienation is foundational to Marxist theory, highlighting the dehumanizing effects of capitalist exploitation. The manuscripts also lay the groundwork for Marx’s theory of surplus value, which he would elaborate on in later works like Das Kapital. Furthermore, these writings reflect Marx’s transition from philosophical inquiry to economic analysis, blending the influences of Hegel and Feuerbach with his own critique of political economy. The manuscripts’ emphasis on human emancipation and the need for a socialist transformation has made them a cornerstone of Marxist thought, inspiring movements and scholars to address issues of economic inequality and worker exploitation. Their relevance endures as a powerful critique of capitalism and a vision for a more just society.

Historical Context of the Manuscripts

The Economic and Philosophic Manuscripts were written by Karl Marx in 1844, reflecting the socio-economic upheavals of the Industrial Revolution. They emerged amid rising capitalist expansion and worker exploitation, influencing Marx’s critique of political economy and his early vision of socialist transformation. The manuscripts remained unpublished until 1932, gaining significance in Marxist scholarship and the broader labor movement. Their historical context underscores the intersection of philosophical thought and economic critique, shaping Marx’s evolving ideas on capitalism and human liberation.

2.1 Composition and Publication History

Karl Marx composed the Economic and Philosophic Manuscripts in 1844 while living in Paris, a period of intense intellectual and political ferment. These manuscripts were part of Marx’s early efforts to critique capitalism and explore the concept of alienated labor, drawing on his readings of political economy and Hegelian philosophy. Initially, the manuscripts were not published during Marx’s lifetime, largely due to the political and economic challenges he faced. They remained unpublished until 1932, when they were released by the Marx-Engels Institute in Moscow, becoming a pivotal text in Marxist scholarship. The delay in publication meant that the manuscripts were not widely recognized until decades after Marx’s death, despite their profound influence on his later works, such as Das Kapital. The manuscripts’ composition and publication history reflect the broader socio-political context of the 19th century, including the rise of industrial capitalism and the struggles of the working class. Their eventual publication in the 20th century solidified their place as foundational texts in Marxist theory, offering insights into Marx’s evolving critique of capitalism and his vision of human liberation.

2.2 Intellectual Influences on Marx

Karl Marx’s Economic and Philosophic Manuscripts were deeply influenced by various intellectual traditions and thinkers of his time. The manuscripts reflect Marx’s engagement with G.W.F. Hegel, particularly his dialectical method, which Marx adapted to analyze historical and economic processes. Additionally, the ideas of Ludwig Feuerbach played a significant role, as Marx adopted Feuerbach’s critique of religion and his emphasis on humanism, applying these concepts to his analysis of alienation. The works of classical economists, such as Adam Smith and David Ricardo, also shaped Marx’s understanding of labor value and economic systems. Furthermore, Marx was influenced by socialist thinkers like Charles Fourier, whose critiques of industrial society resonated with Marx’s own views on worker exploitation. The manuscripts reveal Marx’s synthesis of these diverse intellectual currents, blending philosophy, economics, and political theory to critique capitalism and explore the potential for human emancipation. This intellectual fusion laid the groundwork for Marx’s later theories and his vision of a society free from alienation and exploitation.

Key Concepts Explored

The Economic and Philosophic Manuscripts explore foundational ideas like alienated labor, where workers are disconnected from their work, and the theory of surplus value, which critiques capitalist profit mechanisms. Marx also delves into philosophical influences, particularly Hegel and Feuerbach, shaping his critique of human alienation under capitalism.

3.1 Alienated Labor and Its Forms

Karl Marx’s concept of alienated labor is central to the Economic and Philosophic Manuscripts, where he argues that capitalism inherently alienates workers from their humanity. Marx identifies four primary forms of alienation: alienation from the product of labor, alienation in the labor process itself, alienation from fellow workers, and alienation from human potential. Workers under capitalism, Marx contends, lose control over their creations, as their labor is reduced to a commodity. This dehumanizing process strips workers of their creative agency, transforming them into mere tools for production. Marx further emphasizes that alienation is not only economic but deeply philosophical, reflecting the broader estrangement of humanity from its true nature under capitalist systems. He critiques how capitalism reduces labor to a means of survival rather than a fulfilling expression of human potential. This analysis remains foundational to Marxist critiques of exploitation and continues to resonate in modern discussions of worker rights and dignity.

3.2 Theory of Surplus Value

In the Economic and Philosophic Manuscripts, Karl Marx introduces the concept of surplus value as a critical component of capitalist exploitation. Surplus value arises when workers produce more value than they receive in wages, with the excess being appropriated by the capitalist class. Marx argues that this process is inherent to the capitalist system, where labor is treated as a commodity. Workers, under capitalism, are paid only for a portion of the value they create, while the remaining value is retained by capitalists as profit. This dynamic is central to Marx’s critique of economic inequality and class struggle. The theory of surplus value highlights how capitalism inherently exploits labor, reducing workers to a means of profit rather than valuing their human potential. Marx’s analysis of surplus value not only critiques economic systems but also underscores the philosophical implications of treating labor as a commodity. This concept remains a cornerstone of Marxist theory, providing a framework for understanding the mechanisms of exploitation and the systemic inequalities perpetuated by capitalism.

3.3 Philosophical Influences: Hegel and Feuerbach

Karl Marx’s Economic and Philosophic Manuscripts were deeply influenced by the philosophical ideas of Georg Wilhelm Friedrich Hegel and Ludwig Feuerbach. Hegel’s dialectical method shaped Marx’s understanding of historical development and conflict, particularly in how opposing forces interact and resolve through synthesis. However, Marx critiqued Hegel’s idealism, arguing that dialectics should be grounded in material conditions rather than abstract thought. Feuerbach, on the other hand, influenced Marx’s critique of religion and alienation. Feuerbach’s concept of humans projecting their essential qualities onto a divine being resonated with Marx’s analysis of workers under capitalism, who similarly lose control over their labor and humanity. Marx adapted these philosophical frameworks to develop his theory of alienated labor, emphasizing how capitalism strips workers of their creative potential and reduces them to mere commodities. The interplay of Hegelian dialectics and Feuerbachian critique of alienation provided Marx with a robust foundation to explore the economic and philosophical dimensions of human exploitation. This synthesis of ideas remains central to Marxist thought, bridging philosophy and economics in a powerful critique of capitalist society.

Structure and Content Analysis

The manuscripts are divided into sections, each focusing on specific themes. Marx breaks down economic systems, labor dynamics, and philosophical concepts, providing a detailed critique of capitalism and its impact on workers. The structure reflects his evolving ideas on human alienation and exploitation.

4.1 Breakdown of Manuscript Sections

The Economic and Philosophic Manuscripts are structured into several key sections, each addressing distinct themes. The first part introduces Marx’s critique of political economy, focusing on concepts like alienated labor and its forms. He argues that under capitalism, workers become estranged from their labor, their fellow workers, and their humanity. The second section delves into the theory of surplus value, where Marx examines how capitalists exploit workers by appropriating the value created beyond the workers’ wages. This analysis lays the foundation for his later works, such as Das Kapital. The manuscripts also explore philosophical influences, particularly from Hegel and Feuerbach, with Marx critiquing Hegel’s idealism and incorporating Feuerbach’s materialist approach. Throughout the text, Marx emphasizes the dehumanizing effects of capitalism and the need for a revolutionary transformation to restore workers’ autonomy and dignity. The structure reflects Marx’s evolving ideas on economics, philosophy, and social justice, making the manuscripts a cohesive yet multifaceted work.

4.2 Comparison with Later Works (e.g., Das Kapital)

The Economic and Philosophic Manuscripts serve as a foundational text for Marx’s later works, particularly Das Kapital. While the manuscripts introduce key concepts like alienated labor and surplus value, Das Kapital elaborates on these ideas with greater economic rigor. In the manuscripts, Marx focuses on the philosophical and humanistic dimensions of worker exploitation, emphasizing the loss of autonomy and dignity under capitalism. In contrast, Das Kapital presents a more systematic analysis of capitalist production, delving into economic structures and class relations. The manuscripts’ emphasis on alienation evolves into a broader critique of capitalism’s mechanisms in Das Kapital. Additionally, while the manuscripts remain grounded in philosophical critique, Das Kapital shifts toward a more scientific and empirical approach. Despite these differences, both works share a common goal: to expose the inherent contradictions of capitalism and advocate for revolutionary change. The manuscripts provide the theoretical framework that Marx later expands upon, making them a crucial precursor to his mature thought.

Reception and Influence

The Economic and Philosophic Manuscripts initially received limited attention but gained prominence in the 20th century. Their emphasis on alienation resonated with Marxist scholars, influencing socialist movements globally. The manuscripts’ ideas on worker exploitation remain central to critiques of capitalism, shaping modern labor rights discussions.

5.1 Initial Reception and Later Recognition

The Economic and Philosophic Manuscripts were largely overlooked during Marx’s lifetime, as they were not published until 1932. Initially, their radical ideas about alienated labor and capitalism did not resonate widely, partly due to the political and intellectual climate of the 19th century. However, in the 20th century, these manuscripts gained significant recognition, particularly among Marxist scholars and philosophers. Their publication by the Soviet Union in 1932 marked a turning point, as they became central to Marxist theory and critiques of capitalism. The manuscripts’ emphasis on human alienation under capitalist systems struck a chord with intellectuals grappling with the social and economic upheavals of the time. Over the years, they have been celebrated for their philosophical depth and their exploration of themes like worker exploitation and the commodification of labor. Today, they are regarded as foundational texts in Marxist thought, offering insights into the human condition under capitalism that remain relevant in contemporary discourse.

5.2 Impact on Marxist Thought and Movements

The Economic and Philosophic Manuscripts profoundly shaped Marxist thought and movements by introducing key concepts such as alienated labor and the exploitation of workers under capitalism. Marx’s analysis of how capitalism reduces workers to commodities resonated deeply with socialist and communist movements, inspiring critiques of economic systems and calls for revolutionary change. The manuscripts’ emphasis on human emancipation and the restoration of workers’ dignity became central to Marxist ideology, influencing movements worldwide. They also laid the groundwork for later Marxist theories, including the concept of surplus value, which Marx expanded upon in Das Kapital. The manuscripts’ philosophical depth, particularly their critique of Hegel and Feuerbach, provided a framework for understanding the interplay between economics and human consciousness. As a result, they became a foundational text for socialist and communist movements, guiding activists and scholars in their efforts to challenge capitalist systems. Their influence continues to be felt in contemporary debates about labor rights, economic inequality, and the search for a more equitable society.

Modern Relevance and Applications

The Economic and Philosophic Manuscripts remain relevant today, addressing issues like worker alienation in the digital age. Automation and AI amplify exploitation, echoing Marx’s critique of capitalism. Modern discussions on labor rights, income inequality, and the gig economy align with Marx’s insights, ensuring their enduring applicability.

6.1 Alienation in Contemporary Work

Marx’s concept of alienation remains highly relevant in today’s workforce, where technological advancements and globalization have intensified worker exploitation. The gig economy, remote work, and digital platforms often strip workers of control over their labor, mirroring Marx’s description of alienated labor. Many employees feel disconnected from their work’s purpose, treated as mere commodities rather than human beings.

Modern capitalism perpetuates alienation through practices like micromanagement, unpaid overtime, and precarious employment conditions. Workers in service industries, for instance, often experience emotional labor, forced to adopt personas that align with corporate expectations rather than their true selves. This alienation extends beyond the workplace, affecting workers’ mental and physical health.

The rise of automation and AI exacerbates these issues, as workers face job insecurity and diminished agency. Despite technological progress, many feel increasingly disconnected from their humanity and creativity, aligning with Marx’s critique of capitalism’s dehumanizing effects. Addressing alienation requires reimagining work structures to prioritize human dignity and fulfillment over profit.

6.2 Automation and Worker Exploitation

Automation and artificial intelligence have transformed the modern workplace, intensifying worker exploitation in ways that align with Marx’s critique of capitalism. As machines and algorithms assume roles once held by humans, workers face reduced bargaining power and diminished autonomy. Many are forced into precarious jobs with minimal benefits, reflecting Marx’s concept of the proletariat’s vulnerability.

Despite promises of efficiency, automation often leads to job displacement, pushing workers into lower-wage sectors or unemployment. This dynamic perpetuates economic inequality, as profits from technological advancements disproportionately benefit corporations and shareholders rather than workers. Marx’s theory of surplus value is evident here, where workers’ labor generates wealth they do not share in.

The rise of the gig economy, fueled by digital platforms, further entrenches exploitation. Workers are classified as independent contractors, denying them basic rights and protections. Automation, in this context, becomes a tool for extracting maximum productivity while minimizing labor costs, deepening the alienation Marx described in his manuscripts. This trend highlights the enduring relevance of his critique of capitalist exploitation in the digital age.

Future Directions and Research

Future research on the manuscripts could explore their relevance to contemporary issues like automation and AI ethics. Scholars may delve into how Marx’s ideas on alienation apply to digital labor and the gig economy, offering new perspectives on worker rights and technological advancement.

7;1 Contemporary Scholarship and Debates

Contemporary scholarship on the Economic and Philosophic Manuscripts continues to explore their relevance in understanding modern economic systems and labor dynamics. Recent debates focus on applying Marx’s concepts of alienation and exploitation to the digital age, particularly in the context of automation and the gig economy. Scholars argue that Marx’s ideas about worker alienation resonate strongly in today’s tech-driven workforce, where employees often feel disconnected from their labor and its outcomes. Additionally, there is growing interest in how Marx’s philosophical framework can inform discussions on AI ethics and the future of work. Some researchers emphasize the manuscripts’ emphasis on human dignity and the need for meaningful labor, advocating for policies that prioritize worker well-being over profit. Meanwhile, critics debate the applicability of Marx’s 19th-century theories to 21st-century capitalism, questioning whether his critique of alienation remains relevant in an era of remote work and digital entrepreneurship. These debates highlight the enduring importance of Marx’s early writings in shaping contemporary discourse on economics, technology, and society.

7.2 Applications in Economics and Philosophy

The Economic and Philosophic Manuscripts offer profound insights into the intersection of economics and philosophy, particularly through Marx’s critique of capitalism and his exploration of human alienation. In economics, Marx’s theory of surplus value and his analysis of labor exploitation provide a foundational critique of capitalist systems, highlighting the commodification of workers and the disparity between labor and capital. These ideas remain relevant in modern discussions about income inequality, worker rights, and the ethics of economic systems.

In philosophy, Marx’s manuscripts draw heavily from Hegel and Feuerbach, emphasizing the importance of dialectical reasoning and the critique of abstract idealism. His concept of alienated labor extends beyond economics, addressing existential questions about human purpose and fulfillment. This philosophical framework has inspired interdisciplinary approaches to understanding social and economic structures, encouraging scholars to consider the moral and ethical dimensions of economic policies.

Together, the manuscripts bridge economics and philosophy, offering a holistic view of human society. Their applications continue to influence contemporary debates on automation, worker exploitation, and the search for meaningful labor in a rapidly changing world.

all creatures of our god and king pdf

“All Creatures of Our God and King” is a classic Christian hymn celebrating God’s creation, originally written by St. Francis of Assisi and translated by William H. Draper. The hymn, set to the tune “Lasst Uns Erfreuen,” calls all nature and humanity to praise God, emphasizing stewardship and worship.

1.1. Overview of the Hymn

“All Creatures of Our God and King” is a timeless Christian hymn that exalts God’s creation and invites all beings to praise Him. Written by St. Francis of Assisi and translated by William H. Draper, the hymn emphasizes themes of worship, stewardship, and the unity of all creation. Its verses call upon nature, humanity, and even the elements to join in glorifying God. The chorus, with its repetitive “Alleluia,” reinforces the joyous and universal nature of praise. The hymn’s structure includes multiple verses, a catchy chorus, and bridging phrases that connect the themes seamlessly. Its enduring popularity stems from its rich theological depth and its ability to inspire reverence for God’s sovereignty over all creation.

1.2. Historical Background

The hymn “All Creatures of Our God and King” originates from a poem by St. Francis of Assisi, written around 1225, expressing his deep love for nature and God’s creation. It was translated into English by William H. Draper in 1919, adapting the original Italian text. The melody, “Lasst Uns Erfreuen,” is a German hymn tune from 1623, later arranged by Ralph Vaughan Williams in 1906. This combination transformed the poem into a beloved hymn, celebrating God’s sovereignty over all creation. Its historical roots reflect St. Francis’s theology of creation as a sacred trust, making it a timeless piece in Christian worship and a symbol of humanity’s connection to the natural world.

1.3. Significance in Christian Worship

“All Creatures of Our God and King” holds profound significance in Christian worship as a unifying hymn that calls all creation to praise God. Its themes of stewardship, joy, and reverence resonate deeply, making it a staple in worship services worldwide. The hymn’s emphasis on creation care aligns with Christian teachings about humanity’s role as caretakers of the earth. Its inclusion in numerous hymnals and its adaptation into various musical styles have ensured its enduring presence in worship traditions. The hymn’s message of collective praise and gratitude continues to inspire believers, fostering a sense of unity and awe for God’s sovereignty over all creation.

History of the Hymn

The hymn, originally written by St. Francis of Assisi in 1225, was translated into English by William H. Draper in 1919. The tune “Lasst Uns Erfreuen” dates back to 1623, with arrangements by Ralph Vaughan Williams in 1906, popularizing the hymn globally.

2.1. Original Composition by St. Francis of Assisi

St. Francis of Assisi, an Italian Catholic friar, originally composed the hymn around 1225. Titled “Canticle of the Sun,” it praised God through nature, reflecting Francis’ deep love for creation and his belief in the interconnectedness of all living things. The hymn was written in Italian and intended for singing during a public event in Assisi, showcasing Francis’ desire to inspire devotion and unity among people. Its themes of praise, stewardship, and harmony with creation laid the foundation for its enduring relevance in Christian worship, making it a timeless expression of spiritual connection to the natural world and its Creator.

2.2. Translation by William H. Draper

William H. Draper translated St. Francis of Assisi’s “Canticle of the Sun” into English in 1919, creating the version known as “All Creatures of Our God and King.” Draper’s translation maintained the original’s poetic beauty and theological depth, adapting it for English-speaking congregations. His work helped popularize the hymn globally, ensuring its themes of creation, praise, and stewardship resonated across cultures. Draper’s contribution was instrumental in making the hymn accessible to a broader audience, preserving its spiritual essence while introducing it to new generations of worshipers.

2.3. The Tune “Lasst Uns Erfreuen”

The melody “Lasst Uns Erfreuen” originates from a 17th-century German hymn, first published in 1623 in Cologne. It gained prominence when Ralph Vaughan Williams arranged it for the hymn in 1906, blending its robust, uplifting rhythm with the translated text. The tune’s joyful and majestic quality complements the hymn’s themes of creation and praise, making it a perfect match for St. Francis of Assisi’s words. Its harmonious structure and soaring crescendos have made it a beloved choice for congregational singing, enhancing the hymn’s emotional and spiritual impact across generations.

2.4. Arrangement by Ralph Vaughan Williams

Ralph Vaughan Williams’ arrangement of “Lasst Uns Erfreuen” in 1906 revitalized the hymn, blending its robust melody with the translated text. His version, featured in the English Hymnal, harmonizes the tune’s uplifting rhythm with the lyrical themes of creation and praise. The arrangement is part of the Open Hymnal Project and remains in the public domain, widely used in worship. Its grandeur and accessibility have made it a cornerstone of congregational singing, enhancing the hymn’s emotional and spiritual impact across generations.

Theological Themes

The hymn emphasizes praise to God, stewardship of creation, and the universal call to worship. It reflects St. Francis’ deep reverence for nature and divine sovereignty.

3.1. Praise and Worship of God

The hymn profoundly expresses praise and worship of God, calling all creatures to join in glorifying their Creator. St. Francis’ words emphasize God’s sovereignty over nature, with elements like wind, water, and fire symbolizing creation’s role in worship. The chorus, with its repetitive “Alleluia,” underscores the joy and adoration directed toward God. This theological theme highlights the universal call to worship, uniting all creation in acknowledging God’s majesty. The hymn’s lyrics inspire believers to recognize God’s presence in all aspects of life and to respond with heartfelt praise, reflecting St. Francis’ deep reverence for the divine and the sacredness of creation.

3.2. Stewardship of Creation

The hymn “All Creatures of Our God and King” emphasizes the sacred responsibility of stewardship over God’s creation. St. Francis of Assisi’s original text reflects his deep love for nature and the environment, urging believers to care for the earth and its inhabitants. The hymn calls all creatures to praise God, highlighting the interconnectedness of creation and humanity’s role as caretakers. This theme encourages Christians to view the natural world as a gift from God, fostering a sense of reverence and responsibility. By celebrating creation, the hymn inspires believers to act as faithful stewards, preserving and honoring the beauty of God’s world.

3.3. The Role of Alleluia in the Hymn

The refrain “Alleluia” plays a central role in “All Creatures of Our God and King,” serving as a unifying and joyful expression of praise. Appearing in nearly every stanza and the chorus, it creates a rhythmic and emotional anchor, drawing worshippers into collective celebration. The word “Alleluia,” meaning “Praise the Lord,” encapsulates the hymn’s themes of adoration and gratitude. Its repetition emphasizes the universal call to worship, binding creation and humanity together in a shared act of devotion. This refrain enhances the hymn’s accessibility, making it memorable and engaging for congregational singing while underscoring its theological depth.

Musical Elements

The hymn features the traditional melody “Lasst Uns Erfreuen,” arranged by Ralph Vaughan Williams, with harmonious chords that enhance its celebratory tone, supporting the lyrical praise of creation.

4.1. Traditional Arrangements

The hymn’s traditional arrangement features the melody “Lasst Uns Erfreuen,” originally from a 17th-century German hymnal, harmonized by Ralph Vaughan Williams in 1906. This arrangement enhances the hymn’s grandeur, blending rich organ accompaniments with congregational singing. The structure typically includes multiple verses, a chorus, and a bridge, maintaining a consistent harmonic progression that underscores the lyrical themes of creation and praise. The traditional setting is often performed with classical instrumentation, emphasizing the timeless quality of the hymn. Its enduring popularity stems from its balanced blend of simplicity and majesty, making it accessible for both congregational worship and formal choral performances.

4.2. Modern Interpretations

Modern interpretations of “All Creatures of Our God and King” often blend traditional melodies with contemporary styles. Artists like David Crowder and Brent Milligan have reimagined the hymn, incorporating acoustic and electronic elements. These arrangements maintain the hymn’s spiritual core while appealing to modern audiences. Instrumental adaptations, such as violin duets, also refresh the piece, offering a fresh yet reverent sound. Additionally, worship groups like Sovereign Grace Praise have created versions that emphasize communal singing. These modern takes ensure the hymn remains relevant, bridging generations and musical preferences while preserving its timeless message of praise and stewardship.

4.3. Instrumental Adaptations

“All Creatures of Our God and King” has inspired numerous instrumental adaptations, enriching its worshipful appeal. Violin duets and piano arrangements are particularly popular, offering a serene and reverent interpretation. The hymn’s melody, set to “Lasst Uns Erfreuen,” is well-suited for orchestral renditions, blending strings, woodwinds, and brass. Modern adaptations often feature acoustic or electronic elements, while maintaining the hymn’s traditional essence. These instrumental versions allow for creative expression, making the hymn accessible in diverse worship settings. Whether performed by a solo instrument or a full orchestra, the music continues to inspire praise and reflection, honoring God’s creation.

Cultural Impact

“All Creatures of Our God and King” has become a beloved hymn in Christian worship, widely featured in hymnals and cherished for its celebration of creation and divine praise.

5.1. Use in Worship Services

“All Creatures of Our God and King” is a cherished hymn in Christian worship, often sung during services to celebrate God’s creation and foster a sense of unity among believers. Its timeless message resonates across denominations, making it a staple in hymnals worldwide. The hymn is frequently used in liturgical settings, particularly during Easter, Earth Day, and other occasions emphasizing stewardship and praise. Many churches incorporate it into special services, such as outdoor worship or environmental-themed events. Its versatility allows for traditional choir performances or modern instrumental arrangements, ensuring its relevance in diverse worship contexts. This hymn continues to inspire congregations to honoring God through creation.

5.2. Presence in Hymnals

“All Creatures of Our God and King” is widely featured in numerous Christian hymnals, reflecting its enduring popularity. The hymn, translated by William H. Draper in 1919, is often included in both traditional and modern hymnals. Its verses, derived from St. Francis of Assisi’s original text, emphasize creation’s praise of God. Many hymnals provide sheet music for the tune “Lasst Uns Erfreuen,” making it accessible for congregational singing. PDF versions of the hymn are also available online, offering easy access for worship leaders and musicians. Its presence in hymnals underscores its significance as a unifying worship piece across Christian traditions, blending theology and music seamlessly.

5.3. Popular Recordings and Performances

“All Creatures of Our God and King” has been widely recorded and performed by various artists and worship groups. Notable versions include arrangements by Jonathan Baird and Ryan Baird, as well as contemporary interpretations by David Crowder and Brent Milligan. The hymn is frequently featured in worship services and concerts, often accompanied by orchestral or instrumental adaptations. Its timeless melody and rich theology make it a favorite for both traditional and modern performances. Many recordings and sheet music arrangements, including PDF versions, are available online, allowing it to reach a global audience and inspire diverse expressions of worship.

Structure of the Hymn

The hymn features multiple verses addressing creation, a repeated “Alleluia” chorus, and bridging phrases that connect sections, creating a cohesive worship experience.

6.1. Verses and Their Meaning

The verses of “All Creatures of Our God and King” are a poetic call to praise, addressing various elements of creation. They invoke the sun, moon, wind, and water, urging all to worship God. The hymn’s imagery reflects St. Francis of Assisi’s deep love for nature, emphasizing humanity’s role as stewards of creation. Each verse builds on themes of praise, thanksgiving, and harmony, encouraging believers to join in chorus with the natural world. The lyrics inspire a sense of unity and joy, reminding all of God’s sovereignty over His creation.

6.2. The Chorus

The chorus of “All Creatures of Our God and King” is a powerful refrain that unites all verses, emphasizing collective praise to God; Repeating “Alleluia, Alleluia, Alleluia,” it creates a joyful and triumphant tone, inviting all creation to join in worship. The chorus serves as a unifying element, tying together the diverse elements of nature and humanity celebrated in the verses. Its repetition reinforces the hymn’s central theme of praising God, making it a memorable and uplifting part of the song. The chorus also underscores the theological idea that all creation exists to glorify its Creator, fostering a sense of unity and shared purpose among worshippers.

6.3. Bridging Phrases

Bridging phrases in “All Creatures of Our God and King” serve as transitional elements, connecting verses and reinforcing the hymn’s thematic unity. These phrases, often found at the end of verses, create a smooth flow into the chorus, maintaining the hymn’s rhythmic and theological coherence. For example, lines like “Alleluia, Alleluia, Alleluia” act as a bridge, uniting diverse expressions of praise into a single, triumphant declaration. These phrases also emphasize the hymn’s call to collective worship, ensuring that each verse builds toward a shared moment of celebration. Their strategic placement enhances the hymn’s musicality and deepens its spiritual impact, making it a beloved and enduring piece of Christian worship.

Educational Resources

Sheet music and study guides for “All Creatures of Our God and King” are widely available in PDF format, offering insights into its composition and theological themes. Online tutorials and workshops further enhance learning and appreciation of this hymn.

7.1. Sheet Music Availability

Sheet music for “All Creatures of Our God and King” is widely available in PDF format, accessible from platforms like Hymnary.org and the Open Hymnal Project. These resources include arrangements for SATB, organ, and instrumental ensembles, such as violin duets. Many versions are free to download for worship and educational purposes, with options for piano/vocal scores and chord charts. Arrangements by composers like Ralph Vaughan Williams and modern adaptations are also accessible. The sheet music often includes translations and original compositions, making it a valuable tool for musicians and congregations. Its availability in digital formats ensures easy access for those seeking to perform or study the hymn.

7.2. Study Guides and Analysis

Study guides and analyses of “All Creatures of Our God and King” are available in PDF formats, offering theological and historical insights. These resources explore the hymn’s origins, its translation by William H. Draper, and its connection to St. Francis of Assisi’s Canticle of the Sun. Analyses often delve into the hymn’s themes of creation stewardship and worship, providing context for its use in Christian liturgy. Additionally, some guides include musical analysis, examining the tune “Lasst Uns Erfreuen” and its arrangement by Ralph Vaughan Williams. These educational tools are invaluable for deeper understanding and appreciation of the hymn’s rich heritage and spiritual significance.

7.3. Online Tutorials and Workshops

Online tutorials and workshops for “All Creatures of Our God and King” are readily available, offering interactive learning experiences. Websites like Hymnary.org provide free PDF scores and guides for musicians and congregations. Tutorials often include step-by-step instructions for playing the hymn on various instruments, such as piano or guitar. Some platforms offer video workshops that explore the hymn’s history, theological themes, and musical arrangements. These resources are particularly useful for worship leaders, educators, and musicians seeking to deepen their understanding and enhance their performance of the hymn. They cater to both beginner and advanced levels, ensuring accessibility for all.

ge washer/dryer combo manual

Welcome to the GE Washer/Dryer Combo manual. This guide provides essential information for operating, installing, and maintaining your appliance, ensuring optimal performance and user satisfaction.

1.1 Overview of the GE Washer/Dryer Combo

The GE Washer/Dryer Combo is a space-saving, all-in-one appliance designed for convenience and efficiency. It combines a front-load washer and a condenser or ventless dryer in a single unit, ideal for small spaces like apartments or laundry rooms. Available in various models, such as the PFQ97HS and GUD27GSSMWW, these units offer advanced features like steam wash, sanitize cycles, and energy-efficient operation. With capacities ranging from 2.4 to 4.8 cu. ft., they cater to different household needs. The combo units are designed to simplify laundry tasks, providing a compact yet powerful solution for washing and drying clothes in one place.

1.2 Importance of the Manual

This manual is crucial for understanding and safely operating your GE Washer/Dryer Combo. It provides detailed instructions for installation, usage, and maintenance, ensuring optimal performance and longevity. By following the guidelines, you can avoid potential issues and prevent damage to the unit. The manual also outlines safety precautions and troubleshooting tips, helping you address common problems efficiently. Reading and adhering to the manual ensures compliance with manufacturer recommendations, which is essential for warranty validity and safe operation. It serves as a comprehensive resource to maximize the appliance’s efficiency and user experience, making it indispensable for every owner.

1.3 Key Features of the GE Washer/Dryer Combo

The GE Washer/Dryer Combo offers advanced features designed for convenience and efficiency. It includes a front-load design, steam cleaning options, and condenser drying technology for ventless operation. The unit is equipped with a digital control panel, allowing easy cycle selection and monitoring. Key features also include multiple wash and dry cycles, a sanitize option, and an energy-saving mode. The combo is designed to be space-saving, making it ideal for compact spaces. It also boasts quiet operation, a large capacity drum, and smart integration capabilities for seamless user control. These features ensure a superior laundry experience, combining functionality and innovation in a single unit.

Installation Instructions

Proper installation ensures safe and efficient operation. Begin with unpacking and preparation, followed by electrical connections, water supply setup, venting requirements, and drainage configuration.

2.1 Unpacking and Preparation

Begin by carefully unpacking the GE Washer/Dryer Combo, ensuring all components are included and undamaged. Place the unit on a level, stable surface to ensure proper operation. Before installation, inspect the appliance for any shipping damage and report issues immediately. Secure the unit to prevent movement during use. Protect the floor with a suitable surface cover to avoid damage. Read the entire manual to understand safety precautions and installation requirements. Retain the packaging for potential future relocation. Proper preparation ensures a smooth installation process and optimal performance of your GE Washer/Dryer Combo.

2.2 Electrical Connections

Ensure the GE Washer/Dryer Combo is connected to a dedicated 120-volt, 20-amp electrical circuit to meet power requirements. Avoid using extension cords, as they may cause fire hazards. Verify the unit is properly grounded by following the grounding instructions in the manual. Check that the electrical outlet matches the appliance’s plug configuration to prevent mismatches. Turn off the power before performing any maintenance or repairs to avoid electrical shock. Keep the area around electrical components dry to prevent hazards. Proper electrical connections are essential for safe and efficient operation of your GE Washer/Dryer Combo.

2.3 Water Supply Requirements

Connect the GE Washer/Dryer Combo to a cold water supply line, as hot water is not typically required for optimal performance. Ensure the water pressure is between 20-120 PSI to avoid damage. Install a water shut-off valve nearby for easy access in case of emergencies. Use high-quality, corrosion-resistant hoses to prevent leaks and ensure proper water flow. Regularly inspect the hoses for signs of wear or damage and replace them if necessary. Proper water supply setup ensures efficient operation and prevents potential issues with your GE Washer/Dryer Combo.

2.4 Venting Requirements for Vented Models

For vented models of the GE Washer/Dryer Combo, proper venting is essential for safe and efficient operation. Use a dedicated 4-inch diameter venting system, ensuring it is free from obstructions and debris. The venting system should extend no more than 20 feet from the unit to maintain airflow efficiency. Install a vent hood or equivalent at the exterior termination to prevent backdrafts. Avoid using flexible ducts, as they can restrict airflow. Ensure all connections are secure and sealed to prevent leaks. Regularly inspect the venting system for damage or blockages to maintain optimal performance and safety. Refer to local building codes for additional requirements. Use a venting kit recommended by GE for compatibility.

2.5 Drainage and Plumbing Setup

Proper drainage and plumbing setup is crucial for the GE Washer/Dryer Combo to function efficiently. Ensure the drain hose is securely connected to a standpipe or laundry tub, maintaining a minimum height of 30 inches to prevent siphoning. Use the provided water supply hoses, ensuring they are free from kinks or damage. Connect the hot and cold water hoses to the respective inlet ports on the unit. Regularly inspect the drain pump filter to remove debris and ensure smooth water flow. Follow the installation instructions for specific plumbing requirements to avoid leaks or water damage. Use GE-recommended parts for compatibility and optimal performance. Always turn off the water supply when servicing the unit.

Operating the GE Washer/Dryer Combo

Understand the control panel, select appropriate wash and dry cycles, and utilize special features like Steam and Sanitize for enhanced cleaning. Follow on-screen instructions for seamless operation.

3.1 Understanding the Control Panel

The control panel is the command center of your GE Washer/Dryer Combo, featuring intuitive controls for selecting cycles, options, and monitoring progress. A digital display shows cycle status, remaining time, and error codes. Rotary knobs or buttons allow you to choose wash and dry cycles, while additional buttons enable special features like Steam and Sanitize. The Start/Stop button initiates or pauses operations, and indicator lights provide feedback. Familiarize yourself with the panel to optimize laundry results and troubleshoot issues efficiently. Proper use ensures smooth operation and extends the appliance’s lifespan.

3.2 Selecting Wash and Dry Cycles

Selecting the right wash and dry cycles on your GE Washer/Dryer Combo ensures optimal cleaning and care for your laundry. Choose from pre-set cycles like Normal, Heavy Duty, or Delicates based on fabric type and soil level. For drying, options include settings like UltraFast, Sanitize, or Energy Save. Use the control panel to adjust temperature, spin speed, and special features like Steam or Refresh. Match the cycle to the load size and fabric care labels for best results. Refer to the manual for detailed cycle descriptions and customization options to achieve the perfect wash and dry for every load.

3.3 Loading Laundry: Best Practices

Properly loading your GE Washer/Dryer Combo ensures efficient cleaning and prevents damage. Fill the drum to 2/3 capacity for optimal performance. Avoid overloading, as this can cause imbalance. Separate delicate fabrics from heavier items and check pockets for loose objects. Balance bulky items with smaller loads and avoid overstuffing. Leave enough space for clothes to move freely during cycles. For best results, follow fabric care labels and avoid mixing colors with whites. Do not add large, bulky items that may interfere with washing or drying performance. This ensures your laundry is cleaned and dried effectively while maintaining appliance efficiency.

3.4 Starting and Stopping the Unit

To start the GE Washer/Dryer Combo, ensure the lid is closed and the desired cycle is selected. Press and hold the Start button until the display confirms the cycle has begun. Monitor the digital display for remaining time and status updates. For stopping, press and hold the Stop button, and the unit will pause the cycle. Always ensure the unit is stopped before opening the lid for safety. If an error occurs, refer to the error code list for troubleshooting. Regularly redistributing the load during operation can prevent imbalance issues.

3.5 Using Special Features (Steam, Sanitize, etc.)

To activate the steam feature on your GE Washer/Dryer Combo, select the Steam Cycle option on the control panel before starting the cycle. This enhances stain removal and softens fabrics. For sanitize, choose the Sanitize mode to eliminate bacteria and odors using high heat. Ensure the drum is not overloaded for optimal performance. Always check fabric care labels to confirm compatibility with these features. After selecting, press Start to begin. The unit will automatically adjust settings for the selected feature. For best results, use the recommended detergent for steam and sanitize cycles. Regularly cleaning the detergent dispenser ensures proper function of these features.

Maintenance and Care

Regular maintenance ensures optimal performance of your GE Washer/Dryer Combo. Clean the detergent dispenser, check hoses, and dry the unit after use to prevent mold and odors.

4.1 Cleaning the Detergent Dispenser

Cleaning the detergent dispenser regularly is crucial for maintaining your GE Washer/Dryer Combo’s efficiency. Remove the dispenser and soak it in warm water. Scrub gently with a soft brush to eliminate residue. Rinse thoroughly and reinstall. This prevents clogs and ensures proper detergent distribution, optimizing wash performance and preventing mold buildup.

4.2 Checking and Replacing Hoses

Regularly inspect the water supply hoses for cracks, brittleness, or wear. Replace them every 5 years or sooner if damage is detected. Turn off the water supply before inspecting or replacing hoses. For the GE Washer/Dryer Combo, use only high-quality, reinforced hoses designed for appliances. Tighten connections securely to prevent leaks. If unsure, consult a professional for assistance. Proper hose maintenance ensures reliable performance and prevents water damage. Always refer to the manual for specific recommendations on compatible hose types and replacement procedures.

4.3 Drying the Unit After Use

After each use, ensure the washer/dryer combo is thoroughly dried to prevent mold and mildew buildup. Leave the door open to allow interior surfaces to air out completely. For vented models, run a drying cycle after the last load. For ventless models, use the condenser cleaning cycle to remove moisture. Regularly wipe down the gasket and interior with a clean, dry cloth. This maintenance step is crucial for maintaining hygiene and ensuring fresh laundry results. Always refer to the manual for specific drying instructions tailored to your model.

4.4 Regular Maintenance Tips

Regular maintenance ensures your GE Washer/Dryer Combo operates efficiently and prolongs its lifespan. Clean the detergent dispenser monthly and check hoses for cracks or damage. Run a cleaning cycle every 1-2 months to remove detergent residue and fabric softener buildup. For vented models, ensure the venting system is clear of lint and debris to maintain proper airflow. Check the condenser (if applicable) and ensure it’s free from dust. Leave the door open after use to dry the interior. Refer to your manual for specific cleaning cycles and maintenance schedules tailored to your model. Consistent upkeep prevents mold, mildew, and performance issues.

Troubleshooting Common Issues

Identify and resolve common issues by checking error codes, ensuring proper installation, and redistributing laundry. Refer to the manual for specific solutions and maintenance tips.

5.1 Common Error Codes and Solutions

GE Washer/Dryer Combo error codes help diagnose issues. A “2 flash” code indicates a slipping belt, requiring belt replacement. Other codes may signal drainage or venting problems. Always check the manual for specific code meanings. For example, if the unit doesn’t heat, ensure electrical connections are secure. If laundry is unbalanced, redistribute the load. Regular maintenance, like cleaning filters and checking hoses, prevents many issues. If problems persist, consult the troubleshooting section or contact GE support. Refer to your model’s manual for detailed solutions tailored to your appliance. Addressing errors promptly ensures optimal performance and extends the unit’s lifespan.

5.2 Issues with Not Starting or Not Heating

If your GE Washer/Dryer Combo fails to start, ensure it is properly plugged in and the circuit breaker hasn’t tripped. Check for child lock activation, which may prevent operation. Verify the power cord is secure and functional. If the unit doesn’t heat, inspect the power supply and heating element connections. Ensure venting is clear for vented models. For ventless models, check condenser filters. If issues persist, consult the error codes or manual for specific guidance. Addressing these problems promptly ensures efficient operation and prevents further complications. Contact a professional if troubleshooting steps don’t resolve the issue. Regular maintenance can help prevent such problems.

5.3 Problems with Spin Cycle or Drying Performance

If the spin cycle isn’t functioning properly, check for imbalance or overloading. Ensure the unit is level, as an uneven surface can disrupt spin performance. For drying issues, verify venting is clear for vented models or condenser filters are clean for ventless models. Blocked water drainage or clogged lint filters can also affect drying efficiency. Consult the error codes if displayed. Regularly cleaning filters and checking drain hoses can prevent such problems. If issues persist, refer to the troubleshooting guide or contact a professional for assistance. Proper maintenance ensures optimal spin and drying performance, extending the appliance’s lifespan and reliability. Addressing these issues promptly is crucial for consistent results.

5.4 Noise or Vibration Issues

If your GE Washer/Dryer Combo is producing unusual noise or vibration, check if the unit is properly leveled and balanced. Ensure the floor is even and adjust the legs as needed. Loose clothing or uneven loads can also cause imbalance during the spin cycle. Verify that all shipping bolts have been removed and that internal components are secure. Excessive vibration may indicate improper installation or overloaded cycles. Check for loose drain hoses or vent connections, as these can contribute to noise. Regularly cleaning the drum and checking for blockages in filters can also help reduce noise. If issues persist, consult the troubleshooting guide or contact a professional for assistance. Proper maintenance and balanced loads are key to minimizing noise and vibration, ensuring smooth operation and longevity of the appliance. Addressing these issues promptly can prevent further complications and maintain optimal performance. Always refer to the manual for specific guidance on resolving noise-related problems.

Safety Precautions

Always follow safety guidelines to avoid accidents. Never overload the unit, keep children away, and ensure proper installation. Refer to the manual for detailed safety measures.

6.1 General Safety Warnings

Always follow these safety warnings to ensure safe operation of your GE Washer/Dryer Combo. Never climb on or stand on the unit, as this could cause injury or damage. Keep children away from the appliance, especially when it is in operation. Avoid overloading the washer or dryer, as this can lead to imbalance or malfunction. Do not leave the unit unattended during operation, especially when using special features like steam or sanitize. Ensure proper installation and grounding to prevent electrical hazards. Refer to the manual for detailed safety guidelines and precautions to maintain a safe laundry environment.

6.2 Electrical Safety Guidelines

Ensure the GE Washer/Dryer Combo is properly grounded to prevent electrical shock. Use a dedicated 120-volt, 20-amp circuit for the appliance, as specified in the manual. Avoid using extension cords, as they may cause power fluctuations or overheating. Never modify the power cord or plug, as this could lead to electrical hazards. Keep the unit away from water to prevent short circuits. Regularly inspect the power cord for damage and replace it if necessary. Always unplug the unit before performing maintenance or repairs. Consult a qualified technician for any electrical issues to ensure safety and compliance with local regulations.

6.3 Child Safety Considerations

Ensure children are kept away from the GE Washer/Dryer Combo during operation, as moving parts and hot surfaces pose risks. Never allow children to climb on or stand on the unit, as this can lead to accidents. Keep the laundry area clean and clear of tripping hazards. Supervise children when they are near the appliance and teach them basic safety precautions. Use child safety locks if available to prevent unauthorized access. Always follow the manual’s guidelines for safe operation and maintenance to protect your family. Regularly inspect the unit for any potential hazards and address them promptly to ensure a safe environment.

7.1 Summary of Key Points

This manual provides a comprehensive guide for the GE Washer/Dryer Combo, covering installation, operation, and maintenance. Key features include advanced cycles, energy efficiency, and user-friendly controls. Proper installation requires careful setup of electrical, water, and venting connections. Regular maintenance, such as cleaning the detergent dispenser and checking hoses, ensures longevity. Safety precautions, like avoiding overloaded cycles and keeping children away, are essential; Troubleshooting common issues, like error codes or noise problems, is addressed to help resolve problems quickly. By following these guidelines, users can optimize performance, extend the appliance’s lifespan, and ensure safe, efficient operation.

7.2 Final Tips for Optimal Performance

For the best results with your GE Washer/Dryer Combo, always follow recommended load sizes and detergent usage. Regularly clean filters and check hoses to prevent blockages. Ensure proper ventilation for vented models and maintain a balanced unit to reduce noise. Use the steam and sanitize features sparingly to preserve energy and extend lifespan. Keep the unit dry after use to prevent mold growth. Refer to the manual for specific cycle selections and troubleshooting guidance. By adhering to these tips, you’ll enjoy efficient, reliable performance and extend the life of your appliance. GE Appliances is committed to helping you achieve laundry excellence with ease.

no grid survival projects pdf

No-Grid Survival Projects PDF

Discover comprehensive guides for off-grid living, including renewable energy, food storage, and shelter solutions. Popular PDFs like “No-Grid Survival Projects Bible” offer practical strategies for self-sufficiency, available for free download online.

No-grid survival focuses on self-sufficiency, empowering individuals to thrive without reliance on public utilities. It encompasses renewable energy, food production, water management, and sustainable shelter solutions. This lifestyle prioritizes preparedness, resilience, and environmental harmony. By mastering off-grid skills, individuals can ensure independence during crises or natural disasters. Key aspects include solar power, rainwater harvesting, and food preservation. Community support and legal awareness are also crucial for long-term success. No-grid survival is a holistic approach to living sustainably, ensuring readiness for any situation while promoting eco-friendly practices.

Key Aspects of No-Grid Survival Projects

No-grid survival projects emphasize practical, self-sufficient strategies for off-grid living. They include renewable energy systems like solar and wind, water procurement methods such as rainwater harvesting, and food security through gardening and preservation. Shelter construction, waste management, and energy storage are also vital components. These projects are designed to be implemented incrementally, ensuring readiness for emergencies and long-term independence. They often involve DIY solutions, making them accessible for individuals with varying skill levels and resources, promoting resilience and sustainability in any environment.

Importance of Renewable Energy

Renewable energy is crucial for off-grid survival, enabling sustainable power generation without reliance on finite resources. Solar, wind, and micro-hydro systems provide clean energy, reducing dependence on external grids. These systems are cost-effective in the long term and ensure energy independence, especially during crises. By harnessing renewable energy, individuals can maintain essential systems like lighting, communication, and water purification. Investing in renewable energy solutions is vital for resilience and self-sufficiency in off-grid living, making it a cornerstone of survival projects.

Food Storage and Preservation

Food storage and preservation are essential for long-term survival off the grid. Techniques like canning, dehydrating, and root cellaring help maintain nutrition and prevent spoilage. These methods ensure a steady food supply during emergencies or grid failures. Proper storage solutions, such as airtight containers and cold storage, are crucial for extending shelf life. Additionally, fermentation and smoking are traditional practices that preserve food naturally. Mastering these skills ensures food security and sustainability, making them vital components of any off-grid survival plan.

Shelter and Construction

Shelter and construction are critical for off-grid survival, ensuring protection from harsh elements. DIY projects include building emergency shelters using natural materials like wood and earth. Permanent off-grid housing often incorporates sustainable materials and energy-efficient designs. Proper construction techniques ensure durability and safety, while renewable energy integration enhances self-sufficiency. Waste management systems, like composting toilets, are also essential for long-term living. These projects emphasize practicality, resilience, and harmony with the environment, providing reliable shelter for survival scenarios.

Popular No-Grid Survival PDFs

Popular no-grid survival PDFs include “No-Grid Survival Projects Bible: 10 IN 1” and “Simple No-Grid Survival Projects for Beginners.” These guides provide detailed strategies for off-grid living, covering renewable energy, food storage, and shelter solutions. They are widely recommended for their practical advice and comprehensive coverage of survival skills. Many of these resources are available for free download, offering accessible knowledge for preparing for emergencies and achieving self-sufficiency. They are essential tools for anyone serious about off-grid living and survival preparedness.

No-Grid Survival Projects Bible: 10 IN 1

The “No-Grid Survival Projects Bible: 10 IN 1” is a comprehensive guide offering 10 essential projects for off-grid living. It covers solar power systems, rainwater harvesting, food preservation, and shelter construction, providing detailed instructions for each project. Designed for both beginners and experienced individuals, this resource focuses on self-reliance and sustainability. The book is packed with practical advice, making it an indispensable tool for anyone preparing for emergencies or aiming to live independently off the grid. Its clear instructions and versatile content ensure readiness for various survival scenarios.

Simple No-Grid Survival Projects for Beginners

Perfect for newcomers, “Simple No-Grid Survival Projects for Beginners” offers easy-to-follow guides for off-grid living. It covers basic projects like solar panel installation, rainwater harvesting, and food storage; These projects require minimal resources and are designed to help build confidence in self-sufficiency. The guide also includes tips on water filtration and simple shelter construction, making it an excellent starting point for anyone new to off-grid survival. Clear instructions and practical advice ensure even beginners can take their first steps toward independence.

Water Procurement and Management

Water is a critical resource in off-grid survival. Procurement methods include rainwater harvesting, well drilling, and creek water collection. Proper management ensures water quality and availability. Techniques like filtration, purification, and storage are essential. Greywater systems and composting toilets conserve water, reducing waste. These strategies are detailed in PDF guides, providing step-by-step instructions for sustainable water systems. Implementing these methods ensures a reliable water supply, crucial for survival and daily needs in self-sufficient living. Efficient water management is key to thriving off the grid.

Rainwater Harvesting

Rainwater harvesting is a sustainable method for water procurement in off-grid living. It involves collecting and storing rainwater for various uses, such as irrigation and household needs. Proper systems require gutters, downspouts, and storage tanks. Filtration and treatment are essential to ensure water safety. PDF guides provide detailed instructions for building and maintaining rainwater systems, emphasizing conservation and efficiency. This practice reduces reliance on external water sources, enhancing self-sufficiency and resilience in off-grid environments. Rainwater harvesting is a vital component of water management for survival and sustainability.

Water Filtration Systems

Water filtration systems are essential for ensuring safe drinking water in off-grid living. These systems remove contaminants, bacteria, and viruses, making water safe for consumption. Techniques include sand filtration, charcoal filters, and ceramic elements. DIY systems can be built using simple materials, while advanced systems incorporate UV treatment. Regular maintenance is crucial to prevent clogging and bacterial growth. No-grid survival PDFs provide detailed guides for constructing and maintaining water filtration systems, ensuring access to clean water during emergencies or remote living conditions. These systems are vital for long-term sustainability and health.

Energy Generation Off the Grid

Energy generation off the grid is a cornerstone of self-sufficient living, enabling independence from public utilities. Solar panels, wind turbines, and micro-hydro systems are popular methods for harnessing renewable energy. These systems provide clean, reliable power and can be tailored to meet specific needs. No-grid survival PDFs offer detailed guides for installing and maintaining these systems, ensuring a steady power supply during emergencies or remote living. Proper planning and understanding of energy storage solutions, like batteries, are also crucial for long-term sustainability. These resources empower individuals to create their own energy systems for a resilient lifestyle.

Solar Power Systems

Solar power is a leading renewable energy source for off-grid living, offering a reliable and sustainable way to generate electricity. Solar panels convert sunlight into power, making them ideal for remote locations. To maximize efficiency, systems require proper installation, including assessing sunlight exposure and selecting suitable panel sizes. Energy storage solutions, like batteries, are essential for nighttime use. Maintenance involves regular cleaning and performance monitoring. No-grid survival PDFs provide step-by-step guides for designing and installing solar power systems, ensuring a consistent energy supply for off-grid homes.

Wind Energy Solutions

Wind energy is a key component of off-grid survival, providing a reliable source of power in areas with consistent wind patterns. Wind turbines convert kinetic energy from the wind into electricity, making them a sustainable option for remote locations. Systems include blades, a generator, and a tower, with energy stored in batteries for consistent supply. Proper installation involves assessing wind speed and turbine size. Maintenance, such as blade cleaning and lubrication, ensures optimal performance. Wind energy solutions are scalable, from small turbines for homes to larger systems for communities, offering a versatile off-grid power option.

Micro-Hydro Power Projects

Micro-hydro power projects harness energy from flowing water in streams or rivers to generate electricity. Ideal for off-grid locations, these systems use a turbine connected to a generator, powered by water flow. They are highly reliable, as water flow is consistent compared to solar or wind. Micro-hydro systems are scalable, suitable for small communities or individual homes. Installation requires access to a water source with sufficient flow and elevation. Regular maintenance ensures efficiency. These systems are eco-friendly and provide a sustainable energy solution for remote areas, enhancing off-grid independence and resilience.

Food Security in Off-Grid Living

Food security is crucial for off-grid survival, ensuring a sustainable food supply without reliance on public utilities. Techniques include survival gardening, food preservation, and livestock management. These methods provide consistent access to nutritious food, essential for long-term independence. Growing your own food and preserving harvests ensures resilience during crises. Livestock management offers additional protein sources and resources. Guides like “No-Grid Survival Projects PDF” detail these strategies, helping individuals achieve self-sufficiency and thrive in off-grid environments. Proper planning and implementation are key to maintaining food security in remote or challenging conditions.

Survival Gardening

Survival gardening is a cornerstone of off-grid living, ensuring a steady food supply during emergencies. It involves growing edible plants tailored to your climate, using water conservation techniques, and implementing crop rotation for soil health. Composting and natural fertilizers enhance sustainability. Raised beds and vertical gardens maximize space, while edible plants like vegetables, herbs, and fruits provide essential nutrients. Survival gardening guides in PDFs like “No-Grid Survival Projects” offer practical tips for cultivating food independently, ensuring self-sufficiency and food security in challenging conditions.

Food Preservation Techniques

Food preservation is vital for long-term off-grid survival, ensuring access to nutritious meals year-round. Techniques like canning, dehydrating, and fermenting help maintain food quality and safety. Canning involves sealing food in airtight containers, while dehydration removes moisture to prevent spoilage. Fermentation enhances flavor and nutritional value, using natural processes. Root cellars and vacuum sealing are also effective methods. These techniques, detailed in guides like “No-Grid Survival Projects,” empower individuals to store food securely, reducing reliance on external supplies during emergencies or grid failures.

Livestock Management

Livestock management is essential for sustainable off-grid living, providing a reliable source of food and resources. Guides like “No-Grid Survival Projects” detail strategies for raising animals, including feeding, breeding, and health care. Proper management ensures a steady supply of meat, dairy, and eggs, while also maintaining animal well-being. Techniques such as rotational grazing and natural disease prevention are emphasized. Integrating livestock with other systems, like using manure for fertilizer, enhances overall self-sufficiency. These methods help off-grid homesteaders maintain a balanced and productive ecosystem.

Shelter and Construction Projects

Shelter and construction projects are vital for off-grid survival, ensuring safety and protection from harsh environments. Guides like “No-Grid Survival Projects” provide detailed plans for building emergency shelters and permanent housing using sustainable materials. Techniques include constructing log cabins, earthbag homes, and repurposing shipping containers. These projects emphasize durability, energy efficiency, and adaptability to various climates. DIY instructions and material lists help beginners create sturdy shelters, ensuring long-term security and comfort in off-grid living scenarios.

Building Emergency Shelters

Emergency shelters are crucial for immediate protection in off-grid scenarios. DIY projects include constructing lean-tos, debris huts, and snow shelters using natural materials like logs, branches, and snow. Guides detail how to build quick, durable structures that shield from wind, rain, and extreme temperatures. Essential tools include a knife, rope, and tarp. These shelters are adaptable to various environments, ensuring survival until more permanent housing is established. Plans often emphasize simplicity and resourcefulness, making them accessible even for those with limited experience.

Permanent Off-Grid Housing

Permanent off-grid housing offers long-term sustainability and independence. Eco-friendly designs like earthships, straw bale homes, and tiny houses are popular choices. These structures often utilize natural, locally sourced materials and incorporate renewable energy systems for power. Many guides provide detailed blueprints and construction tips, ensuring energy efficiency and resilience. Legal considerations, such as zoning laws, are also addressed to help builders comply with local regulations. These homes are designed to withstand harsh conditions and provide a self-sufficient lifestyle, making them ideal for those committed to off-grid living.

Waste Management and Recycling

Effective waste management and recycling are crucial for sustainable off-grid living. Implementing systems like composting toilets and greywater recycling helps minimize waste and conserve resources. Composting toilets turn human waste into fertilizer, while greywater systems reuse water from sinks and showers for irrigation. Recycling materials like metal, glass, and plastic reduces landfill contributions and encourages resourcefulness. Proper waste management not only protects the environment but also enhances self-sufficiency, ensuring a healthier and more sustainable off-grid lifestyle. These practices are essential for long-term independence and environmental stewardship.

Greywater Systems

Greywater systems recycle water from sinks, showers, and laundry for irrigation and other non-potable uses. This sustainable practice conserves water and reduces wastewater. By rerouting greywater through filters and pipes, it can safely irrigate plants, reducing the need for freshwater. Proper setup, including separation from blackwater, is crucial to maintain hygiene. Using natural cleaning products ensures water remains uncontaminated. Greywater systems are a vital component of off-grid living, promoting water efficiency and environmental sustainability. They require minimal maintenance and are a practical solution for resourceful living.

Composting Toilets

Composting toilets are a sustainable solution for managing human waste in off-grid environments. They break down waste into compost using natural processes, reducing water consumption and eliminating the need for septic systems. These toilets separate urine and feces, accelerating decomposition and minimizing odors. Proper maintenance involves regular aeration and carbon addition to maintain healthy microbial activity. Composting toilets are eco-friendly, producing nutrient-rich fertilizer for gardens while conserving water. They are a practical choice for off-grid living, promoting self-sufficiency and environmental stewardship. Regular upkeep ensures functionality and hygiene in remote settings.

Legal and Community Considerations

Understanding local laws and regulations is crucial for off-grid living. While no state outright prohibits off-grid lifestyles, city ordinances often create barriers. Unincorporated county areas are typically more off-grid friendly. Building a supportive community is equally important, as like-minded individuals can share resources and knowledge, fostering resilience and mutual aid.

Researching and complying with local regulations ensures legal compliance, avoiding potential conflicts. Engaging with local communities can also provide valuable networks for off-grid enthusiasts, creating a stronger, more sustainable lifestyle collective.

Local Laws and Regulations

Before embarking on off-grid survival projects, it’s essential to research and comply with local laws and regulations. While no state outright prohibits off-grid living, many city ordinances can make it challenging. Zoning laws, permits, and environmental regulations often dictate what is allowable. Unincorporated county areas typically offer more freedom for off-grid initiatives. Always verify legal requirements for renewable energy systems, water collection, and construction projects to avoid penalties. Understanding these regulations ensures your off-grid lifestyle remains compliant and sustainable in the long term.

Building a Supportive Community

Building a supportive community is vital for off-grid survival. Collaborating with like-minded individuals fosters shared knowledge, resources, and skills. Join local or online groups focused on off-grid living to network and learn. Participating in workshops, skill-sharing events, and cooperative projects strengthens community bonds. A supportive network provides emotional and practical support during challenges. Encourage open communication and mutual aid to create a resilient community. This collective effort enhances preparedness and ensures long-term success in off-grid living.

hockey skate size guide

Understanding hockey skate sizing is crucial for optimal performance and comfort. Proper fit enhances skating efficiency, control, and overall enjoyment. This guide provides essential tips and insights to help you navigate skate sizing charts, measure your feet accurately, and choose the right size for your skill level and skating style. Whether you’re a beginner or an advanced player, finding the perfect fit is key to unlocking your full potential on the ice.

Understanding Skate Sizing Charts

Skate sizing charts vary by brand, offering size conversions and width options. They help match foot measurements to ideal skate sizes, ensuring proper fit and performance.

How Skate Sizing Compares to Shoe Sizing

Hockey skate sizing differs significantly from shoe sizing, as skates are designed for performance and support. Generally, senior hockey skates fit 1.5 sizes smaller than a men’s shoe size, while junior and youth skates fit 1 size down. This is because skates need to be snug to maximize control and efficiency on the ice. Proper fit ensures your toes barely touch the toe cap, allowing minimal movement from side to side but enough space to wiggle toes up and down. This tight fit is crucial for optimal skating performance and comfort, making accurate sizing essential for players of all levels.

Importance of Proper Fit for Performance

A proper fit in hockey skates is essential for maximizing performance, comfort, and control on the ice. Ill-fitting skates can lead to reduced skating efficiency, discomfort, and even hinder overall performance. Skates that are too tight can restrict movement and cause discomfort, while skates that are too loose may result in poor control and increased risk of blisters. A well-fitted skate allows for optimal energy transfer during strides and quick turns, enabling better speed and agility. Proper fit also ensures better support for the foot, reducing fatigue and enhancing overall skating performance. Whether you’re a beginner or an advanced player, achieving the right balance of snugness and comfort is key to unlocking your full potential on the ice.

Measuring Your Foot for Hockey Skates

Accurate foot measurement is vital for proper hockey skate sizing. Use a Brannock device or ruler to measure length and width while standing upright for precise fit.

How to Accurately Measure Foot Length and Width

To ensure accurate measurements, stand barefoot on a flat surface. Place your foot on a piece of paper, keeping your weight evenly distributed. Trace the outline of your foot carefully with a pencil. Measure the longest point (heel to toe) for length and the widest part across the ball for width. Use a ruler or Brannock device to record precise numbers. Always measure both feet, as they may differ slightly. For best results, measure later in the day, as feet tend to swell slightly. Accurate measurements ensure a proper fit, preventing discomfort and performance issues. This step is foundational for choosing the right hockey skate size.

Using a Brannock Device for Precise Measurements

A Brannock device is a reliable tool for measuring foot length and width accurately. To use it, place your bare foot on the device with your heel snug against the back. Slide the measuring slider forward until it touches the tip of your longest toe. This gives your foot length. For width, ensure the foot is centered and adjust the width gauge until it fits comfortably across the ball of the foot. Measure both feet, as they may differ slightly. Record the larger measurement to ensure a proper fit. Using a Brannock device ensures precision, which is essential for hockey skates, as even small discrepancies can affect performance and comfort. This method is highly recommended for accurate sizing.

Skate Width and Its Impact on Fit

Skate width significantly affects comfort and performance. Narrow, medium, and wide options cater to different foot shapes. Proper width ensures a snug, supportive fit, enhancing control and maneuverability.

Narrow, Medium, and Wide Skate Options

Hockey skates come in narrow, medium, and wide widths to accommodate different foot shapes. Narrow skates are ideal for slimmer feet, offering a snug fit that enhances control. Medium width is the most common, providing a balanced fit for average foot shapes. Wide skates are designed for broader feet, ensuring comfort and preventing blisters. Proper width is crucial for performance, as it affects how the skate hugs the foot. Choosing the right width ensures optimal support, stability, and mobility. Always consider your foot shape and try on skates if possible to determine the best fit for your needs.

How Skate Width Affects Skating Performance

Skate width significantly impacts skating performance by influencing fit, stability, and maneuverability. A skate that is too narrow can cause discomfort and restrict movement, while one that is too wide may reduce support and control. Proper width ensures even pressure distribution, allowing for better edge control and quicker turns. It also affects power transfer during strides, as a well-fitted skate maximizes energy efficiency. Skaters with wider feet may find wider skates enhance stability, while narrower feet benefit from a snug fit for precision. Ultimately, the right width balances comfort and performance, enabling skaters to perform at their best on the ice.

Senior vs. Junior Skate Sizing

Senior skates fit 1.5 sizes below shoe size, while junior skates fit 1.0 size down, ensuring proper support and performance for different age groups and foot sizes.

Differences in Fit for Adults and Youth

Senior hockey skates are designed for adults and full-grown teenagers, fitting 1.5 sizes smaller than shoe size for optimal support and performance. Youth skates, however, are sized 1.0 size down from shoe size, accommodating smaller, developing feet while allowing for growth. The fit differences ensure proper support and comfort for varying foot structures and skating demands. Adults require a snug fit for stability and control, while youth skates prioritize both support and room for growth. Understanding these distinctions helps in selecting the right skate size, ensuring comfort and performance for players of all ages and skill levels.

Recommended Size Reductions by Age Group

When sizing hockey skates, age plays a significant role in determining the ideal fit. Generally, senior skates fit 1.5 sizes smaller than shoe size, while junior and youth skates fit 1.0 size smaller. For younger players, such as those in the 8-12 age range, a slightly larger reduction may be necessary to accommodate growth. Teenagers nearing adult size often require less reduction, typically 1.0 to 1.5 sizes down. It’s essential to consult brand-specific sizing charts, as Bauer, CCM, and Graf may vary slightly. Proper size reduction ensures a snug, supportive fit, enhancing performance and comfort for players of all ages;

Brand-Specific Sizing Guides

Brand-specific sizing guides vary, with Bauer recommending 1.5 sizes down, CCM offering detailed charts, and Graf focusing on unique width systems for optimal fit.

Bauer Skate Sizing Chart

Bauer’s skate sizing chart is designed to help you find the perfect fit based on your shoe size. Generally, Bauer skates fit 1.5 sizes smaller than your regular shoe size. For example, if you wear a size 10 shoe, you would likely need a size 8.5 in Bauer skates. Their sizing chart provides a detailed conversion guide, ensuring accuracy for both senior and junior skates. Bauer also offers specific models with unique features, so it’s important to consult their official chart for exact measurements. Remember, proper fit is crucial for performance, so consider trying on skates before purchasing. Bauer’s sizing system is trusted by players worldwide for comfort and precision.

CCM Skate Sizing Chart

CCM’s skate sizing chart offers a precise guide to finding your ideal fit. Typically, CCM skates fit 1.5 sizes smaller than your regular shoe size, similar to other brands. For instance, a size 10 shoe corresponds to a size 8.5 skate. Their chart includes detailed measurements for both senior and junior skates, ensuring accuracy. CCM also provides specific sizing recommendations based on age groups, with youth skates fitting 1 size smaller than shoe size. They emphasize the importance of proper fit for performance, suggesting that skates should feel snug but allow slight toe movement. Always refer to CCM’s official chart for exact sizing, as variations may occur between models. Proper fit ensures maximum comfort and skating efficiency.

Graf Skate Sizing Chart

Graf’s skate sizing chart offers a unique approach to fit, focusing on precise width classifications. Unlike other brands, Graf uses a distinct method to categorize skate widths, ensuring a tailored fit for various foot shapes. Their sizing generally aligns with standard shoe sizes but may require adjustments based on individual foot dimensions. Graf skates are known for their durability and comfort, making them a popular choice for players seeking a snug yet responsive fit. Proper sizing is critical for performance, so consulting Graf’s official sizing chart is recommended. Always consider trying skates on if possible, as Graf’s sizing can vary slightly from other brands. This ensures optimal comfort and skating efficiency.

Skate Fit Tips for Different Skill Levels

Beginners should prioritize comfort and support, while advanced players opt for a snug fit to maximize performance. Proper fit varies by skill level to ensure optimal skating efficiency and control.

Beginner vs. Advanced Skate Fit Requirements

Beginners and advanced players have different needs when it comes to skate fit. Beginners often prioritize comfort and support, as they are still developing their skating skills. A slightly roomier fit can help prevent discomfort and blisters during long practice sessions. Advanced players, however, typically prefer a snugger fit to maximize performance, as it allows for better control and precision on the ice. The fit should adapt to the player’s skating style, frequency of play, and personal comfort preferences. Proper fit ensures optimal performance and prevents injuries, making it essential to tailor the fit to the player’s skill level and skating goals.

Professional Skate Fitting Recommendations

Professional skate fitters emphasize the importance of a precise fit to ensure peak performance and comfort. They recommend trying skates with thick hockey socks, as this mimics game conditions. A proper fit should allow toes to barely touch the toe cap, with minimal side-to-side movement. The heel should feel snug to prevent slipping during sharp turns. For advanced players, a tighter fit is often preferred for better control, while beginners may opt for a slightly roomier fit to avoid discomfort. Professionals also suggest considering the skate’s volume—narrower boots for slimmer feet and wider for broader feet. Heat molding is a recommended step to customize the fit further, ensuring optimal comfort and performance. This personalized approach ensures the skates adapt to the player’s needs, enhancing their overall skating experience.

How to Size Hockey Skates for Growth

Proper fit is crucial for growth. Allow a little extra room for toes to accommodate growth without sacrificing performance. Ensure skates are snug but not overly tight.

Tips for Buying Skates That Allow for Growth

When purchasing hockey skates for growing players, consider skates with a snug yet comfortable fit, allowing a little extra room for toes to accommodate growth. Choose skates with adjustable features or a slightly larger size to ensure they can be worn for multiple seasons. Measure foot length and width accurately, and consult brand-specific sizing charts for guidance. Ensure the skates are not too loose, as this can affect performance. Opt for skates with removable insoles to add extra space if needed. Proper fit ensures both comfort and performance, making it easier for young players to develop their skills on the ice.

When to Size Up for Junior Players

Junior hockey players often outgrow their skates quickly, so timing the move to a larger size is essential. If a player’s toes consistently touch the end of the skate or they experience discomfort, it’s time to size up. Growth spurts during the season may require intermediate adjustments. Typically, juniors should size up when their shoe size increases by a full size or more. Consult brand-specific sizing charts, like those from Bauer or CCM, for precise guidance. Proper fit ensures better performance and prevents blisters or restricted movement. Avoid sizing up too early, as overly large skates can hinder control and skating efficiency. Always try skates on before purchasing to confirm the fit.

Final Thoughts on Choosing the Right Skate Size

Selecting the right hockey skate size is a critical decision that impacts performance, comfort, and overall enjoyment of the game. Proper fit ensures better control, speed, and maneuverability on the ice. Always consider factors like foot length, width, and personal comfort when choosing a size. Refer to brand-specific sizing charts, as sizing can vary between manufacturers. Trying skates on before purchasing is highly recommended to confirm the fit. For junior players, account for growth, but avoid sizing up too early, as this can compromise performance. Remember, the right fit is an investment in your game, so take the time to get it just right.

ellio’s pizza air fryer instructions

Air fryers offer a convenient and healthier way to achieve crispy, oven-like results at home. Cooking Ellios Pizza in an air fryer ensures even cooking and a perfectly crispy crust without excess oil, making it a great alternative to traditional oven methods while maintaining delicious flavor.

Why Air Fryers Are Ideal for Cooking Ellios Pizza

Air fryers are an excellent choice for cooking Ellios Pizza due to their ability to produce a crispy crust and evenly cooked toppings with minimal oil. The compact size of the air fryer allows for precise temperature control, ensuring the pizza cooks uniformly without hot spots. This method is faster than traditional oven cooking, with typical cooking times ranging from 8 to 12 minutes, depending on the size and desired crispiness. Additionally, air fryers are energy-efficient and easier to clean compared to conventional ovens, making them a practical option for quick meals. The air fryer’s rapid air circulation technology enhances the texture of the crust, achieving a crispy exterior while maintaining a soft interior, which is particularly beneficial for frozen pizzas like Ellios.

Benefits of Using an Air Fryer for Frozen Pizza

Using an air fryer for frozen pizza, such as Ellios, offers several advantages. It delivers a crispy crust and melted cheese with minimal effort, rivaling traditional oven results. The air fryer’s rapid air technology ensures even cooking, preventing undercooked or burnt spots. Compared to deep-frying, it uses far less oil, making it a healthier option. Cleanup is also simplified, as the air fryer basket is easy to wash. Additionally, the compact size allows for cooking individual portions, perfect for personal meals. The quick cooking time, typically 8-12 minutes, makes it ideal for busy schedules. Overall, the air fryer provides a convenient, efficient, and delicious way to enjoy frozen pizza at home.

Preparing the Air Fryer for Ellios Pizza

Preheat the air fryer to 375-400°F (190-205°C) for optimal results. Ensure the basket is clean and free of debris for even air circulation and cooking.

Why Preheating Is Important

Preheating your air fryer ensures even cooking and a crispy crust. It allows the air fryer to reach the optimal temperature, preventing the pizza from cooking unevenly or undercooking. By preheating, you create a hot environment that immediately starts cooking the pizza, leading to better texture and flavor. This step is crucial for achieving a golden-brown crust and melted cheese without sacrificing the pizza’s structure. Consistent heat distribution from preheating also helps avoid hot spots that could burn parts of the pizza. Therefore, taking a few minutes to preheat is essential for a perfect air-fried Ellios Pizza experience.

Recommended Temperature for Preheating

The recommended temperature for preheating your air fryer when cooking Ellios Pizza is typically between 375°F (190°C) and 400°F (205°C). Preheating at this range ensures the air fryer is hot enough to immediately start cooking the pizza, which is crucial for achieving a crispy crust and evenly melted cheese. A temperature of 400°F is often ideal for a whole pizza, as it provides a balance between crispiness and cooking time. However, some recipes suggest starting at 375°F for a softer crust or adjusting based on personal preference. Always refer to your air fryer’s guidelines, as slight variations may exist depending on the model. Proper preheating at the right temperature guarantees a delicious and perfectly cooked Ellios Pizza every time.

Preparing Ellios Pizza for Air Frying

Remove the Ellios Pizza from its packaging and place it directly in the air fryer basket. Ensure the pizza fits evenly for proper air circulation and cooking results.

Choosing the Right Ellios Pizza for Air Frying

When selecting an Ellios Pizza for air frying, consider the size and type that best fits your needs. Personal-sized pizzas are ideal for air frying, as they cook evenly and fit perfectly in the basket. Opt for your favorite flavor, whether it’s cheese, pepperoni, sausage, or a combination. Frozen pizzas work best, as they hold up well to the air frying process. If you’re cooking for multiple people, you can also cook individual slices or smaller portions. Ensure the pizza is in good condition, with no visible damage to the crust or packaging, to achieve the best results. This step ensures a delicious, crispy crust and well-cooked toppings every time you use your air fryer.

Removing Packaging and Preparing the Pizza

Start by removing the Ellios Pizza from the freezer and taking it out of its packaging. Carefully pull away the plastic wrap or cardboard box to ensure the pizza is fully exposed for even cooking. If the pizza is frozen to the packaging, gently pry it loose or run the package under warm water for a few seconds. Once removed, inspect the pizza for any ice crystals or excess moisture, which can affect crispiness. For optimal results, pat the pizza dry with a paper towel to remove excess moisture. If desired, lightly brush the crust with oil or seasonings for extra flavor. Now, the pizza is ready to be placed in the preheated air fryer basket, ensuring it lies flat for even cooking. Proper preparation ensures a crispy crust and evenly cooked toppings.

Cooking Time and Temperature for Ellios Pizza

Cooking Ellios Pizza in an air fryer typically requires a temperature of 400°F (205°C) for 10-12 minutes. Adjust the time based on pizza size and desired crust crispiness for perfect results.

Cooking Time for a Whole Ellios Pizza

Cooking a whole Ellios Pizza in an air fryer typically takes 10 to 12 minutes at 400°F (205°C). For a crisper crust, cook at 400°F, while a softer crust may require slightly shorter cooking time. Always check the pizza’s condition after 8 minutes to avoid overcooking, as air fryer performance can vary. Adjust the cooking time based on personal preference for crust texture and cheese melt. Ensure even cooking by not overcrowding the basket and flipping the pizza halfway through if necessary. This method ensures a perfectly cooked pizza with a crispy base and melted cheese, making it a quick and delicious meal option.

Cooking Time for Ellios Pizza Slices

Cooking time for Ellios Pizza slices in an air fryer is generally shorter than for a whole pizza. For individual slices, cook at 375°F (190°C) for 5 to 7 minutes. This ensures a crispy crust and melted cheese. Arrange slices in a single layer in the air fryer basket to allow even cooking. Check the pizza after 4 minutes and flip if needed for uniform crispiness. Thicker slices may require an additional 1 to 2 minutes, while thinner slices could be ready sooner. Adjust the cooking time based on your preference for crust texture and cheese melt. This method provides a quick and satisfying way to enjoy Ellios Pizza slices with minimal effort and cleanup.

Adjusting Temperature for Crust Preference

Adjusting the air fryer temperature allows you to achieve your preferred crust texture when cooking Ellios Pizza. For a crisper crust, set the temperature to 400°F (205°C) and cook for 8-10 minutes. This higher heat ensures a golden-brown, crunchy base. If you prefer a softer crust, reduce the temperature to 350°F (175°C) and extend the cooking time slightly to 10-12 minutes. Monitoring the pizza during the last few minutes is crucial, as crust preferences can vary. Lowering the temperature slightly or shortening the cooking time can prevent burning. Experiment with these adjustments to find your perfect balance of crispiness and softness for an ideal Ellios Pizza experience in the air fryer.

The Reheating Process in an Air Fryer

Reheating Ellios Pizza in an air fryer is quick and effective, yielding a crispy crust and hot, flavorful toppings. It’s an ideal method for reviving leftovers with minimal effort.

Reheating Leftover Ellios Pizza in an Air Fryer

Reheating leftover Ellios Pizza in an air fryer is a fantastic way to restore its crispy crust and melted cheese. To achieve the best results, preheat the air fryer to 350°F (175°C). Place the leftover pizza slices or whole pie in the basket, ensuring they are evenly spread for consistent heating. Cook for 5-6 minutes, or until the crust is golden and the cheese is bubbly. For extra crispiness, you can slightly increase the temperature to 375°F (190°C) for the last 2 minutes. Remember to shake the basket halfway through cooking to ensure even reheating. This method prevents the pizza from becoming soggy, unlike microwaving, and delivers a fresh-out-of-the-oven taste without much effort. Adjust the time based on personal preference for crispiness or softness. Your leftovers will taste as good as freshly cooked!

Recommended Temperature and Time for Reheating

For optimal results when reheating Ellios Pizza in an air fryer, set the temperature to 350°F (175°C). Cook the pizza for 5-6 minutes, or until it reaches your desired crispiness and the cheese is melted. This temperature ensures the crust doesn’t burn while restoring its crunch. If you prefer a crisper texture, increase the temperature to 375°F (190°C) for the last 2 minutes of cooking. For softer crust lovers, reduce the temperature slightly or shorten the cooking time. Always preheat the air fryer for 2-3 minutes before adding the pizza to ensure even heating. Shake the basket halfway through cooking for consistent results. Adjust the time based on the thickness of the crust or the number of slices. This method guarantees a fresh, hot pizza with minimal effort!

Tips for Achieving the Perfect Crust

Pat dry excess moisture, spray lightly with oil, and cook at 400°F for crispiness. Arrange pizza flat in the basket for even cooking and a golden-brown crust.

How to Achieve a Crispy Crust in an Air Fryer

To achieve a crispy crust when cooking Ellios Pizza in an air fryer, preheat the appliance to 400°F (205°C) for optimal results. Pat the pizza dry with a paper towel to remove excess moisture, ensuring the crust cooks evenly. Lightly spray the crust with cooking oil for added crispiness. Place the pizza directly in the air fryer basket, avoiding overcrowding, and cook for 8-10 minutes. Shake the basket halfway through cooking to promote even browning. For a crisper texture, increase the temperature slightly or extend the cooking time by 1-2 minutes. Keep an eye on the pizza during the final minutes to prevent burning. This method ensures a golden, crunchy crust while maintaining a flavorful and melted cheesy topping.

How to Maintain a Soft Crust

Maintaining a soft crust when cooking Ellios Pizza in an air fryer requires careful temperature and timing adjustments. Preheat the air fryer to a slightly lower temperature, around 370°F (188°C), to prevent excessive crisping. Place the pizza on a non-stick baking sheet or line the air fryer basket with parchment paper to reduce direct heat exposure. Cook for 6-8 minutes, checking after 5 minutes to ensure the crust doesn’t harden. Avoid overcooking, as this can lead to a tougher texture. If reheating, set the air fryer to 350°F (175°C) for 3-4 minutes to warm the pizza without drying out the crust. This method ensures a soft, flexible crust while keeping the cheese melted and the toppings flavorful.

Troubleshooting Common Issues

Common issues include burnt crusts and undercooked sections. Adjusting temperature and ensuring even air circulation can resolve these problems, providing a perfectly cooked pizza every time.

What to Do If the Crust Is Too Burnt

If the crust becomes too burnt, reduce the air fryer temperature slightly and shorten the cooking time. For example, lower the temperature from 400°F to 380°F to prevent overcooking. Ensure the pizza is placed in the center of the basket for even air circulation. Checking the pizza halfway through the cooking process can help avoid burning. If the crust starts to darken too quickly, cover the edges with foil or rotate the pizza for more even cooking. Using a lower rack in the air fryer can also help reduce direct heat exposure. Adjusting these settings will help achieve a perfectly cooked crust without burning, ensuring a delicious result every time.

Solving Undercooked or Uneven Cooking

If your Ellios Pizza is undercooked or unevenly cooked, it may be due to incorrect temperature settings or insufficient preheating. To resolve this, ensure the air fryer is preheated to the recommended temperature (375-400°F) before cooking. Extend the cooking time by 1-2 minutes if the pizza is not fully cooked, checking periodically to avoid burning. For even cooking, rotate the pizza halfway through the cooking time and ensure it’s placed in the center of the basket. If the crust is still undercooked, increase the temperature slightly. Adjusting these settings will help achieve a perfectly cooked crust and evenly melted cheese. Remember, trial and error may be needed depending on your specific air fryer model and personal preferences for crispiness and doneness.

Air frying Ellios Pizza offers a crispy and delicious result with minimal effort. Enjoy perfectly cooked pizza every time with these simple and effective tips.

Final Thoughts on Air Frying Ellios Pizza

Cooking Ellios Pizza in an air fryer is a game-changer for pizza lovers. It delivers a crispy crust and melted cheese with minimal effort and less oil than traditional frying. The precise temperature control allows for customization, ensuring your pizza is cooked exactly how you like it. Whether you’re reheating leftovers or cooking a fresh pizza, the air fryer consistently provides excellent results. Experiment with different temperatures and times to find your perfect combination. This method is not only convenient but also healthier, making it a great option for quick meals without sacrificing flavor. With these simple steps, you can enjoy restaurant-quality pizza right at home. Don’t hesitate to try new variations and make air frying your go-to method for Ellios Pizza.

Encouragement to Experiment and Enjoy

Don’t be afraid to get creative with your Ellios Pizza in the air fryer! Experiment with different temperatures and cooking times to tailor the crispiness and flavor to your liking. Try adding unique toppings or seasonings before or after cooking for extra flavor. Reheating leftovers? Adjust the time slightly to restore that perfect crispiness. Remember, every air fryer is different, so small adjustments might be needed for optimal results. The beauty of air frying lies in its versatility, allowing you to enjoy your favorite pizza with minimal effort. Embrace the process, explore new possibilities, and savor the delicious outcomes. Make air frying a fun and enjoyable part of your culinary routine!