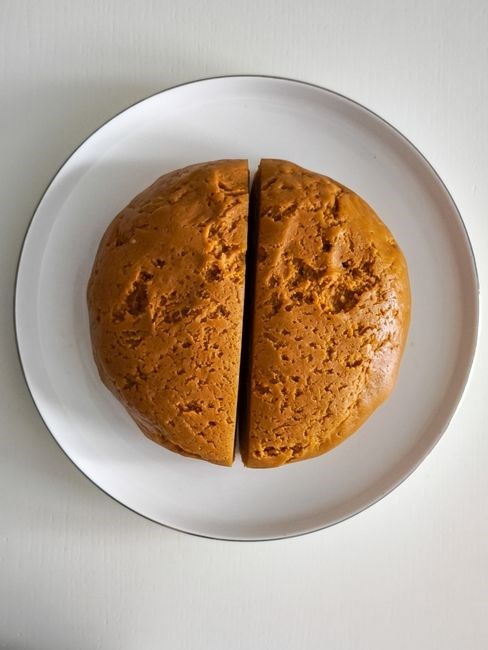
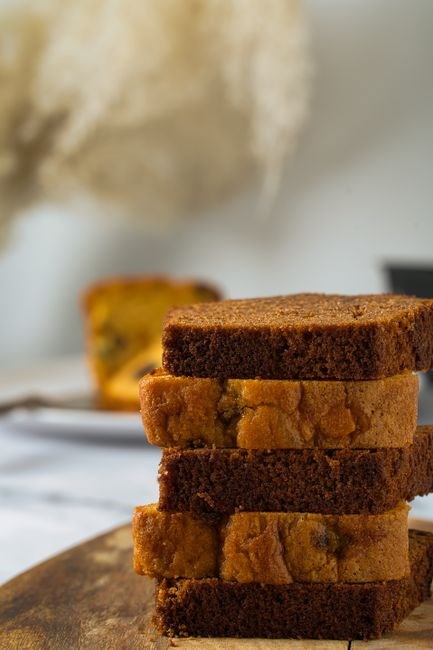
Overview of Trader Joe’s Pumpkin Bread Mix
Trader Joe’s Pumpkin Bread Mix offers a quick, flavorful solution for autumn baking. The blend contains flour, sugar, pumpkin puree, cinnamon, nutmeg, and baking powder, ready to combine with eggs, milk, and butter for a moist loaf. Its simple, no-preparation steps make it ideal for busy households.!
Ingredients Overview
Trader Joe’s mix contains flour, sugar, pumpkin puree, cinnamon, nutmeg, baking powder, salt, and dried milk. Combine with eggs, milk, melted butter, and optional vanilla. The blend yields a moist, aromatic loaf ready for baking. Add a splash of vanilla or ginger for depth
Dry Mix Components
The blend’s natural sweetness from sugar pairs well with the pumpkin’s earthy flavor, creating a harmonious balance that satisfies both sweet and savory palates. The dry mix is engineered to yield a soft crumb and balanced flavor, suitable for loaf or muffin. Dried milk powder adds subtle creaminess, while cocoa powder deepens without overpowering. A pinch of sea salt ensures a wellrounded finish,and xanthan gum gives a tender crumb that holds during baking. The result is a moist loaf that pairs with coffee now.!!
Optional Add-ins
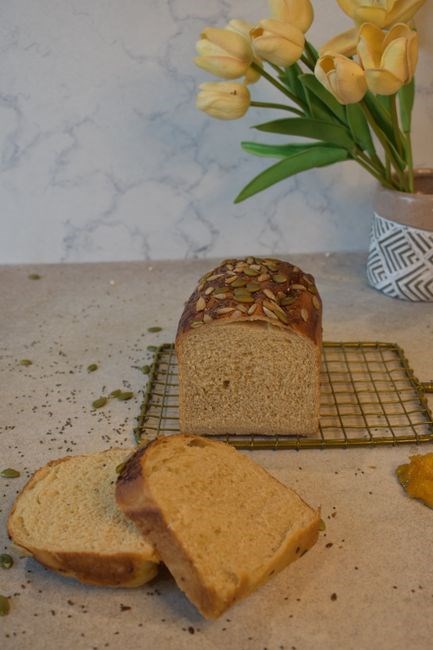
While the base mix delivers a classic pumpkin flavor, you can elevate the loaf by adding a handful of complementary ingredients. A generous handful of chopped pecans or walnuts adds a satisfying crunch and nutty undertone that pairs beautifully with the spice blend. For a touch of sweetness, dark chocolate chips or white chocolate chunks melt into the batter, creating pockets of glossy chocolate that contrast with the moist crumb. Dried cranberries or raisins introduce a chewy texture and a burst of tartness that balances the pumpkin’s earthiness. A sprinkle of shredded coconut imparts a subtle tropical note, while a teaspoon of espresso powder deepens the overall flavor profile, giving the bread a subtle coffee kick that works well with morning coffee. If you’re feeling adventurous, a tablespoon of toasted sesame seeds or pumpkin seeds can add a nutty crunch and a pop of color. Finally, a dash of ground ginger or a pinch of smoked paprika can add a surprising depth of flavor, making each bite a little more complex.
Other creative variations include adding a tablespoon of toasted pumpkin seeds for crunch, a dash of cayenne pepper for heat, or a swirl of caramel sauce for richness. You can also fold in a handful of dried apricots or raisins for a chewy contrast, or sprinkle toasted almond slivers on top before baking for an extra nutty finish. These additions allow you to tailor the loaf to your taste preferences and seasonal ingredients.
adding spices for extra depth.

Equipment Needed
A standard 8-inch square pan, a mixing bowl, whisk, spatula, measuring cups, and a cooling rack. Use parchment paper or butter to grease the pan. A digital thermometer helps gauge doneness. A mixing spoon, a silicone spatula, and a small bowl for optional add‑ins complete the kit. Keep it handy! now.
Baking Pan
For the Trader Joe’s Pumpkin Bread Mix, an 8‑inch square pan is the standard choice, but a 9‑inch round pan works well too. The pan’s flat bottom ensures even heat distribution while the slightly raised edges keep the batter from spilling during mixing. Before pouring line the pan with parchment paper or lightly grease it with butter or non‑stick spray; this prevents sticking and simplifies cleanup. If you prefer a darker crust use a dark‑colored pan but be mindful that darker pans absorb more heat so you may need to reduce the oven temperature by 10‑15°F. A silicone baking pan is a great alternative for a reusable non‑stick option. When the pan is ready tap it gently to remove any air pockets that could cause uneven baking. Finally place the pan on a sturdy baking sheet to catch any drips and to provide additional stability during the bake. This preparation step ensures a smooth evenly baked loaf that comes out of the oven clean and ready to slice. For extra crispness you can lightly brush the top with melted butter after baking and for a moist crumb add a splash of milk to the batter. Remember to let the loaf cool in the pan for 10 minutes before transferring it to a wire rack this helps the structure set and prevents the bread from breaking apart. Once cooled slice with serrated knife for clean cuts and serve warm or at room temperature with dollop of whipped cream or drizzle of maple syrup
Mixing Utensils
To turn Trader Joe’s Pumpkin Bread Mix into a tender, evenly‑moist loaf, you’ll need a few reliable tools that keep the batter smooth and free of lumps. A medium‑sized stainless‑steel or glass mixing bowl is essential; its size allows you to whisk the wet ingredients—eggs, milk, melted butter—without spilling. A sturdy whisk or electric hand mixer with a paddle attachment works best for incorporating the dry mix; the whisk’s flexible wires break up clumps quickly, ensuring the batter remains silky. A rubber spatula or silicone scraper is indispensable for scraping the bowl’s sides and bottom, guaranteeing every grain of flour is blended into the wet mix. For measuring liquids, a clear glass measuring cup with a spout makes it easy to pour milk and melted butter accurately; a separate small measuring cup for the pumpkin puree helps keep the batter’s consistency consistent. A small, flat‑topped spoon or a wooden spoon can be used to fold in optional add‑ins such as chopped pecans or dried cranberries after the batter is combined. If you prefer a more precise approach, a digital kitchen scale can weigh out the dry mix and optional add‑ins, ensuring each batch matches the original recipe’s ratios. Finally, a silicone spatula is handy for smoothing the batter’s surface before pouring it into the prepared pan, which helps the loaf rise evenly and prevents a rough crust. With these simple utensils at hand, you’ll find the mixing process forgiving, setting the stage for a perfect! bread that’s moist and ready! to share!!

Preparation Steps
Begin by preheating the oven to 350°F (175°C). Grease an 8-inch square pan with butter or oil. In a bowl, whisk eggs, milk, and melted butter until blended. Stir in the pumpkin bread mix, sugar, and pumpkin puree, mixing until smooth. Let the rest 5 minutes before baking now! Enjoy with a cup of coffee. :)!!
Preheat Oven
Before you begin mixing, set your oven to 350°F (175°C). This temperature ensures the bread rises evenly and develops a golden crust without burning. Use a reliable oven thermometer to confirm the exact heat, as some ovens run hotter or cooler than labeled. Allow the oven to fully preheat for at least 10 minutes; this gives the interior of the loaf time to bake evenly once placed inside. If you’re using a convection setting, reduce the temperature by about 25°F (15°C) to avoid over-browning. Keep the oven door closed during the first 20 minutes to maintain consistent heat, then open it briefly for the last 5 minutes to allow the top to set. A properly preheated oven is the foundation for a moist, flavorful pumpkin bread that rises beautifully and has a crisp, caramelized edge. Enjoy the aroma that fills your kitchen as the batter transforms into a comforting, seasonal treat!
If you prefer a crisp top, place the pan on the middle rack and bake for 30 minutes. For a softer crumb, lower the temperature to 325°F (163°C) and bake for 35 minutes. Always use a calibrated oven thermometer to avoid surprises. Let the bread rest in the pan for 10 minutes before transferring to a wire rack; this helps set the structure and prevents cracking.
Remember to check the oven’s heat distribution; some models have hot spots that can cause uneven baking. If your bread browns too quickly on top, tent it loosely with foil. After cooling, slice with a serrated knife to preserve the loaf’s shape and enjoy each bite of this comforting seasonal delight.
Grease Pan
Use an 8‑inch square or a 9‑inch round pan. Begin by melting a tablespoon of unsalted butter or a neutral oil. Spread it evenly over the bottom and up the sides with a pastry brush or paper towel. For extra protection, line the pan with parchment paper, trimming the edges so the paper sits flush with the sides. This prevents sticking and makes cleanup painless. If you prefer a lighter crust, lightly dust the greased surface with flour or a small amount of cornmeal; tap off excess. Some bakers also use a silicone baking mat, which eliminates the need for greasing entirely. Once the pan is ready, set it aside while you mix the batter. A well‑greased pan ensures the bread lifts cleanly and retains its shape when inverted onto a cooling rack. Remember to check that the greasing is uniform; uneven spots can cause the loaf to stick or crack during baking. After the batter is poured, tap the pan gently on the counter to release any air bubbles and level the surface. This step also helps the batter spread evenly, giving the loaf a consistent rise. Finally, place the pan in the preheated oven and bake as directed. Enjoy the aroma of freshly baked pumpkin bread filling your kitchen! After the loaf has baked, allow it to cool in the pan for ten minutes, then carefully lift it onto a wire rack; this step ensures the crumb sets properly and the loaf retains its shape for slicing. Enjoy! Delicious! Now! When the loaf cools, slice it with knife serve with a dollop of whipped cream for touch of the indulgence.
Use an 8‑inch square or a 9‑inch round pan. Begin by melting a tablespoon of unsalted butter or a neutral oil. Spread it evenly over the bottom and up the sides with a pastry brush or paper towel. For extra protection, line the pan with parchment paper, trimming the edges so the paper sits flush with the sides. If you prefer a lighter crust, lightly dust the greased surface with flour or a small amount of cornmeal; tap off excess. Some bakers also use a silicone baking mat, which eliminates the need for greasing entirely. Once the pan is ready, set it aside while you mix the batter. A well‑greased pan ensures the bread lifts cleanly and retains its shape when inverted onto a cooling rack. Remember to check that the greasing is uniform; uneven spots can cause the loaf to stick or crack during baking. After the batter has baked, allow it to cool in the pan for ten minutes, then carefully lift it onto a wire rack; this step ensures the crumb sets properly and the loaf retains its shape for slicing. Enjoy the aroma of freshly baked pumpkin bread filling your kitchen! After the loaf has cooled, slice it with a knife and serve with a dollop of whipped cream for indulgence. Let it rest for few minutes! When the loaf is out of the oven, let it cool on a rack for at least fifteen minutes before slicing. This resting period allows the steam to redistribute, ensuring a moist crumb and preventing the bread from becoming gummy. Serve warm with butter or a drizzle of maple syrup for extra indulgence. Enjoy!!
Mix Dry and Wet
After the wet mixture has been whisked together, it’s time to fold in the dry pumpkin bread blend. Use a large, heat‑proof bowl to avoid splattering. Slowly pour the dry mix into the wet batter in three portions, stirring gently with a rubber spatula or wooden spoon after each addition. The goal is to achieve a uniform, slightly lumpy batter without over‑mixing, which can make the loaf tough. A quick, even fold ensures the leavening agents are distributed properly while preserving the airy texture that characterizes Trader Joe’s pumpkin loaf. Keep the mixing time to under a minute; once the flour is incorporated, the batter should look glossy and free of large flour pockets. If you notice any dry streaks, give the mixture a final gentle stir, but avoid turning the batter into a smooth, stiff dough. At this stage, you can add optional extras such as chopped pecans, chocolate chips, or a pinch of salt to enhance flavor. Gently fold in these add‑ins, ensuring they’re evenly distributed. Finally, pour the batter into the prepared pan, tapping the pan lightly on the counter to release any trapped air bubbles. The batter should fill the pan to the top, creating a level surface that will bake evenly. Let the batter rest for a few minutes before sliding the pan into the preheated oven, allowing the mixture to settle and the leavening to activate fully. Before baking, give the batter a final gentle swirl to ensure the crumb will rise evenly. This small step helps prevent a domed top and promotes a uniform rise. The batter’s consistency should be thick yet pourable, similar to a thick pancake batter. If it appears too thin, add a tablespoon of flour; if too thick, add a splash of milk. Adjusting the moisture at this point guarantees a moist crumb once baked. Once the batter is ready, proceed to the oven for the next stage of the recipe. After the batter has settled, you may lightly dust the top with a sprinkle of cinnamon or a dusting of powdered sugar for a decorative finish. This optional touch not only enhances the visual appeal but also adds a subtle sweet aroma as the bread bakes. Remember to keep the oven door closed during the first 20 minutes to maintain consistent heat, then open it briefly for the final 10 minutes to allow the crust to brown. Once the loaf is done, remove it from the oven and let it cool in the pan for ten minutes before transferring it to a wire rack. This cooling period allows the crumb to set, preventing it from becoming gummy or sticking to the pan. Slice the bread with a serrated knife for clean cuts, and serve warm or at room temperature. Enjoy the comforting flavors of autumn in every bite! Let the aroma of pumpkin and spices fill your home as it bakes. A slice of this loaf pairs wonderfully with a cup of coffee or tea!!!
Cooking Instructions
Bake at 350°F for 45–50 minutes, or until a toothpick comes out clean. Let the loaf cool in the pan for 10 minutes, then transfer to a rack to finish cooling. Slice and serve warm or at room temperature. Keep the oven door closed for 20 minutes, open it for 10 minutes to brown crust.. The loaf stays moist, perfect. Enjoy the aroma of pumpkin and spices !.
Bake Time and Temperature
Set your oven to a steady 350°F (177°C) and allow it to preheat fully before placing the pan inside. Once the batter is poured into a greased 8‑inch square pan, bake for 45 to 50 minutes; A reliable indicator of doneness is a clean toothpick or cake tester inserted into the center; if it comes out with only a few moist crumbs, the loaf is ready. For a golden, slightly crisp top, keep the oven door shut for the first 20 minutes to trap heat, then open it for the final 10 minutes to allow the crust to brown. If you prefer a softer crust, leave the door closed for the entire baking period. After baking, let the bread cool in the pan for 10 minutes, then transfer to a wire rack to finish cooling. The result is a moist, aromatic loaf with a subtle pumpkin flavor and warm spice notes that pairs well with butter or a drizzle of maple syrup. Enjoy!
For a richer flavor, fold in a handful of chopped pecans or walnuts before baking. If you like a sweeter loaf, add an extra tablespoon of brown sugar to the mix. To keep the bread moist for longer, wrap the cooled loaf in parchment paper and store it in an airtight container. When ready to serve, slice and warm the pieces in a toaster or microwave for a few seconds to bring back the warm aroma.
For a gluten‑free version, replace flour with a 1:1 blend of gluten‑free flour and xanthan gum. Substitute half the butter with unsweetened applesauce and cut sugar by one tablespoon. These tweaks keep the loaf tender while meeting needs.Yum!!
Cooling and Serving
Allow the bread to cool completely—about 30 to 45 minutes—before cutting. A fully cooled loaf will hold its shape and offer a tender, moist interior. If you prefer a warm slice, reheat individual pieces in a toaster or microwave for 10 to 15 seconds; this quick warming restores the aromatic spices without drying out the crumb.
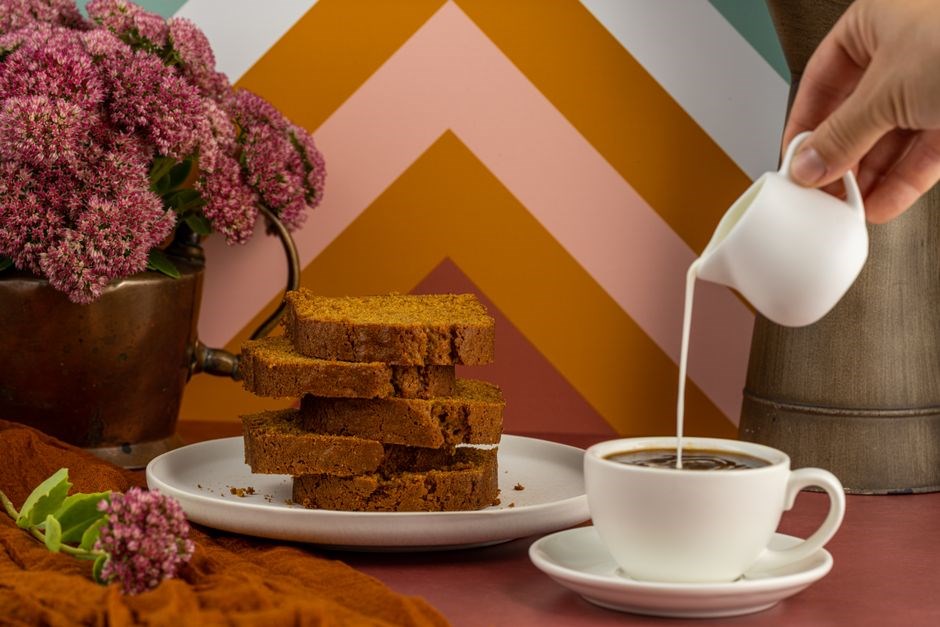
Serve the bread plain or with a light spread of unsalted butter, a drizzle of maple syrup, or a dusting of powdered sugar for added sweetness. For a festive touch, top each slice with a dollop of whipped cream and a sprinkle of cinnamon. The bread also pairs well with a cup of hot coffee or tea, making it an ideal breakfast or afternoon snack. Store any leftovers in an airtight container at room temperature for up to three days, or freeze slices for longer preservation.
For a cozy twist, top each slice with a spoonful of pumpkin spice yogurt or a drizzle of honey, Pair the loaf with a latte or a chai for a breakfast Keep leftovers wrapped tightly to preserve freshness cinnamon and.
Check Doneness
Beyond the toothpick test, a reliable indicator is the loaf’s aroma. A fragrant, slightly sweet scent that permeates the kitchen signals that the batter has reached its peak. The crust should exhibit a deep amber hue, slightly crisp to the touch, yet the interior should remain supple. If the loaf feels too firm or the crumb appears dense, it may need a few more minutes. In contrast, an overly soft loaf with a wet center indicates underbaking. For those who prefer a firmer crumb, a brief extra minute can help. Additionally, a gentle tap on the bottom of the loaf should produce a hollow sound; a dull thud suggests that the interior still contains moisture. Some bakers also use a digital thermometer; a reading between 190°F (88°C) and 200°F (93°C) confirms doneness. Once the loaf has met these criteria, remove it from the oven and let it rest on a wire rack for at least 30 minutes before slicing. This resting period allows steam to escape, ensuring clean cuts and a moist, cohesive crumb that holds together when served.
Add glossy finish. Add pinch of cinnamon for warmth, or sprinkle chopped walnuts on top before baking for crunch today. now. Once the loaf has met criteria, remove it.