Considering a switch? Converting from power to manual windows offers a simpler, potentially more reliable system, appealing to those who prefer classic crank operation.
Many enthusiasts, like those on Reddit’s r/MechanicAdvice, actively choose manual cranks over the complexities of power window repairs and maintenance.
This guide explores the process, benefits, and potential challenges of reverting your vehicle’s windows to a manual setup, drawing from forums and community experiences.
Why Convert?
Reliability and Simplicity are key motivators for converting power windows to manual operation. Frequent power window failures, as highlighted by a Car Talk Community member with a 1993 Toyota Camry, can become costly and frustrating. Manual systems, lacking complex motors and wiring, offer increased dependability.
Cost Savings also play a significant role. Repairing or replacing power window components can be expensive, while manual regulators and cranks are generally more affordable. Some, like a poster on GMT400 forum, even prefer the simplicity and direct control of manual operation.
Furthermore, a preference for a more classic driving experience drives some conversions. Eliminating electronic components can reduce vehicle weight and potentially improve overall system longevity.
Is it Worth the Effort?
Determining “worth” is subjective. While converting offers potential benefits like increased reliability and reduced repair costs, it’s not always straightforward. Reddit’s r/MechanicAdvice suggests simpler fixes – greasing mechanisms and replacing switches – might suffice before a full conversion.
Consider your skill level. The process involves door panel removal, regulator replacement, and potential wiring adjustments. If you’re uncomfortable with automotive repairs, professional installation adds to the cost.
However, for those facing repeated power window failures, or simply preferring manual operation, the long-term benefits can outweigh the initial effort. A successful conversion provides a dependable, cost-effective solution.

Tools and Materials Needed
Essential components include manual window regulators, window cranks, and door panel tools. A drill, screwdrivers, and a socket set are also crucial for a successful conversion.
Manual Window Regulators
Sourcing the correct regulators is paramount. These mechanisms physically raise and lower the window glass, replacing the electric motor and associated components of the power system. Compatibility is key; ensure the regulator is specifically designed for your vehicle’s year, make, and model.
Junkyard finds can be cost-effective, but inspect for rust or damage before purchasing. New regulators offer reliability but come at a higher price point. The GMT400 forum highlights that the regulator and handle assembly often come as a single, removable unit, simplifying the swap in some cases.
Consider the regulator’s build quality and ease of installation when making your selection. A well-constructed regulator will ensure smooth and reliable window operation for years to come.
Window Cranks
Selecting the right window cranks is crucial for both functionality and aesthetics. These cranks directly connect to the manual regulator, providing the user interface for window operation. Options range from basic, utilitarian cranks to more stylish, period-correct designs.
Ensure the crank’s mounting pattern matches the manual regulator you’ve chosen. Some sources suggest that, if desired, you can even drill a hole in the existing power window door panel to accommodate the crank, avoiding panel replacement.
Consider the crank’s handle shape and finish to complement your vehicle’s interior. A comfortable grip and durable construction are also important factors to consider during your selection.
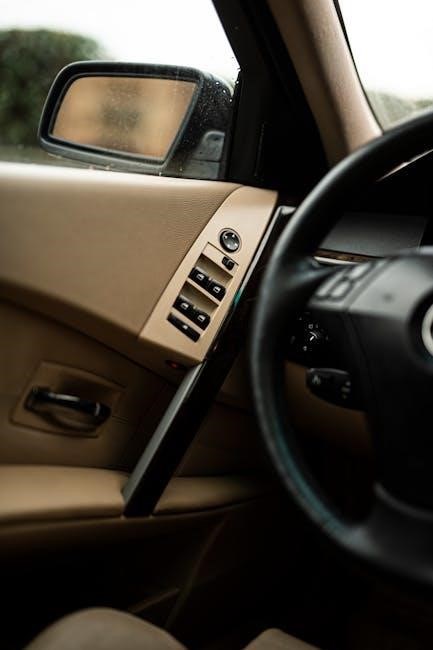
Door Panel Removal Tools
Proper door panel removal is essential to avoid damage during the conversion process. A dedicated door panel removal tool kit is highly recommended, consisting of plastic pry tools designed to gently separate the panel from the door frame without scratching paint or breaking clips.
These tools allow you to carefully release the hidden fasteners and wiring connectors securing the panel. Avoid using metal screwdrivers as they can easily cause cosmetic damage.

Having a variety of tool shapes and sizes within the kit will prove beneficial when navigating different panel designs and fastener locations. Patience and a gentle touch are key!
Drill and Drill Bits
A drill and a selection of drill bits are often necessary, particularly when adapting existing door panels. Some conversions, as noted in GMT400 truck forums, involve drilling a hole for the manual window crank if retaining the original power window door panel.
Ensure you have a drill bit set including sizes appropriate for the crank shaft and any mounting hardware. A step drill bit can create clean, appropriately sized holes in plastic.
Precise drilling is crucial to avoid damaging internal door components. Always use a center punch to mark the drilling location accurately before starting.
Screwdrivers and Socket Set
A comprehensive set of screwdrivers and a socket set are fundamental for this conversion. Removing door panels, the power window regulator, and installing the manual components requires various sizes and types of both.
Phillips head and flathead screwdrivers are essential for accessing interior trim and securing electrical connections. A socket set, including metric and potentially standard sizes, will be needed for bolts holding the regulator and motor in place.
Having both shallow and deep sockets provides access to recessed fasteners. Ensure your tools are in good condition to prevent stripping screws or damaging bolts during disassembly.
Step-by-Step Conversion Process
Begin with disconnection! Carefully disconnect the power window system, remove the door panel, then swap regulators and install cranks—a methodical approach is key.
Disconnecting the Power Window System
Safety first! Before commencing, always disconnect the vehicle’s battery to prevent accidental shorts during the power window system disassembly. Locate and carefully disconnect the wiring harness connected to the faulty power window motor and switch.
Take detailed photos of the wiring configuration for potential future reference, should you decide to revert the process.
Remove the power window switch assembly from the door panel or console, noting the orientation and any securing mechanisms.
Ensure all electrical connections are insulated to avoid any unintended contact. This initial step is crucial for a safe and successful conversion to manual operation.
Removing the Door Panel
Access is key! Begin by carefully removing the door panel, utilizing appropriate door panel removal tools to avoid damaging the clips or the panel itself. Start by locating and removing any screws hidden behind armrests, door handles, or speaker grilles.
Gently pry the panel away from the door frame, working around the edges to release the retaining clips.
Be mindful of any wiring harnesses connected to the door panel, such as those for speakers or courtesy lights, and disconnect them carefully.
Once free, lift the door panel upwards to disengage it from the window sill, providing access to the window regulator mechanism.
Removing the Power Window Regulator
Disconnect and detach! With the door panel removed, locate the power window regulator assembly. Disconnect the electrical connector supplying power to the regulator motor. Then, carefully remove any bolts or fasteners securing the regulator to the door frame.
Support the window glass while loosening the final fasteners, as it will no longer be supported by the regulator.
Gently maneuver the power window regulator out of the door, noting its orientation for reinstallation of the manual regulator.
As noted in GMT400 forums, the removable curtain containing the regulator is a relatively simple swap.
Installing the Manual Window Regulator
Time for the swap! Carefully position the new manual window regulator into the door frame, ensuring it aligns with the mounting points. Secure it using the fasteners removed from the power regulator, tightening them to the manufacturer’s specifications.
Manually guide the window glass into the regulator tracks, ensuring smooth movement.
If necessary, temporarily support the glass to verify proper alignment before fully securing the regulator.
Remember the GMT400 forum suggestion: if aesthetics aren’t a concern, you might even drill a hole in the existing power door panel for the crank!
Installing the Window Crank

Bring back the classic feel! Once the manual regulator is securely in place, it’s time to install the window crank. Align the crank shaft with the corresponding opening in the door panel.
Gently push the crank onto the shaft, ensuring a snug fit.
Some cranks may require a small retaining clip or screw – don’t forget to install it!
Test the crank’s operation, verifying smooth up-and-down movement of the window glass.
Ensure the crank doesn’t bind or feel loose. A properly installed crank provides reliable control, offering a satisfying tactile experience.

Addressing Potential Issues
Expect the unexpected! Conversion may reveal leftover wiring or necessitate minor door panel adjustments for a clean fit, requiring careful problem-solving skills.
Wiring Leftovers
Dealing with disconnected wires is crucial. After removing the power window system, you’ll inevitably have unused wiring harnesses within the door. These wires, while no longer powering the windows, can present a potential hazard if left exposed or shorted.
Properly insulating these wires with electrical tape or heat-shrink tubing is essential for safety. Consider neatly bundling and tucking them away to prevent interference with the manual regulator’s operation. Some installers choose to completely remove the unused wiring, but this requires careful tracing to ensure no other systems are affected. Prioritize a clean and safe installation to avoid future electrical issues.
Door Panel Modifications
Adapting the door panel is often necessary. Since manual window setups require a crank, you’ll need to create an opening in your existing door panel. The complexity of this modification varies significantly depending on your vehicle and panel design.
Some, like those on the GMT400 forum, suggest simply drilling a hole for the crank, prioritizing functionality over aesthetics. Others may opt for a more refined approach, carefully cutting and finishing the opening for a cleaner look. Pre-existing holes from junkyard doors, if available, can simplify this process considerably. Careful planning and execution are key to a professional result.
Finding Matching Parts
Sourcing compatible components is crucial. Locating manual window regulators and cranks that fit your specific vehicle model can be challenging, but junkyards are excellent resources. Ensuring compatibility is paramount; regulators must align with your door’s dimensions and mounting points.
For vehicles like the 1993 Toyota Camry, finding parts may require diligent searching. Consider online marketplaces and automotive forums for leads. Pay attention to year-to-year variations, as even slight differences can cause fitment issues. Prioritize obtaining complete assemblies, including the crank handle and any necessary hardware, to streamline the installation process.

Vehicle-Specific Considerations
Unique challenges exist for different models. GM GMT400 trucks simplify the swap with removable curtain assemblies, while Camrys require more focused part sourcing and installation.
GM Trucks (GMT400) Conversion
GMT400 trucks (1988-1998) present a relatively straightforward conversion process. The key lies in the removable curtain assembly that houses both the power window regulator and handle. This assembly is directly swappable with its manual counterpart, significantly simplifying the process.
Forum discussions on GMT400 forums highlight this ease of exchange. If aesthetics aren’t a primary concern, some users even suggest drilling a hole directly into the existing power door panel to accommodate the manual window crank, bypassing the need for a complete panel swap.
However, ensure compatibility when sourcing the manual regulator and crank, verifying they fit your specific GMT400 model year and cab configuration.
Toyota Camry (1993) Conversion
For the 1993 Toyota Camry, converting power windows to manual is a viable solution, particularly given the frequent failure of the original power window motors. Owners facing multiple motor replacements often consider this conversion as a cost-effective, long-term fix.
Discussions on Car Talk Community forums suggest the project is manageable for those comfortable with automotive DIY. Sourcing compatible manual window regulators and cranks is crucial, requiring careful research to ensure proper fitment.
Expect some degree of modification or adaptation during installation, as direct bolt-in replacements aren’t always readily available for this model year.
Sedan Door Panel Considerations
Sedan door panels present unique challenges during power-to-manual window conversion. Often, junkyard doors with intact manual setups are the easiest route, as noted in Reddit discussions, avoiding extensive modification. However, finding matching panels can be difficult.
If retaining the existing door panel, a hole must be carefully cut to accommodate the manual window crank. Precision is key to a clean, functional installation.
Consider the interior aesthetics; a poorly placed or sized hole can detract from the vehicle’s appearance. Careful planning and measurement are essential for a professional finish;
Cost Analysis
Budgeting for the switch? Manual regulator and crank costs vary, but generally remain affordable. Labor expenses depend on DIY versus professional installation choices.
Cost of Manual Regulators
Estimating regulator expenses: The price of manual window regulators fluctuates based on vehicle make, model, and supplier. Generally, you can anticipate spending between $30 and $80 per regulator.
Used regulators sourced from junkyards are a more economical option, often available for $20-$40 each, but condition is a significant factor. New regulators offer reliability but come at a higher cost.
Online retailers like RockAuto and eBay provide a wide range of options and price points. Consider purchasing regulators as a set for all doors to ensure consistency and potentially secure bulk discounts.
Remember to factor in shipping costs when comparing prices from different vendors.
Cost of Window Cranks
Budgeting for cranks: Window cranks are typically the least expensive component of a power-to-manual conversion. Expect to pay between $10 and $30 per crank, depending on the style and finish.
Basic, functional cranks can be found for around $10-$15, while chrome or aesthetically enhanced cranks may cost closer to $30. Sourcing from junkyards can yield even lower prices, potentially under $10 per crank, but availability varies.
Online marketplaces offer a diverse selection, allowing comparison shopping; Ensure the cranks are compatible with your vehicle’s interior and regulator design. Purchasing a set of four ensures a uniform look across all doors.
Potential Labor Costs
Professional installation: If you’re not comfortable with DIY auto repair, professional labor will add to the conversion cost. Labor rates vary significantly by location and shop expertise, generally ranging from $75 to $150 per hour.
The conversion itself isn’t exceptionally complex, but door panel removal, regulator replacement, and potential wiring adjustments require skill. Expect 2-4 hours of labor per door, translating to $150-$600 per door, or $600-$2400 for all four.
Some shops may offer a flat rate for the entire conversion. Carefully weigh the cost of labor against your own time and mechanical abilities.
Safety Precautions
Prioritize safety! Always disconnect the vehicle battery before starting. Handle glass with extreme care to avoid injury, and use appropriate tools correctly for a secure process.
Disconnecting the Battery
Crucially, begin by disconnecting the vehicle’s battery. This prevents accidental electrical shorts during the conversion process, safeguarding both you and the vehicle’s electrical system. Locate the negative terminal – typically black – and carefully loosen the nut securing the cable.
Remove the cable from the terminal, ensuring it doesn’t accidentally reconnect. For added safety, you can also disconnect the positive (red) terminal. Secure the disconnected cables to prevent them from touching the terminals. This simple step is paramount, eliminating power flow to the power window system and minimizing risks during disassembly and installation of the manual components.
Handling Glass Carefully
Window glass presents a significant safety hazard. Always exercise extreme caution when working around it, as broken glass can cause severe injuries. Support the window fully during removal from the power regulator; avoid letting it drop freely.
Consider having a second person assist in supporting the glass panel. Wear gloves to improve grip and protect your hands from potential cuts. If the glass is removed completely, lay it on a soft, padded surface to prevent scratches or breakage. Inspect the glass for any existing cracks or damage before proceeding, and address them appropriately.
Proper Tool Usage
Selecting the right tools is crucial for a safe and efficient conversion. Utilize door panel removal tools to avoid damaging interior trim pieces. A quality drill and appropriately sized drill bits are essential for creating mounting points for the manual crank, if needed.
Ensure screwdrivers and socket sets fit fasteners precisely to prevent stripping. When disconnecting electrical components, use insulated tools. Always follow manufacturer’s instructions for each tool. Prioritize safety glasses to protect your eyes from debris. Avoid forcing tools, as this can lead to damage or injury.

Long-Term Maintenance
Keep things smooth! Regular lubrication of the manual window mechanism and consistent checks of crank operation ensure lasting functionality and prevent future issues.
Inspect the regulator for wear, guaranteeing continued smooth window movement and a reliable manual system.
Lubricating the Manual Mechanism
Maintaining smooth operation is key after converting to manual windows. Regularly lubricating the window tracks and regulator mechanism prevents binding and ensures effortless window movement. A silicone-based lubricant is highly recommended, as it won’t attract dust and grime like petroleum-based products.
Apply the lubricant sparingly to all moving parts – the window tracks, the regulator’s gears, and the window crank itself. Work the window up and down several times to distribute the lubricant evenly. This proactive maintenance will significantly extend the lifespan of your manual window system and prevent frustrating sticking or difficult operation. Consistent lubrication is a small effort with a substantial reward!
Checking Crank Operation
Regularly assess the feel of your window cranks to identify potential issues early on. A smooth, consistent rotation indicates a healthy system. Any resistance, grinding noises, or looseness should be investigated immediately. Ensure the crank securely engages the regulator and doesn’t slip during operation.
If you notice any abnormalities, re-lubricate the mechanism thoroughly. If the problem persists, inspect the regulator for wear or damage. A properly functioning crank should raise and lower the window with minimal effort, providing a satisfying and reliable manual control experience. Consistent checks prevent minor issues from escalating into major repairs.
Inspecting Regulator Function
Periodically examine the manual window regulator for signs of wear, corrosion, or damage. Pay close attention to the cables, pulleys, and pivot points. Ensure all components move freely without binding or excessive play. Look for any frayed cables or cracked plastic parts, as these can lead to failure.
A well-maintained regulator is crucial for smooth window operation. Lubricate all moving parts regularly to reduce friction and prevent wear; If you discover any damaged components, replace them promptly to avoid further complications. Proper inspection and maintenance extend the regulator’s lifespan and ensure reliable manual window control.