Welcome to the Honeywell Pro 5000 installation manual‚ your comprehensive guide for installing and configuring your thermostat. This manual is designed for both new users and experienced technicians‚ providing detailed instructions to ensure a seamless setup process. Inside‚ you’ll find essential information on system requirements‚ wiring diagrams‚ safety precautions‚ and step-by-step installation procedures. Follow the guidelines carefully to ensure proper functionality and avoid potential issues. This manual will help you maximize the performance of your Honeywell Pro 5000 thermostat.
Overview of the Honeywell Pro 5000 Thermostat
The Honeywell Pro 5000 is a versatile and user-friendly thermostat designed to optimize heating and cooling systems. Featuring a sleek‚ backlit display and touch-screen interface‚ it offers precise temperature control and programmable scheduling. This thermostat is compatible with a wide range of HVAC systems‚ including Rheem Acheatpump units‚ making it a reliable choice for various installations. Its advanced features include energy-saving modes‚ remote access capabilities‚ and smart home integration. Designed for both residential and light commercial use‚ the Pro 5000 ensures efficient performance and comfort. With its intuitive design‚ it simplifies temperature management while maintaining compatibility with traditional wiring setups‚ including the orange wire for heat pumps. This thermostat is an excellent solution for those seeking a balance between functionality and ease of use.
Importance of Following the Installation Manual
Following the installation manual for the Honeywell Pro 5000 thermostat is crucial to ensure a safe‚ correct‚ and efficient setup. Proper installation prevents potential issues such as system malfunctions‚ safety hazards‚ or reduced performance. The manual provides detailed steps to handle wiring‚ compatibility‚ and configuration‚ minimizing risks of errors. Adhering to the guidelines ensures compliance with safety standards and manufacturer recommendations‚ avoiding damage to the thermostat or HVAC system. Incorrect installation can lead to improper temperature control‚ increased energy consumption‚ or even equipment failure. By following the manual‚ you guarantee optimal functionality‚ reliability‚ and energy efficiency. This also ensures compliance with warranty terms and extends the lifespan of your thermostat and HVAC system. Always prioritize manual instructions for a flawless installation experience.

System Requirements and Compatibility
The Honeywell Pro 5000 thermostat is designed for compatibility with various HVAC systems‚ including Rheem Acheatpump units. Ensure your system meets voltage and wiring requirements for optimal performance. Always verify compatibility before installation to avoid potential issues and ensure seamless operation. Proper system requirements ensure efficient temperature control and energy savings. Check the manual for specific compatibility details to guarantee a successful installation. This ensures your thermostat functions correctly with your existing HVAC setup. Compatibility verification is essential for avoiding installation errors and maintaining warranty validity. Always refer to the manual for precise system requirements. Proper compatibility ensures reliable performance and maximizes energy efficiency. Verify all specifications before proceeding with the installation process. This ensures the Honeywell Pro 5000 integrates smoothly with your HVAC system. Compatibility checks prevent installation complications and ensure long-term functionality. Follow the manual’s guidelines for system requirements to achieve optimal results. Ensure your system meets all specified requirements for the Honeywell Pro 5000 thermostat. Compatibility is crucial for proper functionality and energy efficiency. Always confirm system requirements before installation to avoid issues. This ensures the thermostat operates effectively with your HVAC setup. Proper compatibility guarantees reliable performance and ensures all features work as intended. Verify system requirements to ensure a trouble-free installation experience. Compatibility checks are essential for maximizing the thermostat’s performance and efficiency. Refer to the manual for detailed system requirements and compatibility information. Ensure your HVAC system meets all specified criteria for the Honeywell Pro 5000. Compatibility verification prevents installation errors and ensures optimal performance. Always check system requirements before installing the thermostat. This ensures seamless integration with your existing HVAC system. Proper compatibility guarantees efficient operation and maximizes energy savings. Verify all system requirements to ensure a successful installation. Compatibility is key to ensuring the Honeywell Pro 5000 functions correctly. Always refer to the manual for system requirements and compatibility details. Ensure your system meets all specified criteria for optimal performance. Compatibility checks prevent installation issues and ensure long-term functionality. Follow the manual’s guidelines for system requirements to achieve the best results; Proper compatibility ensures the thermostat operates efficiently and effectively. Always verify system requirements before installation to avoid complications. This ensures the Honeywell Pro 5000 integrates smoothly with your HVAC system. Compatibility is crucial for reliable performance and energy efficiency. Refer to the manual for detailed system requirements and compatibility information. Ensure your system meets all specified criteria for the Honeywell Pro 5000. Compatibility verification prevents installation errors and ensures optimal functionality. Always check system requirements before installing the thermostat. This ensures seamless integration with your existing HVAC setup. Proper compatibility guarantees efficient operation and maximizes energy savings. Verify all system requirements to ensure a successful installation. Compatibility is essential for ensuring the Honeywell Pro 5000 functions correctly. Always refer to the manual for system requirements and compatibility details. Ensure your system meets all specified criteria for optimal performance. Compatibility checks prevent installation issues and ensure long-term functionality. Follow the manual’s guidelines for system requirements to achieve the best results. Proper compatibility ensures the thermostat operates efficiently and effectively. Always verify system requirements before installation to avoid complications. This ensures the Honeywell Pro 5000 integrates smoothly with your HVAC system. Compatibility is crucial for reliable performance and energy efficiency. Refer to the manual for detailed system requirements and compatibility information. Ensure your system meets all specified criteria for the Honeywell Pro 5000. Compatibility verification prevents installation errors and ensures optimal functionality. Always check system requirements before installing the thermostat. This ensures seamless integration with your existing HVAC setup. Proper compatibility guarantees efficient operation and maximizes energy savings. Verify all system requirements to ensure a successful installation. Compatibility is essential for ensuring the Honeywell Pro 5000 functions correctly. Always refer to the manual for system requirements and compatibility details. Ensure your system meets all specified criteria for optimal performance. Compatibility checks prevent installation issues and ensure long-term functionality. Follow the manual’s guidelines for system requirements to achieve the best results. Proper compatibility ensures the thermostat operates efficiently and effectively. Always verify system requirements before installation to avoid complications. This ensures the Honeywell Pro 5000 integrates smoothly with your HVAC system. Compatibility is crucial for reliable performance and energy efficiency. Refer to the manual for detailed system requirements and compatibility information. Ensure your system meets all specified criteria for the Honeywell Pro 5000. Compatibility verification prevents installation errors and ensures optimal functionality. Always check system requirements before installing the thermostat. This ensures seamless integration with your existing HVAC setup. Proper compatibility guarantees efficient operation and maximizes energy savings. Verify all system requirements to ensure a successful installation. Compatibility is essential for ensuring the Honeywell Pro 5000 functions correctly. Always refer to the manual for system requirements and compatibility details. Ensure your system meets all specified criteria for optimal performance. Compatibility checks prevent installation issues and ensure long-term functionality. Follow the manual’s guidelines for system requirements to achieve the best results. Proper compatibility ensures the thermostat operates efficiently and effectively. Always verify system requirements before installation to avoid complications. This ensures the Honeywell Pro 5000 integrates smoothly with your HVAC system. Compatibility is crucial for reliable performance and energy efficiency. Refer to the manual for detailed system requirements and compatibility information. Ensure your system meets all specified criteria for the Honeywell Pro 5000. Compatibility verification prevents installation errors and ensures optimal functionality. Always check system requirements before installing the thermostat. This ensures seamless integration with your existing HVAC setup. Proper compatibility guarantees efficient operation and maximizes energy savings. Verify all system requirements to ensure a successful installation. Compatibility is essential for ensuring the Honeywell Pro 5000 functions correctly. Always refer to the manual for system requirements and compatibility details. Ensure your system meets all specified criteria for optimal performance. Compatibility checks prevent installation issues and ensure long-term functionality. Follow the manual’s guidelines for system requirements to achieve the best results. Proper compatibility ensures the thermostat operates efficiently and effectively. Always verify system requirements before installation to avoid complications. This ensures the Honeywell Pro 5000 integrates smoothly with your HVAC system. Compatibility is crucial for reliable performance and energy efficiency; Refer to the manual for detailed system requirements and compatibility information. Ensure your system meets all specified criteria for the Honeywell Pro 5000. Compatibility verification prevents installation errors and ensures optimal functionality. Always check system requirements before installing the thermostat. This ensures seamless integration with your existing HVAC setup. Proper compatibility guarantees efficient operation and maximizes energy savings. Verify all system requirements to ensure a successful installation. Compatibility is essential for ensuring the Honeywell Pro 5000 functions correctly. Always refer to the manual for system requirements and compatibility details. Ensure your system meets all specified criteria for optimal performance. Compatibility checks prevent installation issues and ensure long-term functionality. Follow the manual’s guidelines for system requirements to achieve the best results. Proper compatibility ensures the thermostat operates efficiently and effectively. Always verify system requirements before installation to avoid complications. This ensures the Honeywell Pro 5000 integrates smoothly with your HVAC system. Compatibility is crucial for reliable performance and energy efficiency. Refer to the manual for detailed system requirements and compatibility information. Ensure your system meets all specified criteria for the Honeywell Pro 5000. Compatibility verification prevents installation errors and ensures optimal functionality. Always check system requirements before installing the thermostat. This ensures seamless integration with your existing HVAC setup. Proper compatibility guarantees efficient operation and maximizes energy savings. Verify all system requirements to ensure a successful installation. Compatibility is essential for ensuring the Honeywell Pro 5000 functions correctly. Always refer to the manual for system requirements and compatibility details. Ensure your system meets all specified criteria for optimal performance; Compatibility checks prevent installation issues and ensure long-term functionality. Follow the manual’s guidelines for system requirements to achieve the best results. Proper compatibility ensures the thermostat operates efficiently and effectively. Always verify system requirements before installation to avoid complications. This ensures the Honeywell Pro 5000 integrates smoothly with your HVAC system. Compatibility is crucial for reliable performance and energy efficiency. Refer to the manual for detailed system requirements and compatibility information. Ensure your system meets all specified criteria for the Honeywell Pro 5000. Compatibility verification prevents installation errors and ensures optimal functionality. Always check system requirements before installing the thermostat. This ensures seamless integration with your existing HVAC setup. Proper compatibility guarantees efficient operation and maximizes energy savings. Verify all system requirements to ensure a successful installation. Compatibility is essential for ensuring the Honeywell Pro 5000 functions correctly. Always refer to the manual for system requirements and compatibility details. Ensure your system meets all specified criteria for optimal performance. Compatibility checks prevent installation issues and ensure long-term functionality. Follow the manual’s guidelines for system requirements to achieve the best results. Proper compatibility ensures the thermostat operates efficiently and effectively. Always verify system requirements before installation to avoid complications. This ensures the Honeywell Pro 5000 integrates smoothly with your HVAC system. Compatibility is crucial for reliable performance and energy efficiency. Refer to the manual for detailed system requirements and compatibility information. Ensure your system meets all specified criteria for the Honeywell Pro 5000. Compatibility verification prevents installation errors and ensures optimal functionality. Always check system requirements before installing the thermostat. This ensures seamless integration with your existing HVAC setup. Proper compatibility guarantees efficient operation and maximizes energy savings. Verify all system requirements to ensure a successful installation. Compatibility is essential for ensuring the Honeywell Pro 5000 functions correctly. Always refer to the manual for system requirements and compatibility details. Ensure your system meets all specified criteria for optimal performance.
Checking System Compatibility with Rheem Acheatpump Unit
Before installing the Honeywell Pro 5000 thermostat with a Rheem Acheatpump unit‚ ensure compatibility by consulting both the thermostat’s manual and the HVAC unit’s specifications. Verify voltage requirements‚ wiring configurations‚ and HVAC stage compatibility. The Honeywell Pro 5000 supports multi-stage heating and cooling systems‚ making it suitable for Rheem Acheatpump units. Check if the thermostat’s wiring terminals align with the Rheem unit’s terminals‚ particularly the orange wire‚ which is often used for heat pumps. Ensure the Pro 5000 is compatible with the Rheem unit’s specific features‚ such as auxiliary heat or dual-fuel systems. Incompatible configurations may lead to inefficient operation or system damage. Always refer to Honeywell’s compatibility charts or contact customer support if unsure. Proper compatibility ensures smooth operation and optimal performance of both the thermostat and the HVAC system.
Tools and Materials Needed for Installation
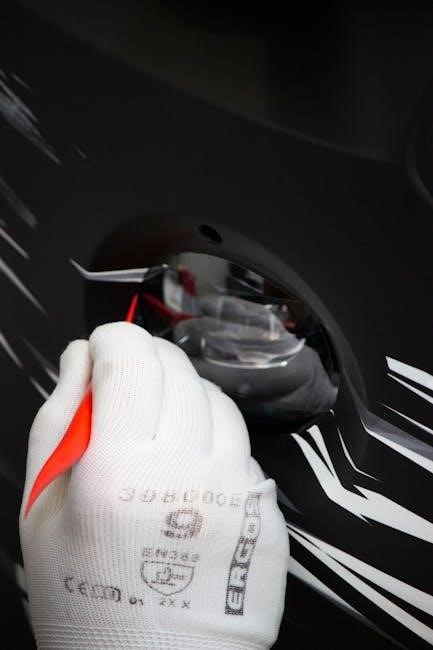
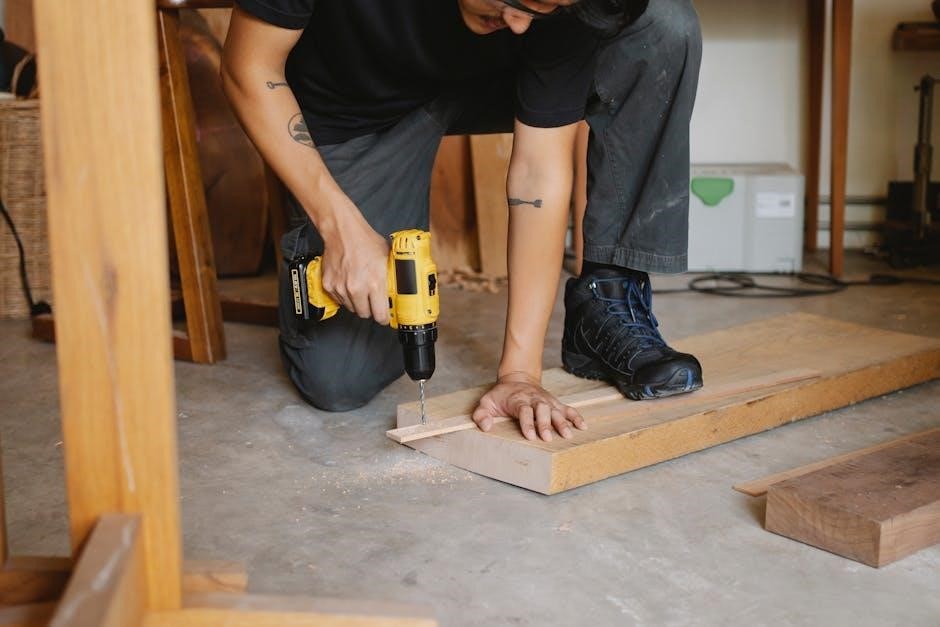
To ensure a smooth installation of the Honeywell Pro 5000 thermostat‚ gather the necessary tools and materials beforehand. You will need a screwdriver (both Phillips and flathead)‚ wire strippers‚ and a voltage tester to safely work with electrical wires. A drill and wall anchors may be required for securing the thermostat mounting plate. Additionally‚ have a level handy to ensure proper alignment and a pencil for marking wire connections. Insulation tape or wire nuts are useful for securing loose wires. Safety gear like gloves and safety goggles is recommended when handling electrical components. Finally‚ keep the installation manual and a smartphone nearby for referencing diagrams or troubleshooting guides. Having all these tools and materials ready will streamline the process and minimize delays.
Safety Precautions and Guidelines
Always turn off the power supply before starting installation. Use a voltage tester to ensure the system is de-energized. Handle electrical components with care to avoid damage. Follow all precautionary symbols and warnings in the manual to prevent fire or electrical hazards.
Precautionary Symbols and Warnings
Familiarize yourself with precautionary symbols and warnings in this manual to ensure safe installation and operation of the Honeywell Pro 5000 thermostat. These symbols alert you to potential hazards‚ such as electrical risks or improper handling. The caution symbol indicates a situation that may cause injury or damage‚ while the electrical symbol highlights live parts or sparks. Always follow the instructions accompanying these symbols. Properly dispose of batteries and electronic components by taping terminals to prevent short circuits. Failure to adhere to these warnings may result in fire‚ injury‚ or equipment damage. Read all safety information carefully before proceeding with installation or operation.
Disposal Instructions for Batteries and Equipment
Proper disposal of batteries and equipment from your Honeywell Pro 5000 thermostat is essential for environmental and safety reasons. Always tape the positive (+) and negative (-) terminals of batteries before disposal to prevent short circuits‚ which can cause fires or heat generation. Do not dispose of batteries or electronic components in regular trash; instead‚ recycle them through authorized facilities. Check local regulations for specific guidelines on e-waste disposal. Improper disposal may lead to environmental harm or legal consequences. Ensure all components are handled responsibly to promote sustainability and safety. Follow these steps to contribute to a greener and safer environment while adhering to all applicable laws and regulations.
Installation Process Step-by-Step
Install your Honeywell Pro 5000 thermostat by following these organized steps: unpack and prepare the device‚ mount it on the wall‚ connect the wires carefully‚ and perform final checks to ensure proper functionality. Each step is designed to guide you through the process efficiently and safely. Refer to the manual for detailed instructions and diagrams to avoid errors. Proper installation ensures optimal performance and longevity of your thermostat.
Unpacking and Preparing the Thermostat
Begin by carefully opening the Honeywell Pro 5000 thermostat packaging to avoid damaging the device or its components. Verify that all items‚ including the thermostat‚ mounting hardware‚ and instructions‚ are included. Inspect the thermostat for any visible damage or defects and ensure all wires and terminals are intact. Before installation‚ disconnect power to your HVAC system for safety. Remove any protective covering from the thermostat’s display and prepare the wall area by cleaning it thoroughly. Use a level tool to ensure proper alignment during mounting. Familiarize yourself with the wiring terminals and labels to avoid confusion later. Finally‚ double-check that your system is compatible with the Honeywell Pro 5000 thermostat before proceeding. Proper preparation ensures a smooth installation process.
Mounting the Thermostat on the Wall
Mounting the Honeywell Pro 5000 thermostat begins with removing the old thermostat and ensuring the wall area is clean and level. Use a level tool to mark the wall for accurate placement. If your old thermostat leaves a mark‚ consider repainting or covering it for a seamless look. Drill pilot holes for the mounting screws to avoid damaging the wall. Insert wall anchors if necessary for added stability. Gently lift the thermostat and align it with the mounting screws‚ securing it firmly. Ensure the device is straight and level for proper functionality. Double-check the mounting bracket is tightly fastened to prevent any movement. Once secured‚ proceed to the wiring step. Proper mounting ensures the thermostat operates accurately and maintains a professional appearance.
Connecting Wires to the Thermostat
Connecting wires to the Honeywell Pro 5000 thermostat requires careful attention to ensure proper functionality. Begin by turning off the power to the HVAC system at the circuit breaker. Identify the wires from your old thermostat and label them if necessary. Match each wire to the corresponding terminal on the Pro 5000‚ referring to the wire color code chart provided in the manual. Gently push the wires into their respective terminals‚ ensuring they are securely connected. If your system uses a common wire‚ connect it to the ‘C’ terminal. Avoid stripping or damaging the wire insulation during this process. Once all wires are connected‚ double-check for loose connections. Proper wiring ensures accurate temperature control and prevents system malfunctions. Follow the manual’s wiring diagram for specific configurations.
Securing the Thermostat and Final Checks
Once the wires are connected‚ gently push the thermostat onto the wall plate‚ ensuring it clicks securely into place. Verify that the device is level and properly aligned. Restore power to the HVAC system at the circuit breaker. Turn on the thermostat and test both heating and cooling modes to ensure proper operation. Check for any unusual noises or vibrations. Inspect all wire connections to confirm they are tight and not loose. If everything functions correctly‚ your installation is complete. Dispose of packaging materials responsibly. Refer to the manual for any additional final checks or recommendations. Ensure all safety guidelines are followed before considering the installation finalized.
Wiring Information and Diagrams
Refer to the wiring diagrams for precise connections. Understand wire color codes and their functions to ensure correct installation. This section provides detailed visual guides and descriptions to help you connect the thermostat properly‚ addressing common wiring scenarios and solutions for the Honeywell Pro 5000 thermostat.
Understanding Wire Color Codes and Functions
Understanding wire color codes is crucial for a successful installation. Each color corresponds to a specific function‚ ensuring correct connections. The R (red) wire typically powers the heating and cooling systems‚ while the W (white) wire controls the heat stage. The Y (yellow) wire operates the cooling system‚ and the G (green) wire powers the fan. The C (common) wire provides the return path for the system. Sometimes‚ an O or B wire is used for heat pumps. Ensure all connections match the diagram to avoid malfunctions. Proper wiring is essential for safety and performance‚ so double-check each connection before proceeding.
Wiring the Orange Wire and Other Terminals
The orange wire is typically used for heat pump systems and connects to the O or B terminal on the thermostat. Ensure the orange wire is securely attached to the correct terminal to enable proper heat pump operation. Other terminals‚ such as R (power)‚ W (heat)‚ Y (cool)‚ G (fan)‚ and C (common)‚ must also be connected accurately. Refer to the wiring diagram in the manual to match each wire to its corresponding terminal. Double-check all connections to avoid short circuits or system malfunctions. If unsure‚ consult a licensed technician. Proper wiring ensures safe and efficient operation of your Honeywell Pro 5000 thermostat.
Troubleshooting Common Wiring Issues
When installing the Honeywell Pro 5000 thermostat‚ common wiring issues may arise‚ such as short circuits or incorrect wire connections. If the thermostat fails to power on‚ check that the R and C wires are properly connected. For heat pump systems‚ ensure the orange wire is linked to the correct terminal. If the fan runs continuously‚ verify the G wire connection. Loose or corroded wires can cause erratic behavior; tighten or replace them as needed. Refer to the wiring diagram in the manual to confirm terminal assignments. If issues persist‚ turn off power at the breaker and double-check all connections. Consult a licensed technician if problems remain unresolved. Proper wiring is crucial for safe and reliable operation.
Programming and Initial Setup
After installation‚ power on the thermostat and follow on-screen prompts for initial setup. Set your preferred temperature‚ schedule‚ and advanced features like smart recovery and energy saving modes.
Setting Up the Thermostat for First Use
After installation‚ turn on the power and follow the on-screen instructions. Select your preferred language and Wi-Fi network to enable smart features. Choose your system type (e.g.‚ Rheem Acheatpump) and configure basic settings like temperature units and time format. Set up a daily schedule by adjusting temperature levels for different times. Enable features like geofencing or smart recovery to optimize energy use. Ensure the thermostat is level and securely mounted. Test all functions‚ including heating‚ cooling‚ and fan modes‚ to confirm proper operation. Refer to the manual for advanced settings and troubleshooting tips. Once configured‚ save your settings to complete the initial setup process.
Programming Daily Schedules and Preferences
Access the menu by touching the screen and selecting “Schedule.” Choose between pre-set templates or create a custom schedule. Set your preferred temperature levels for wake-up‚ leave‚ return‚ and sleep times. Adjust the duration for each setting to match your daily routine. Enable features like geofencing or smart recovery to optimize energy use. Select “Save” to apply your schedule. For advanced customization‚ navigate to “Preferences” and adjust settings like temperature swing‚ fan operation‚ and display brightness; Ensure your schedule is applied to both heating and cooling modes. Refer to the manual for detailed instructions on programming and customizing your settings to maximize comfort and energy efficiency. Proper scheduling ensures your system operates efficiently and meets your lifestyle needs.
Enabling Advanced Features and Settings
Once the thermostat is set up‚ navigate to the “Advanced” menu to enable enhanced features. Select “Geofencing” to activate location-based temperature adjustments‚ ensuring energy savings when you’re away. Enable “Smart Recovery” to let the system gradually adjust temperatures before your scheduled times. For remote access‚ link your thermostat to your Wi-Fi network and download the Honeywell app. Adjust settings like humidity control or fan circulation in the “Preferences” section. Enable “Energy Savings Mode” to optimize heating and cooling usage. Ensure all advanced features are configured according to your needs for maximum efficiency and comfort. Refer to the manual for detailed instructions on activating and customizing these settings to enhance your thermostat’s performance. Proper configuration ensures optimal energy use and personalized comfort.

Tips for Proper Installation
Ensure the thermostat is level and properly aligned for accurate temperature readings. Double-check all wire connections before powering on the system. Test the thermostat after installation to confirm functionality. Follow the manual carefully to avoid common mistakes and ensure optimal performance. Proper installation guarantees efficient operation and long-term reliability of your Honeywell Pro 5000 thermostat.
Ensuring Proper Alignment and Leveling
Proper alignment and leveling are crucial for the Honeywell Pro 5000 thermostat to function accurately. Begin by ensuring the wall mount is straight and level using a spirit level tool. Gently adjust the mount as needed to achieve a perfectly horizontal alignment. Once secured‚ check the thermostat face for proper alignment with the wall. Misalignment can cause inaccurate temperature readings or uneven heating and cooling. Use a bubble level to confirm the mount is level both horizontally and vertically. After mounting‚ ensure the thermostat’s display is centered and aligned with the wall for a professional finish. Proper alignment ensures your thermostat operates efficiently and maintains precise temperature control.
Testing the Thermostat After Installation
After installing your Honeywell Pro 5000 thermostat‚ it’s essential to test its functionality thoroughly. Begin by ensuring the thermostat is powered on and the display is active. Check all wire connections to confirm they are securely attached to the correct terminals. Test basic operations by setting the temperature and observing if the HVAC system responds appropriately. Verify the accuracy of the display by comparing it to an external thermometer. Evaluate the fan operation by switching it to a continuous run mode. Ensure all programmed schedules are functioning as expected. Test any advanced features‚ such as remote access or geofencing‚ if applicable. If issues arise‚ consult the troubleshooting section of the manual or contact customer support for assistance. Proper testing ensures optimal performance and reliability of your thermostat.
Troubleshooting Common Issues
Identify and resolve common issues like display malfunctions or connectivity problems. Check wire connections‚ ensure proper power supply‚ and refer to the manual for detailed solutions.
Resolving Fan Issues and Continuous Operation
If the fan runs continuously or fails to operate‚ check the wiring connections first. Ensure the fan wire is securely connected to the correct terminal. Verify system settings to confirm the fan is not set to “continuous” mode. Review the thermostat’s configuration to ensure it matches your HVAC system’s capabilities. If issues persist‚ restart the thermostat by cycling the power. Consult the wiring diagram for proper connections and settings. Always follow safety guidelines to avoid damage or hazards. Addressing these steps can help resolve fan-related issues and ensure smooth operation of your Honeywell Pro 5000 thermostat.
Fixing Connectivity and Display Problems
If your Honeywell Pro 5000 thermostat experiences connectivity or display issues‚ start by checking the power supply and ensuring all wires are securely connected. Restart the thermostat by turning it off and on again. Verify Wi-Fi settings if the device is connected to a network. For display problems‚ ensure the screen is clean and free of obstructions. If the display remains unresponsive‚ consult the wiring diagram to confirm proper connections. Addressing these steps can resolve connectivity and display issues effectively. Always refer to the manual for detailed troubleshooting guides tailored to your Honeywell Pro 5000 thermostat.

Maintenance and Upkeep
Regularly clean the Honeywell Pro 5000 thermostat and its sensors‚ and check for software updates to ensure optimal performance‚ security‚ and accurate temperature control properly.
Cleaning the Thermostat and Sensors
Regular cleaning of the Honeywell Pro 5000 thermostat and its sensors is essential for maintaining accurate temperature readings and system performance. Use a soft‚ dry cloth to gently wipe down the thermostat’s exterior and display screen‚ avoiding any liquids that could damage electrical components. For sensors‚ ensure they are free from dust or debris by lightly brushing them with a clean cloth or using compressed air. Avoid inserting objects into sensor openings‚ as this may cause damage. Check for dust buildup around the thermostat and sensors periodically‚ especially in high-traffic areas. Clean the device when it is powered off to prevent accidental activation. Regular maintenance ensures reliable operation and extends the lifespan of your thermostat.
and Final Thoughts
Updating Software and Firmware
To ensure optimal performance‚ regularly update the Honeywell Pro 5000 thermostat’s software and firmware. Updates often include improvements‚ bug fixes‚ and new features. Connect the thermostat to your Wi-Fi network to check for updates via the settings menu. If an update is available‚ download and install it following on-screen instructions. The process is typically automatic‚ and the thermostat may reboot during installation. Avoid interrupting the update to prevent system issues. For manual updates‚ visit Honeywell’s official website‚ download the latest firmware‚ and follow the provided instructions. Enable automatic updates in settings to maintain the latest version seamlessly. Updating ensures compatibility‚ enhances security‚ and improves functionality‚ keeping your thermostat running smoothly and efficiently.