FireAngel carbon monoxide detectors are designed to provide early warnings of toxic CO levels, ensuring home safety. They meet European standards and feature continuous monitoring, loud alarms, and resistance to false triggers, making them reliable and essential for protecting against CO threats.
1.1 Overview of FireAngel CO Detectors
FireAngel CO detectors are advanced devices designed to monitor carbon monoxide levels continuously. Certified to European standards like EN 50291, they ensure reliable performance. These detectors feature a loud 85dB alarm to alert users of dangerous CO levels. Equipped with LED indicators for status monitoring, they are resistant to false alarms caused by common household contaminants. Lightweight and compact, FireAngel CO detectors are suitable for installation in bedrooms, hallways, and landings, providing essential protection against carbon monoxide threats. Their user-friendly design and robust features make them a trusted choice for home safety.
1.2 Importance of Carbon Monoxide Detection
Carbon monoxide (CO) is a silent, odorless, and colorless gas that can be deadly in high concentrations. Prolonged exposure to CO can lead to severe health risks, including poisoning and even death. FireAngel CO detectors play a critical role in early detection, providing timely alerts to prevent potential tragedies. Their continuous monitoring ensures that even slight increases in CO levels are detected promptly, allowing individuals to take immediate action. This makes CO detectors an essential safety measure for homes, safeguarding families from invisible threats. Regular use of these devices is vital for maintaining a safe living environment.
1.3 Key Features of FireAngel CO Detectors
FireAngel CO detectors boast advanced sensor technology for accurate detection of carbon monoxide. They feature continuous monitoring, loud 85dB alarms, and resistance to false triggers from household contaminants. Equipped with test/reset buttons and LED indicators, these detectors ensure easy operation and status monitoring. Designed to meet European safety standards like EN 50291, they offer reliable protection. Their lightweight and compact design makes installation hassle-free. Additionally, regular self-checks ensure optimal functionality, providing users with peace of mind and enhanced home safety. These features make FireAngel detectors a trusted choice for CO detection.

Installation Instructions
FireAngel CO detectors offer advanced features like continuous carbon monoxide monitoring, loud 85dB alarms, and resistance to false triggers from household contaminants. Equipped with test/reset buttons and LED indicators, they ensure easy operation and status monitoring. Designed to meet European safety standards, they provide reliable protection with lightweight, compact designs for hassle-free installation. Regular self-checks ensure optimal functionality, offering users peace of mind and enhanced home safety. These features make FireAngel detectors a trusted choice for accurate and efficient CO detection.
2.1 Choosing the Right Location for Installation
Proper placement is crucial for your FireAngel CO detector to function effectively. Install it on walls or ceilings, at least 1-3 meters away from potential CO sources like boilers or heaters. Avoid areas near windows, doors, or direct sunlight to prevent false alarms. Do not install in garages, kitchens, or areas prone to moisture. Ensure the detector is in a central location, such as hallways or near bedrooms, to maximize coverage and provide early warnings of dangerous CO levels in your home.
2.2 Step-by-Step Installation Guide
To install your FireAngel CO detector, start by ensuring the device is ready for use. Insert the batteries into the rear compartment, ensuring they are securely placed. Once batteries are inserted, the detector will automatically activate and perform a self-check. Next, choose a suitable location for installation, ensuring it is level and firmly attached to the wall or ceiling using the provided mounting hardware. After securing the detector, press and hold the Test/Reset button to ensure the alarm sounds correctly. Finally, confirm the detector is functioning properly by checking the LED indicators and ensuring no errors are present.
2.3 Activating the Detector
To activate your FireAngel CO detector, begin by inserting the batteries into the rear compartment. Once installed, the detector will automatically power on and perform a brief self-check, indicated by a short beep or LED flash. This ensures all functions are operational. Next, press and hold the Test/Reset button to test the alarm sound and confirm proper activation. The detector is now ready to monitor for carbon monoxide levels, providing continuous protection for your home. Regular testing is recommended to ensure ongoing reliability.
Operating the FireAngel CO Detector
The FireAngel CO detector continuously monitors carbon monoxide levels, providing real-time protection. It features a loud 85dB alarm, LED indicators, and regular self-checks to ensure reliability and safety.
3.1 Understanding the Alarm Sounds
The FireAngel CO detector emits a loud 85dB alarm when dangerous carbon monoxide levels are detected. This high-pitched sound is designed to alert occupants even from a distance. The alarm will continue until CO levels drop or the reset button is pressed. Familiarizing yourself with this sound ensures prompt action during emergencies. Regular testing by pressing the test/reset button helps confirm the alarm is functioning correctly. Always prioritize safety by responding immediately to the alarm.
3.2 Testing the Detector
To ensure your FireAngel CO detector is functioning properly, press and hold the test/reset button once a week. This action triggers a self-check of the alarm’s circuitry and sounder. The detector will emit a loud 85dB alarm to confirm it is working. Regular testing helps identify any potential issues and ensures the detector remains reliable. Always test after battery replacement or if you suspect a malfunction. This simple step provides peace of mind and ensures your safety in case of a carbon monoxide emergency.
3.3 Regular Maintenance Tips
To maintain your FireAngel CO detector’s efficiency, clean the grille monthly with a soft brush or vacuum to remove dust. Check the LED indicators regularly to ensure they are functioning correctly. Replace batteries annually or when the low-battery warning sounds. Verify the expiration date on the detector and replace it as recommended. Avoid exposing the detector to extreme temperatures or humidity. Ensure it is not obstructed by furniture or curtains. Regular maintenance ensures optimal performance and extends the detector’s lifespan, providing continuous protection against carbon monoxide threats. Always follow the manufacturer’s guidelines for best results.
Troubleshooting Common Issues
FireAngel CO detectors may experience issues like false alarms or sensor malfunctions. Regular testing and cleaning can resolve many problems. Always refer to the user manual for specific solutions and guidelines to ensure your detector functions properly and maintains your safety.
4.1 Resolving False Alarms
False alarms on FireAngel CO detectors can occur due to background CO levels or external factors like cooking fumes. Press the test/reset button to silence the alarm and ventilate the area. Ensure no actual CO sources are present. If the issue persists, check for sensor obstructions or contamination. Regular cleaning and maintenance can help reduce false triggers. Always refer to the user manual for detailed troubleshooting steps to ensure accurate detection and reliable performance. Proper handling of false alarms is crucial for maintaining trust in your detector’s functionality.
4.2 Addressing Sensor Malfunctions
If your FireAngel CO detector experiences sensor malfunctions, start by testing the device using the test/reset button. Ensure the sensor is clean and free from contaminants. If issues persist, check for proper installation and ensure no obstructions are blocking the sensor. Replace the batteries if they are old or weak, as low power can affect performance. If problems continue, contact FireAngel customer support for assistance or replacement options. Regular maintenance and checks can help prevent sensor-related issues, ensuring accurate detection and reliable performance. Always follow the user manual guidelines for troubleshooting.
4.3 Battery Replacement and Care
To maintain your FireAngel CO detector’s functionality, replace the batteries as specified in the user manual. Open the battery compartment, typically located on the rear, and insert new batteries of the recommended type. Ensure proper alignment and secure the compartment tightly. After replacement, test the detector by pressing the test/reset button to confirm it’s working correctly. Avoid mixing old and new batteries to prevent performance issues. For models with sealed batteries, contact FireAngel support for replacement. Regularly check battery levels and replace them every 5-7 years or as indicated by the low-battery warning. Proper battery care ensures reliable detection and home safety.

Understanding Carbon Monoxide
Carbon monoxide (CO) is a colorless, odorless gas produced by incomplete fuel combustion. It poses serious health risks, including respiratory issues and death in high concentrations. Common household sources include faulty boilers, heaters, and improperly ventilated appliances. Understanding CO is crucial for ensuring safety and preventing poisoning through proper detection and maintenance.
5.1 What is Carbon Monoxide?
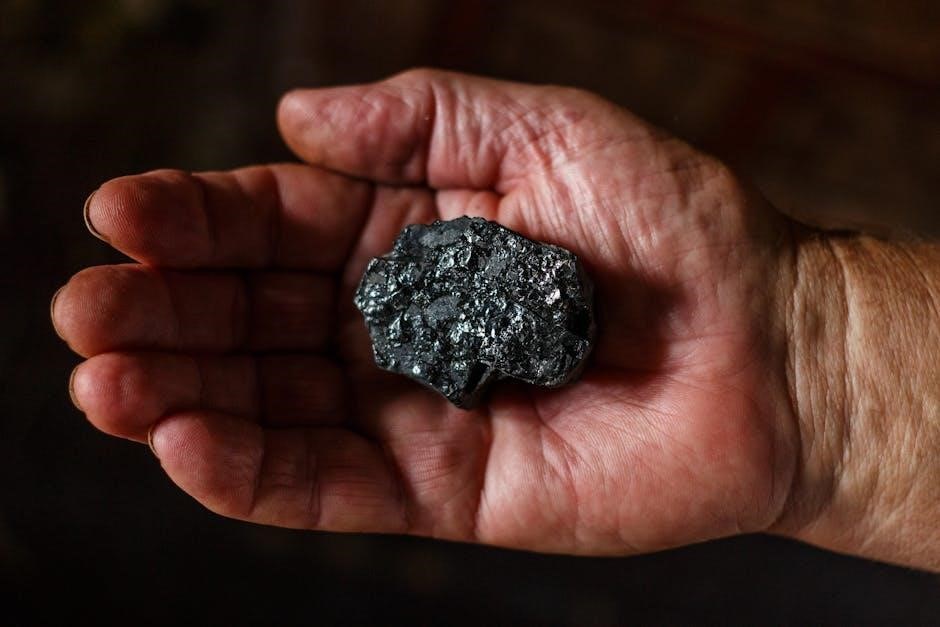
Carbon monoxide (CO) is a colorless, odorless, and tasteless gas produced by incomplete combustion of fuels like coal, wood, or natural gas. It is highly toxic and can cause severe health issues or death in high concentrations. CO is undetectable without specialized devices, making it particularly dangerous. FireAngel detectors are designed to monitor CO levels continuously, ensuring early warning systems are in place to protect against this invisible threat. Understanding CO’s properties is essential for maintaining safety and preventing potential hazards in homes.
5.2 Health Risks Associated with CO Exposure
Carbon monoxide exposure poses serious health risks, as it interferes with oxygen transport in the blood. Prolonged or high-level exposure can lead to headaches, dizziness, nausea, and even unconsciousness or death. Lower levels may cause mild symptoms, but prolonged exposure can still be harmful. Vulnerable groups, such as children, the elderly, and those with heart conditions, are at greater risk. Prompt detection and evacuation are critical to preventing severe health complications. FireAngel detectors play a vital role in alerting individuals to dangerous CO levels before symptoms arise.
5.3 Common Sources of CO in Homes
Carbon monoxide in homes often stems from faulty or improperly maintained fuel-burning appliances, such as boilers, heaters, or water heaters. Blocked flues or chimneys can trap CO indoors. Idling cars in garages or poorly ventilated spaces also pose risks. Additionally, malfunctioning cooking stoves, fireplaces, or portable generators can release dangerous CO levels. Ensuring proper installation, regular maintenance, and adequate ventilation of these devices is crucial to preventing CO buildup and protecting household safety. FireAngel detectors help detect these invisible threats early.
Technical Specifications
FireAngel CO detectors meet EN 50291 standards, using an electrochemical sensor with 85dB alarms. They operate between -10°C and 40°C, 30-90% RH, weighing 90 grams.
6.1 Certifications and Compliance
FireAngel CO detectors are certified to EN 50291-1:2010 and EN 50291-2:2010 standards, ensuring reliable performance. They meet European safety regulations for carbon monoxide detection, with an operating temperature range of -10°C to 40°C and humidity tolerance of 30-90% RH. The detectors are lightweight, weighing just 90 grams, and are designed for long-term use. Compliance with these standards ensures accurate detection and alarm responses, providing users with trusted protection against carbon monoxide threats in various environmental conditions.
6.2 Sensor Technology and Accuracy
FireAngel CO detectors utilize advanced electrochemical sensors for precise carbon monoxide detection. These sensors provide accurate measurements of CO levels, enabling early warnings of potential threats. The technology is designed to minimize false alarms from common household contaminants. With continuous monitoring, the detectors ensure reliable performance, offering peace of mind. The sensors meet strict European standards, ensuring high accuracy and responsiveness to dangerous CO concentrations, making them a trusted choice for home safety and protection against carbon monoxide hazards.
6.3 Operating Conditions and Limits
FireAngel carbon monoxide detectors are designed to operate effectively within specific environmental conditions. They function optimally in temperatures ranging from -10°C to 40°C and humidity levels between 30% and 90% RH. These detectors are lightweight, weighing approximately 90 grams, and are engineered to provide accurate detection without false alarms. By adhering to these operating limits, the devices ensure reliable performance and continuous monitoring of CO levels, meeting European safety standards for home protection and safety.
User Manuals and Guides
FireAngel carbon monoxide detector user manuals are comprehensive and accessible, available in both physical and digital formats. They provide clear instructions for installation, testing, and maintenance, ensuring optimal performance and safety.
7.1 Navigating the User Manual
The FireAngel CO detector user manual is structured to guide users through installation, operation, and troubleshooting. It begins with safety precautions, followed by detailed installation steps and maintenance tips. The manual includes diagrams and troubleshooting sections, making it easy to identify and resolve issues. Users can find specific information quickly, ensuring their detector functions optimally. Regular updates and digital versions are available for convenience. The clear layout ensures that all essential information is accessible, promoting safe and effective use of the device.
7.2 Interpreting Symbols and Indicators
The FireAngel CO detector features LED indicators for power and alarm status, ensuring easy monitoring. The green LED signifies normal operation, while red indicates an alarm or fault. The test/reset button allows users to check functionality and silence false alarms. Symbols in the manual explain these indicators, aiding in quick understanding. Regular self-checks ensure the detector is functioning properly, providing peace of mind. Understanding these indicators helps users respond appropriately to alerts, ensuring safety and maintaining device efficiency. Always refer to the manual for precise interpretations of all symbols and lights.
7.3 Accessing Digital Manuals and Resources
Digital manuals for FireAngel CO detectors are easily accessible online, providing comprehensive guides for installation, operation, and maintenance. Users can download PDF versions from the official FireAngel website or platforms like Manuals.co.uk. Additional resources include troubleshooting guides, FAQs, and instructional videos. For further assistance, customers can contact FireAngel support or visit their website for detailed product specifications and safety tips. These resources ensure users can maximize their detector’s functionality and stay informed about carbon monoxide safety. Regularly updated materials are available to keep users well-informed.
Warranty and Support
FireAngel CO detectors come with a comprehensive warranty covering manufacturing defects. The warranty period varies by model, typically up to 7 years. Dedicated customer support is available for troubleshooting, repairs, and replacements. Users can contact FireAngel directly for assistance or visit their website for detailed warranty terms and support options. This ensures long-term reliability and peace of mind for users relying on these critical safety devices.
8.1 Warranty Terms and Conditions
FireAngel carbon monoxide detectors are backed by a comprehensive warranty that covers manufacturing defects for a specified period, typically up to 7 years. The warranty ensures that any faulty devices are repaired or replaced free of charge, provided the product has been used in accordance with the manufacturer’s instructions. The warranty period begins from the date of original purchase and does not restart with replacements; For full details, users should refer to the product manual or visit the FireAngel website. Proper registration of the device is recommended to validate the warranty terms.
8.2 Contacting Customer Support
FireAngel offers dedicated customer support to assist with any queries or issues regarding their carbon monoxide detectors. Users can contact the support team via phone at 0800 141 2561 or through email for troubleshooting, warranty claims, or general inquiries. Additionally, the official FireAngel website provides comprehensive resources, including FAQs and contact forms, to help users resolve issues promptly. For detailed support, customers are encouraged to refer to the product manual or visit the FireAngel website for up-to-date information and assistance. The support team is available to ensure optimal product performance and user safety.
8.3 Repair and Replacement Options
FireAngel offers repair and replacement options for defective or damaged carbon monoxide detectors. Under warranty, defective devices can be replaced by contacting customer support with proof of purchase. Out-of-warranty units can be replaced by purchasing new detectors directly from FireAngel or authorized retailers. For repairs, users should contact support to determine if the issue can be resolved without replacement. Replacement detectors come with a new warranty period, ensuring continued protection. Always activate new or replaced units according to the instructions provided in the user manual to maintain proper functionality and safety.
FireAngel carbon monoxide detectors are reliable, meeting European safety standards and featuring continuous monitoring, loud alarms, and resistance to false triggers. Regular maintenance ensures optimal performance.
9.1 Summary of Key Points
The FireAngel carbon monoxide detector is a reliable safety device designed to monitor CO levels continuously. It meets European safety standards, ensuring accurate detection and timely alerts. Key features include a loud 85dB alarm, resistance to false triggers, and regular self-check functionality. Proper installation, testing, and maintenance are essential for optimal performance. The detector is lightweight, compact, and suitable for various rooms, providing peace of mind for homeowners. Regular maintenance, such as battery replacement and sensor checks, ensures long-term reliability and effectiveness in protecting against CO threats.
9.2 Final Tips for Safe Usage
To ensure safe usage of your FireAngel carbon monoxide detector, always follow the installation guidelines and test the device weekly. Place detectors near potential CO sources, such as boilers or heaters, and avoid areas with high humidity. Never ignore the alarm; evacuate immediately if it sounds. Regularly clean the detector to avoid dust buildup and replace batteries as instructed. Keep user manuals handy for troubleshooting and maintenance. By adhering to these tips, you can maximize the effectiveness of your detector and maintain a safe living environment.
9.3 Encouragement for Regular Maintenance
Regular maintenance is crucial to ensure your FireAngel carbon monoxide detector functions optimally. Test the alarm weekly using the test button and clean the detector to remove dust. Check the sensor and battery health periodically, replacing batteries as needed. Refer to the user manual for detailed guidance. By prioritizing maintenance, you can rely on your detector to provide consistent protection. Stay vigilant and proactive to safeguard your home and loved ones from the risks of carbon monoxide exposure.

Additional Resources
Explore official FireAngel websites, user forums, and safety guidelines for comprehensive support. Access digital manuals, troubleshooting tips, and compliance standards to enhance your detector’s performance and safety.
10.1 Recommended Reading Materials
For in-depth understanding, refer to the official FireAngel user manuals available online. These guides provide detailed installation, testing, and maintenance instructions. Additionally, safety pamphlets from reputable organizations offer insights into CO risks and detector best practices. Visit FireAngel’s official website or trusted safety resources for downloadable PDFs and comprehensive guides to ensure optimal use and safety of your carbon monoxide detector. Regular updates and new materials are also available to keep you informed.
10.2 Online Communities and Forums
Online forums and communities are valuable resources for discussing FireAngel carbon monoxide detectors. Platforms like Manuals.co.uk and safety-focused forums offer user experiences, troubleshooting tips, and advice. Reddit and specialized safety communities also provide insights and answers to common questions. Engaging with these forums can help you gain practical knowledge and solutions from real users, ensuring optimal use of your detector. These spaces foster collaboration and shared learning, enhancing your understanding of FireAngel products and safety best practices. Active participation can also lead to discovering new features and maintenance tips.
10.3 Safety Guidelines and Regulations
FireAngel carbon monoxide detectors must be installed and maintained according to local safety guidelines and regulations. Ensure compliance with standards like EN 50291-1:2010 and EN 50291-2:2010 for reliable performance. Follow manufacturer instructions for placement, testing, and battery replacement to maintain effectiveness. Regular self-checks and adherence to operating conditions are crucial. Always refer to official safety guidelines to ensure your detector functions optimally, protecting your home and family from CO threats effectively and responsibly. Compliance ensures safety and peace of mind.