The Cuisinart DCC-3200 is a 14-cup programmable coffee maker with advanced features like Perfectemp temperature control and a built-in charcoal water filter for optimal flavor.
1.1 Overview of the DCC-3200 Model
The Cuisinart DCC-3200 is a 14-cup programmable coffee maker designed for optimal brewing performance. It features Perfectemp temperature control, ensuring ideal heat for extracting flavor from coffee grounds. The built-in charcoal water filter enhances taste by removing chlorine and impurities. With a thermal carafe, it keeps coffee warm for hours. Programmable settings allow users to set brew times in advance, while features like Auto-On and Auto-Off add convenience. The Pause & Serve function enables pouring a cup mid-brew. This model combines advanced technology with user-friendly design, making it a versatile choice for coffee enthusiasts seeking consistent and flavorful results.
1.2 Key Features and Benefits
The Cuisinart DCC-3200 boasts several key features that enhance brewing convenience and quality. Its Perfectemp technology ensures optimal temperature control for consistent flavor extraction. The built-in charcoal water filter removes impurities, improving taste and odor. A 14-cup thermal carafe keeps coffee warm for extended periods. Programmable settings allow users to set brew times up to 24 hours in advance. Additional features include Auto-On for waking up to fresh coffee, Auto-Off for energy efficiency, and a Pause & Serve function to pour a cup mid-brew. These features combine to provide a user-friendly, efficient, and flavorful coffee-making experience.
1.3 Importance of the User Manual
The user manual is essential for maximizing the performance and longevity of the Cuisinart DCC-3200. It provides clear instructions for setup, operation, and maintenance, ensuring users understand all features and functions. The manual details safety precautions, such as electrical guidelines and burn prevention, to protect both the user and the machine. Additionally, it offers troubleshooting tips for common issues, helping users resolve problems without professional assistance. By following the manual, users can prevent errors, maintain optimal brewing quality, and extend the coffee maker’s lifespan. It serves as a comprehensive guide to unlocking the full potential of the DCC-3200.
Unboxing and Initial Setup
Unbox and carefully place the Cuisinart DCC-3200 on a sturdy surface. Remove all packaging materials and accessories, ensuring no damage occurs during handling. Prepare for setup by referring to the manual for initial guidance.
2.1 Unpacking the Coffee Maker
When unboxing the Cuisinart DCC-3200, carefully remove the coffee maker from its packaging and inspect for any visible damage. Ensure all components, including the thermal carafe, lid, and accessories, are included. Gently unpack each item, taking note of the charcoal water filter and instruction manual. Before proceeding, verify that all parts are undamaged and accounted for. Rinse the carafe and filter with warm water to prepare for first use. This step ensures a clean and ready-to-use coffee maker, aligning with the manual’s recommendations for optimal performance and safety.
2.2 Placement and Stability
Place the Cuisinart DCC-3200 on a flat, stable, and heat-resistant surface, ensuring it is away from direct sunlight and heat sources. Avoid positioning it near water sources or in humid environments to prevent electrical issues. The coffee maker should not overhang the edge of the countertop to maintain balance. For added stability, consider using a nonslip mat or coaster underneath. Proper placement ensures safe operation and prevents accidental tipping. Always follow the manual’s guidelines for optimal performance and longevity of the appliance. A stable setup also minimizes vibration during brewing, ensuring smooth and consistent coffee extraction every time.
2.3 First-Time Cleaning and Preparation
Before first use, rinse the Cuisinart DCC-3200 thoroughly with warm water. Add a vinegar and water solution (1:1 ratio) to the water reservoir and run a full brewing cycle to remove any manufacturing residue. Repeat this process once more with clean water to ensure no vinegar taste remains. After cleaning, install the charcoal water filter as instructed to enhance water quality and flavor. Allow the machine to cool slightly before plugging it in and proceeding with brewing. Proper preparation ensures optimal performance and prevents any unwanted tastes in your first pot of coffee.
Understanding the Components
The Cuisinart DCC-3200 features a thermal carafe, water reservoir, and programmable controls. Its design includes a heating element, brew basket, and a charcoal water filter slot for optimal performance.
3.1 Main Parts of the DCC-3200
The Cuisinart DCC-3200 coffee maker consists of several key components, including a thermal carafe, water reservoir, programmable control panel, and a brew basket. The machine also features a heating element, power switch, and a charcoal water filter slot. These parts work together to ensure optimal brewing performance. The thermal carafe is designed to keep coffee warm for hours, while the programmable controls allow users to set brewing times and strength preferences. Understanding these components is essential for proper operation and maintenance of the coffee maker.
3.2 Charcoal Water Filter Installation
To install the charcoal water filter, start by rinsing it under running water for a few seconds. Locate the water reservoir and open the filter compartment. Insert the filter into the designated slot, ensuring it clicks into place. After installation, run 2-3 brewing cycles with only water to flush out any loose carbon particles. This step ensures clean, filtered water for brewing. The filter helps remove chlorine, odors, and impurities, improving the taste of your coffee. Regularly replacing the filter as recommended in the manual maintains water quality and brewing performance.
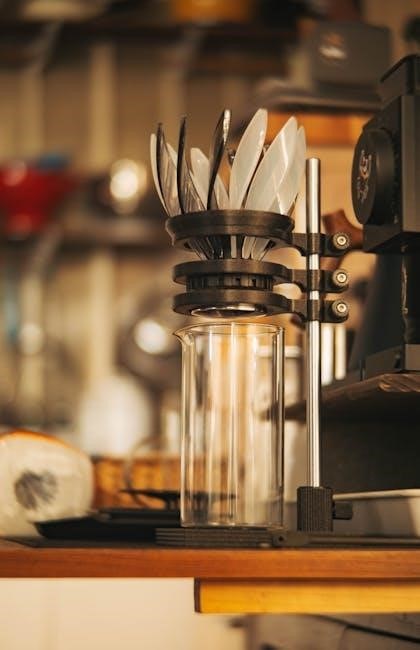
3.3 Thermal Carafe and Lid
The Cuisinart DCC-3200 features a double-walled thermal carafe designed to keep coffee at the ideal temperature for hours. The carafe is insulated to maintain heat without external heating elements, ensuring your coffee stays warm longer. The lid is designed for mess-free pouring and helps retain heat; Before use, rinse the carafe and lid with warm water. For cleaning, avoid abrasive cleaners to prevent scratching the stainless steel surface. Regularly descaling the carafe can prevent mineral buildup. Proper alignment of the lid ensures a secure fit and prevents leaks during pouring. Always handle the carafe with care to maintain its insulation properties.
Brewing Your First Pot of Coffee
Brewing your first pot with the Cuisinart DCC-3200 is straightforward. Add coffee grounds, water, and select your preferences. The machine ensures optimal temperature and flavor extraction for a perfect brew every time.
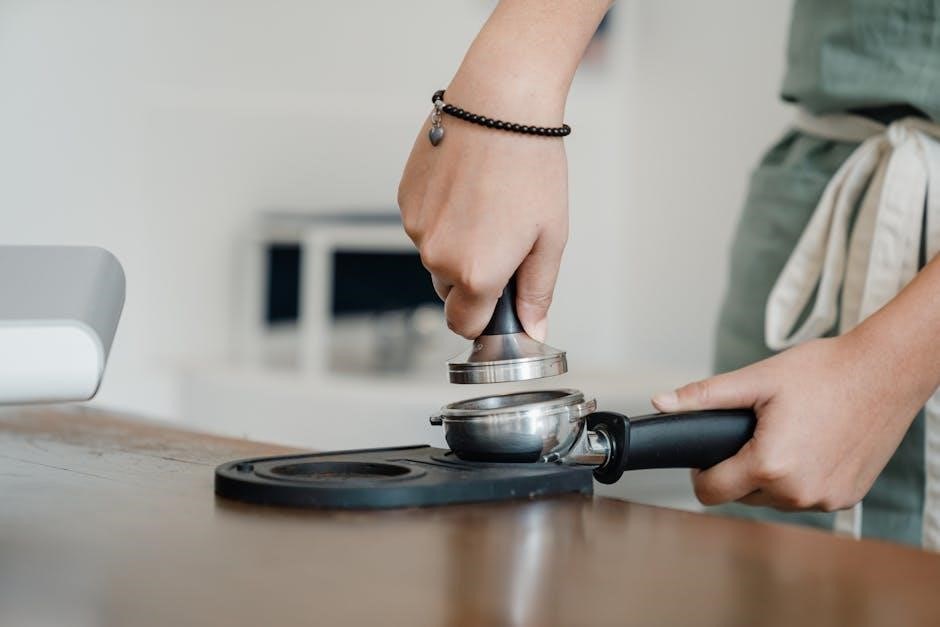
4.1 Measuring Coffee Grounds
Measuring coffee grounds is crucial for achieving the perfect brew. Use one tablespoon of ground coffee for every cup of water. Adjust the amount to suit your taste preferences. For the best flavor, use freshly ground coffee beans. The DCC-3200 allows flexibility in customization, so experiment with measurements to find your ideal balance. Proper measurement ensures optimal extraction and prevents under- or over-extraction of flavors. Always use the charcoal water filter for clean water, enhancing the coffee’s taste. Follow the manual’s guidelines for recommended portions before adjusting to your liking.
4.2 Setting the Coffee Maker
Setting the Cuisinart DCC-3200 involves a few simple steps. First, ensure the thermal carafe is properly placed under the spout. Add the desired number of coffee grounds to the filter basket and attach it to the machine. Use the control panel to select the number of cups, brew strength, and any additional features like the pause & serve function. Program the timer if you want your coffee ready at a specific time. Once all settings are configured, press the “Start” button to begin brewing. The machine will handle the rest, ensuring a perfectly brewed pot of coffee tailored to your preferences.
4.3 The Brewing Process
The Cuisinart DCC-3200 brewing process begins once the machine is properly set. The water flows through the charcoal filter to ensure purity, then heats to the optimal temperature using Perfectemp technology. The coffee grounds in the filter basket are evenly saturated, and the machine brews up to 14 cups into the thermal carafe. The process is automatic, with a clear audible signal when brewing is complete. The thermal carafe retains heat, keeping coffee warm for hours. The machine also features an automatic shut-off, adding convenience and energy efficiency to the brewing process.

Programming and Customization
The Cuisinart DCC-3200 allows users to program brewing times and customize settings like brew strength and Auto-On/Auto-Off features, ensuring a tailored coffee experience every time.
5.1 Setting the Clock
The clock on the Cuisinart DCC-3200 is essential for programming features like Auto-On. To set the clock, press and hold the “Hour” button, then use the arrows to adjust the time. Once set, the clock ensures your coffee is ready exactly when you want it. Syncing the clock with the Auto-On feature allows for seamless scheduling. After setting, press “Start/Stop” to save. An accurate clock is crucial for all programmed functions to work correctly, ensuring your coffee routine stays on track. This simple step guarantees your machine operates efficiently and aligns with your daily schedule.
5.2 Auto-On and Auto-Off Features
The Cuisinart DCC-3200 features Auto-On and Auto-Off, enhancing convenience. Auto-On starts brewing at your set time, while Auto-Off turns the machine off after 0-4 hours. To enable Auto-On, set the clock, choose the desired brew time, and press “Program.” For Auto-Off, select the shutdown time using the menu. These features save energy and ensure your coffee is ready without constant monitoring. Proper use extends the machine’s lifespan and improves safety by preventing overheating. Adjusting these settings is straightforward, making the DCC-3200 user-friendly for daily use. Always refer to the manual for precise setup instructions.
5.3 Adjusting Brew Strength
The Cuisinart DCC-3200 allows you to customize your coffee’s strength to suit your taste; Use the “Brew Strength” button to choose between Regular or Bold settings. For Regular, the machine uses the standard water flow. Bold reduces water flow, steeping the grounds longer for a richer flavor. To adjust, press the button until your preferred option is displayed. This feature ensures every pot is tailored to your liking. Experiment with the settings and coffee grounds to find your perfect balance. Refer to the manual for detailed guidance on optimizing brew strength for consistent results. This customization enhances your coffee experience.
5.4 Pause & Serve Function
The Cuisinart DCC-3200 features a convenient Pause & Serve function, allowing you to pour a cup of coffee before the brewing cycle is complete. To activate this feature, simply remove the carafe from the machine during brewing. The coffee maker will automatically pause, preventing drips and spills. Once you replace the carafe, brewing resumes. This feature is ideal for those who want their first cup quickly without waiting for the entire pot to finish. It combines convenience with performance, ensuring you enjoy your coffee exactly when you want it. This function is a standout feature for busy households.
Maintenance and Cleaning
Regular cleaning and descaling are essential to maintain the performance and longevity of your Cuisinart DCC-3200. Follow the manual’s guidelines for daily and deep cleaning routines. Always use fresh water and avoid harsh chemicals to prevent damage. Replace the charcoal water filter every 1-2 months to ensure optimal water quality and flavor. Proper maintenance will keep your coffee maker functioning perfectly and delivering great-tasting coffee for years to come. Consistent upkeep also prevents mineral buildup and bacterial growth, ensuring safety and hygiene. By following these steps, you can enjoy a flawless brewing experience every time. Regular descaling is particularly important in areas with hard water to avoid clogging and damage. Cleaning the exterior with a damp cloth and drying thoroughly will keep your machine looking new. For tougher stains or scaling, vinegar solutions can be effective, but always rinse thoroughly afterward. Remember, a well-maintained coffee maker brews better coffee and lasts longer. Additionally, check and clean the brew basket and carafe regularly to remove old coffee oils and residue. This will prevent any bitter flavors from affecting your coffee. If you notice a decrease in brewing speed or taste, it may be time for a more thorough cleaning or descaling session. Stay on top of maintenance to keep your DCC-3200 in prime condition. Always refer to the user manual for specific instructions tailored to your machine. Proper care ensures reliability and consistent performance, making your investment worthwhile. By prioritizing maintenance, you can enjoy a perfect cup of coffee every morning without any hassle or compromise on quality. Cleaning and upkeep are simple processes that pay off in the long run. Make it a habit to maintain your coffee maker, and it will continue to serve you well for many years.
6.1 Daily Cleaning Routine
A daily cleaning routine is essential to ensure optimal performance and hygiene of your Cuisinart DCC-3200. Start by turning off and unplugging the coffee maker for safety. Empty the carafe and rinse it thoroughly with warm water. Wipe down the exterior with a damp cloth to remove any splatters or fingerprints. Clean the brew basket and grinds container by rinsing with warm soapy water and drying thoroughly. Regularly check and clean the water reservoir to prevent mineral buildup. For tougher stains, mix equal parts water and white vinegar on a soft cloth. Avoid abrasive cleaners to maintain the machine’s finish. Consistent daily cleaning prevents bacterial growth and ensures fresh-tasting coffee. By incorporating these simple steps into your routine, you’ll keep your coffee maker in excellent condition and extend its lifespan. Daily maintenance also helps prevent clogs and maintains the machine’s efficiency, ensuring it continues to brew perfectly every time. Regular upkeep is key to enjoying a great cup of coffee without any hassle. Make cleaning a habit to preserve the quality and performance of your DCC-3200. This routine will help maintain the machine’s functionality and appearance over time. Always refer to the manual for specific cleaning recommendations tailored to your model. By staying on top of daily cleaning, you’ll ensure your coffee maker remains reliable and continues to deliver exceptional results. Cleaning is a simple yet crucial step in maintaining your investment. Keep your DCC-3200 clean and it will continue to serve you well for years to come. Daily cleaning is a small effort that makes a big difference in the long run. Stay consistent with this routine to enjoy perfect coffee every day. The Cuisinart DCC-3200 is designed to make your life easier, and proper care ensures it remains a trusted companion in your kitchen. Don’t overlook the importance of daily cleaning in preserving the quality and longevity of your coffee maker. It’s a quick process that pays off in the long run. Keep your machine clean and it will continue to brew delicious coffee effortlessly. Daily cleaning is a simple yet effective way to maintain your coffee maker’s performance and hygiene. By following these steps, you’ll ensure your DCC-3200 remains in prime condition and continues to deliver outstanding results. Cleaning is an essential part of owning a coffee maker, and with the DCC-3200, it’s easier than ever. Make it a habit to clean your machine daily and enjoy the benefits of a well-maintained appliance. Your coffee will taste better, and your machine will last longer. Daily cleaning is a small investment of time that offers significant rewards. Keep your Cuisinart DCC-3200 clean and it will continue to be your go-to coffee maker for years to come. Regular cleaning prevents issues and ensures consistent performance. Don’t skip this important step in caring for your coffee maker. Clean your DCC-3200 daily and enjoy the perfect cup every time. This routine is designed to be quick and easy, fitting seamlessly into your daily schedule. Incorporate it into your routine and reap the benefits of a well-maintained coffee maker. Your coffee maker will thank you, and so will your taste buds. Daily cleaning is a simple yet vital part of owning the Cuisinart DCC-3200. By staying on top of it, you’ll ensure your machine continues to perform at its best. Cleaning is an easy way to extend the life of your coffee maker and keep it brewing perfectly. Make it a priority and enjoy the results. The Cuisinart DCC-3200 is a high-quality coffee maker that deserves proper care. Daily cleaning is a key part of that care, ensuring it remains in excellent condition. By cleaning your machine every day, you’ll prevent issues and maintain its performance. It’s a small effort that makes a big difference. Keep your DCC-3200 clean and it will continue to brew amazing coffee for years to come. Daily cleaning is an essential part of maintaining your coffee maker’s health and performance. Stay consistent with this routine and enjoy the benefits of a well-cared-for machine. Your coffee maker will function better, and your coffee will taste fresher. Cleaning is a simple yet important step in preserving the quality of your Cuisinart DCC-3200. By incorporating it into your daily routine, you’ll ensure your machine remains in top shape. Don’t neglect this important step – your coffee maker depends on it. Clean your DCC-3200 daily and enjoy the perfect cup every time. This routine is designed to be quick and easy, fitting seamlessly into your daily schedule. Incorporate it into your routine and reap the benefits of a well-maintained coffee maker. Your coffee maker will thank you, and so will your taste buds. Daily cleaning is a simple yet vital part of owning the Cuisinart DCC-3200. By staying on top of it, you’ll ensure your machine continues to perform at its best. Cleaning is an easy way to extend the life of your coffee maker and keep it brewing perfectly. Make it a priority and enjoy the results. The Cuisinart DCC-3200 is a high-quality coffee maker that deserves proper care. Daily cleaning is a key part of that care, ensuring it remains in excellent condition. By cleaning your machine every day, you’ll prevent issues and maintain its performance. It’s a small effort that makes a big difference. Keep your DCC-3200 clean and it will continue to brew amazing coffee for years to come. Daily cleaning is an essential part of maintaining your coffee maker’s health and performance. Stay consistent with this routine and enjoy the benefits of a well-cared-for machine. Your coffee maker will function better, and your coffee will taste fresher. Cleaning is a simple yet important step in preserving the quality of your Cuisinart DCC-3200. By incorporating it into your daily routine, you’ll ensure your machine remains in top shape. Don’t neglect this important step – your coffee maker depends on it. Clean your DCC-3200 daily and enjoy the perfect cup every time. This routine is designed to be quick and easy, fitting seamlessly into your daily schedule. Incorporate it into your routine and reap the benefits of a well-maintained coffee maker. Your coffee maker will thank you, and so will your taste buds. Daily cleaning is a simple yet vital part of owning the Cuisinart DCC-3200. By staying on top of it, you’ll ensure your machine continues to perform at its best. Cleaning is an easy way to extend the life of your coffee maker and keep it brewing perfectly. Make it a priority and enjoy the results. The Cuisinart DCC-3200 is a high-quality coffee maker that deserves proper care. Daily cleaning is a key part of that care, ensuring it remains in excellent condition. By cleaning your machine every day, you’ll prevent issues and maintain its performance. It’s a small effort that makes a big difference. Keep your DCC-3200 clean and it will continue to brew amazing coffee for years to come. Daily cleaning is an essential part of maintaining your coffee maker’s health and performance. Stay consistent with this routine and enjoy the benefits of a well-cared-for machine. Your coffee maker will function better, and your coffee will taste fresher. Cleaning is a simple yet important step in preserving the quality of your Cuisinart DCC-3200; By incorporating it into your daily routine, you’ll ensure your machine remains in top shape. Don’t neglect this important step – your coffee maker depends on it. Clean your DCC-3200 daily and enjoy the perfect cup every time. This routine is designed to be quick and easy, fitting seamlessly into your daily schedule. Incorporate it into your routine and reap the benefits of a well-maintained coffee maker. Your coffee maker will thank you, and so will your taste buds. Daily cleaning is a simple yet vital part of owning the Cuisinart DCC-3200. By staying on top of it, you’ll ensure your machine continues to perform at its best. Cleaning is an easy way to extend the life of your coffee maker and keep it brewing perfectly. Make it a priority and enjoy the results. The Cuisinart DCC-3200 is a high-quality coffee maker that deserves proper care; Daily cleaning is a key part of that care, ensuring it remains in excellent condition. By cleaning your machine every day, you’ll prevent issues and maintain its performance. It’s a small effort that makes a big difference. Keep your DCC-3200 clean and it will continue to brew amazing coffee for years to come. Daily cleaning is an essential part of maintaining your coffee maker’s health and performance. Stay
6.2 Descaling the Coffee Maker
Descaling the Cuisinart DCC-3200 is essential to remove mineral buildup from water, which can affect performance and flavor. Mix a solution of equal parts white vinegar and water in the reservoir. Run a full brewing cycle, allowing the solution to flow through the machine. Repeat this process once more to ensure thorough cleaning. After descaling, rinse the machine by running two cycles with fresh water to remove any vinegar taste. For severe mineral deposits, you may need to repeat the process. Descaling should be done every 3-6 months, depending on water hardness; Always avoid using harsh chemicals, as they can damage the machine. Regular descaling ensures optimal performance and prevents clogs. This maintenance step is crucial for extending the lifespan of your coffee maker and maintaining its efficiency. By descaling regularly, you’ll keep your DCC-3200 in great working condition and ensure it continues to deliver delicious coffee.
6.3 Replacing the Water Filter
To replace the water filter in your Cuisinart DCC-3200, start by locating the water reservoir, typically found on the side of the coffee maker. Open the reservoir lid to access the filter compartment. Remove the old charcoal filter and dispose of it properly. Take the new filter, ensuring it’s compatible with the DCC-3200 model, and insert it into the designated slot. Secure it in place according to the manufacturer’s instructions, which may involve a clip or holder. After installation, rinse the new filter by running a few cycles of fresh water through the machine to eliminate any loose charcoal particles. Replace the filter every 1-2 months, or as recommended by the user manual, to maintain water quality and machine performance. Using the correct replacement filters is crucial for proper function and to prevent any potential damage. Regular filter replacement ensures optimal taste and longevity of your coffee maker.
Troubleshooting Common Issues
Address common problems like coffee not brewing, bad taste, or machine malfunctions. Refer to the manual for solutions, such as descaling or resetting the coffee maker.
7.1 Coffee Not Brewing
If your Cuisinart DCC-3200 isn’t brewing coffee, check the power switch and ensure it’s properly plugged in. Verify the water reservoir is filled and the filter is correctly installed. If issues persist, clean the machine thoroughly, descale if necessary, and ensure all parts are aligned properly. Refer to the manual for detailed troubleshooting steps to resolve the issue effectively and resume brewing your favorite coffee seamlessly.
7.2 Coffee Tasting Bad
If your coffee tastes unpleasant, ensure the charcoal water filter is fresh and properly installed to eliminate chlorine and impurities. Check the coffee-to-water ratio and adjust to your preference. Old or low-quality coffee beans can also affect flavor. Regularly clean and descale the machine to prevent mineral buildup, which can alter taste. Refer to the manual for descaling instructions and maintenance tips to restore your coffee’s optimal flavor and aroma.
7.3 Machine Not Turning On
If the machine fails to turn on, first ensure it is properly plugged into a working electrical outlet. Check the power cord for any visible damage or tangles. Verify that the outlet is functioning by plugging in another device. If using a GFCI outlet, ensure it has not tripped. Press the power button firmly to confirm it is engaged. If the issue persists, unplug the machine, wait 30 seconds, and plug it back in. Consult the troubleshooting section of the manual for additional guidance or contact Cuisinart customer support for assistance.
Safety Precautions
Always follow electrical safety guidelines, avoid hot surfaces, and keep the machine out of children’s reach to prevent accidents and ensure safe operation.
8.1 Electrical Safety
For electrical safety, always read the instruction manual carefully before use. Avoid exposing the coffee maker to water or moisture, as this can cause electric shock. Keep the machine away from children and ensure the cord is not damaged. Never immerse the coffee maker in water, and avoid using it near water sources. Place the coffee maker on a stable, heat-resistant surface. Do not use damaged cords or plugs, as this can increase the risk of electrical hazards. Always unplug the coffee maker when not in use or during cleaning. Follow these precautions to ensure safe and efficient operation.
8.2 Avoiding Burns
To avoid burns, exercise caution when handling hot components of the Cuisinart DCC-3200. Never touch the brew basket, carafe, or heating elements during or after brewing, as they become extremely hot. Use oven mitts or towels to handle the carafe. Keep children away from the coffee maker while it is in operation. Avoid steam from the machine, as it can cause burns. Always pour coffee carefully to prevent splashing. Ensure the machine is placed on a stable surface to avoid accidental tipping. Following these precautions will help prevent burns and ensure safe operation of your coffee maker.
8.3 Child Safety
To ensure child safety, keep the Cuisinart DCC-3200 out of children’s reach. Place it on a stable, elevated surface to prevent accidental tipping. Supervise children in the kitchen, as the machine’s hot surfaces and sharp edges can pose hazards. Avoid leaving the coffee maker unattended during operation. Teach children to stay away from the machine and never touch its hot parts. Secure any loose cords to prevent tripping or pulling the machine down. Always store the coffee maker and accessories in a safe location when not in use. This will help protect children from potential injuries.

Warranty and Support
Cuisinart offers a limited warranty for the DCC-3200, covering defects in materials and workmanship; For assistance, contact Cuisinart’s customer service or visit their official website for support resources.
9.1 Manufacturer Warranty
The Cuisinart DCC-3200 is backed by a limited warranty from the manufacturer, ensuring coverage for defects in materials and workmanship. The warranty period typically lasts for three years from the date of purchase. During this time, Cuisinart will repair or replace defective parts at no additional cost to the user. For warranty claims, users are advised to contact Cuisinart’s customer service team directly or refer to the provided warranty documentation. Proper registration and adherence to maintenance guidelines are recommended to maintain warranty validity. Full details can be found in the user manual or on the official Cuisinart website.