This manual provides comprehensive guidance for operating and maintaining the Zebra ZE500 printer, covering setup, maintenance, troubleshooting, and technical specifications to ensure optimal performance․
1․1 Overview of the Zebra ZE500 Printer
The Zebra ZE500 is a high-performance industrial printer designed for demanding environments․ It offers thermal transfer and direct thermal printing capabilities, with a maximum resolution of 300 x 300 DPI and a print speed of up to 254 mm/sec․ The printer supports a maximum print width of 168 mm and features various ports and interfaces for seamless connectivity․ Built for reliability and durability, the ZE500 is ideal for applications requiring consistent, high-quality label production in industrial settings․
1․2 Purpose of the Manual
This manual serves as a detailed guide for the Zebra ZE500 printer, providing essential information for installation, operation, and maintenance․ It ensures users can optimize printer performance and troubleshoot common issues effectively․ The manual covers technical specifications, compliance, and accessories, serving as a comprehensive resource for both novice and experienced users to maximize productivity and minimize downtime․
1․3 Where to Find the Manual Online
The Zebra ZE500 manual is available for free download on Zebra’s official website at www;zebra․com/manuals․ Users can access the PDF version, which includes detailed technical specifications, maintenance schedules, and troubleshooting guides․ Additionally, the manual can be found on various online platforms like ManualsLib and Manualzz, ensuring easy accessibility for all users seeking comprehensive guidance for their Zebra ZE500 printer․

Key Features of the Zebra ZE500
The Zebra ZE500 offers a maximum resolution of 300 dpi, print speeds up to 254 mm/sec, and a printing width of 168 mm, ensuring high-quality label production․
2;1 Maximum Resolution and Print Speed
The Zebra ZE500 delivers high-quality printing with a maximum resolution of 300 x 300 dpi․ It achieves impressive print speeds of up to 254 mm per second, making it ideal for demanding environments requiring rapid label production․ This combination ensures sharp text, clear barcodes, and vibrant graphics, meeting the needs of various industrial applications․ The printer’s performance is optimized for efficiency, allowing businesses to maintain high productivity without compromising on print quality․
2․2 Print Technology and Maximum Printing Width
The Zebra ZE500 utilizes advanced thermal transfer and direct thermal printing technologies, ensuring high-quality labels․ It supports a maximum printing width of 168 mm, making it suitable for a variety of label sizes․ The printer’s robust design and precise print mechanisms enable consistent output, while its flexible print technologies cater to different material requirements․ This versatility ensures the ZE500 meets the demands of industrial and commercial printing environments, delivering reliable performance for diverse labeling needs․
2․3 Ports and Interfaces
The Zebra ZE500 is equipped with a range of ports and interfaces to ensure seamless connectivity․ It features USB, Ethernet, and serial ports, enabling easy integration with various systems․ Additionally, optional wireless connectivity options are available, enhancing flexibility for different network environments․ These ports support high-speed data transfer, ensuring efficient communication between the printer and connected devices․ The comprehensive interface options make the ZE500 adaptable to diverse operational needs, from industrial settings to office environments, providing reliable and consistent performance across all connections․

Installation and Setup
This section guides you through the process of unpacking, installing, and setting up the Zebra ZE500 printer, ensuring a smooth and efficient deployment in your environment․
3․1 Unpacking and Physical Installation
Carefully unpack the Zebra ZE500 printer, ensuring all components are included and undamaged․ Place the printer on a flat, stable surface in a well-ventilated area․ Remove all packaging materials and protective covers․ Connect the power cord and ensure the printer is placed in an environment with recommended temperature and humidity levels․ Follow the installation guide for aligning and securing the printer․ Avoid touching sensitive internal components to prevent damage․ Ensure proper grounding to prevent static electricity issues during operation․ Refer to the manual for specific handling instructions to avoid voiding the warranty․ Proper installation ensures optimal performance and longevity․
3․2 Preparing the Site for Installation
Ensure the installation site is clean, dry, and free from dust․ Choose a stable, flat surface with good ventilation․ Maintain a temperature range of 10°C to 35°C and humidity between 20% and 80%․ Ensure a reliable power supply with the correct voltage․ Ground the printer to prevent static interference․ Keep the area clear of obstructions for proper airflow and maintenance access․ Avoid placing near direct sunlight or heat sources․ Ensure all cables and connections are secure to prevent tripping hazards․ Proper site preparation ensures safe and efficient printer operation․
3․3 Connecting Ports and Interfaces
Connect the Zebra ZE500 to your system using the available ports, including USB, Ethernet, and serial interfaces․ Ensure all cables are securely attached to prevent loose connections․ For network setups, configure the Ethernet port with the appropriate IP address․ Use the provided software tools to verify connectivity․ Power on the printer after all connections are made․ If issues arise, restart the printer and check the connections․ Properly connected ports ensure reliable communication and optimal printer performance․ Refer to the manual for specific cable requirements and configuration details․

Maintenance and Troubleshooting
This section covers regular maintenance tasks, troubleshooting common issues, and tips for resolving errors to ensure optimal performance and extend the printer’s lifespan effectively․
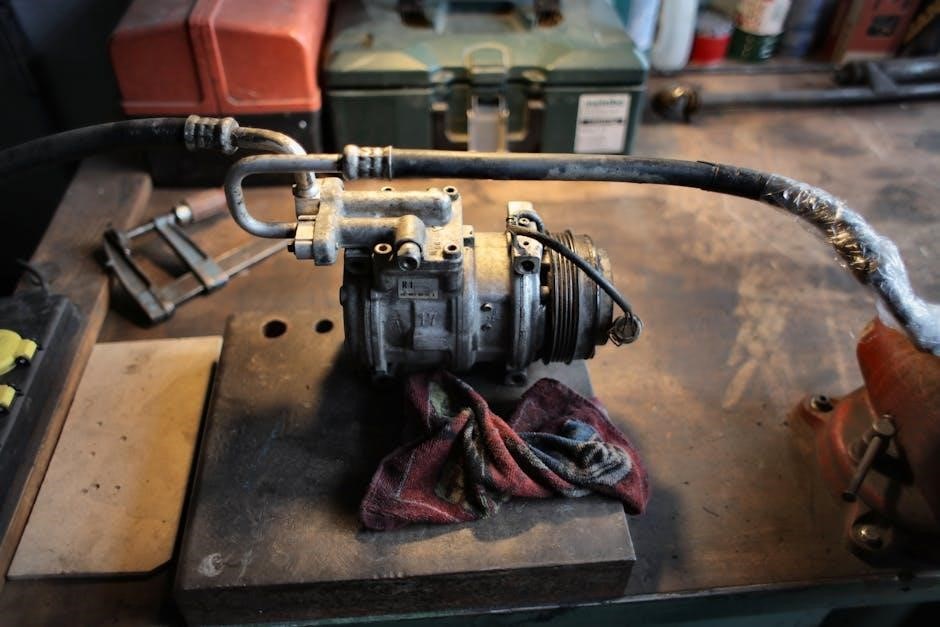
4․1 Recommended Spare Parts
Regularly stock essential spare parts like printheads, rollers, and label sensors to minimize downtime․ Genuine Zebra supplies ensure compatibility and optimal performance․ Refer to the maintenance manual for a detailed list of recommended parts and their replacement intervals․ Always check the printer’s documentation or contact Zebra support for specific part numbers and availability․ Using authentic parts helps maintain print quality and extends the printer’s lifespan․ Plan ahead by ordering critical components in advance to ensure uninterrupted operation․
4․2 Maintenance Schedule
Adhere to a structured maintenance schedule to ensure optimal performance and longevity of the Zebra ZE500․ Perform daily checks on printheads and sensors, and clean the printer interior weekly․ Replace worn parts like rollers and belts monthly․ Schedule deep cleaning every three months to remove dust and debris․ Follow the recommended maintenance intervals outlined in the manual to prevent unexpected downtime․ Regular upkeep ensures consistent print quality and extends the printer’s lifespan․ Always use genuine Zebra parts for replacements to maintain reliability and performance․
4․3 Common Issues and Solutions
- Poor Print Quality: Clean the printhead regularly to remove debris and ensure proper ink transfer․
- Paper Jams: Check for misaligned labels or obstructions; restart the printer and reload media correctly․
- Sensor Errors: Adjust sensor settings or clean sensors to ensure accurate label detection․
- Connection Issues: Verify cable connections and restart both the printer and the connected device․
- Overheating: Ensure proper ventilation and avoid continuous operation without breaks․
Refer to the manual for detailed troubleshooting steps to resolve these issues promptly and maintain optimal performance․

Technical Specifications
The Zebra ZE500 features a maximum resolution of 300 x 300 DPI, a print speed of up to 254 mm/sec, and a maximum print width of 168 mm․
5․1 Maximum Roll Diameter for Labels
The Zebra ZE500 supports label rolls with a maximum outer diameter of 8 inches (203․2 mm)․ This ensures compatibility with standard label sizes and materials, optimizing printing efficiency and media handling․ Proper roll sizing is crucial for maintaining print quality and preventing operational issues․ Always use rolls within the specified diameter range to ensure reliable performance and extend the printer’s lifespan․ The printer accommodates various label types, including thermal transfer and direct thermal labels, with core sizes of 1 inch (25․4 mm) or 3 inches (76․2 mm)․
5․2 Sensor Type Settings
The Zebra ZE500 features adjustable sensor type settings to optimize label detection․ The printer supports both transmissive and reflective sensors, enabling accurate detection of various label types and sizes․ Proper sensor configuration ensures precise label alignment and printing․ Users can select sensor settings through the printer’s control panel or Zebra’s software tools․ Incorrect sensor settings may lead to misalignment or label detection errors, so it’s crucial to configure them according to the media being used․ This ensures reliable operation and high-quality printing results․
5․3 Compliance with Directives and Standards
The Zebra ZE500 complies with applicable directives and standards for Information Technology Equipment (ITE), ensuring safe and reliable operation․ It adheres to regulations such as 2004/108/EC for electromagnetic compatibility and other relevant standards; The printer’s design and functionality meet stringent requirements for use in industrial environments․ Proper installation and operation, as outlined in the manual, are essential to maintain compliance․ This ensures the printer operates within legal and safety guidelines, providing users with a durable and environmentally responsible solution for their labeling needs․
User Guides and Documentation
Find the Zebra ZE500 manual online, offering detailed instructions, quick reference guides, and RFID programming resources․ These materials help users understand and utilize their printer effectively․
6․1 Downloading the PDF Manual
The Zebra ZE500 manual is available for download as a PDF from the official Zebra website or trusted sources like ManualsLib․ The manual is comprehensive, covering installation, maintenance, troubleshooting, and technical specifications․ It includes detailed guides for thermal transfer and direct thermal printing, as well as compliance information․ The PDF format ensures easy access and portability, allowing users to reference the guide on any device․ Ensure to download from verified sources to avoid unauthorized content and maintain printer performance with genuine Zebra supplies․
6․2 Quick Reference Guide
The Quick Reference Guide for the Zebra ZE500 provides a concise overview of essential operations, including loading media, configuring settings, and troubleshooting common issues․ Designed for quick access, it highlights key features like thermal transfer labels, direct thermal printing, and sensor type settings․ The guide also directs users to the full manual for detailed instructions․ Available online or in the PDF manual, it serves as a handy resource for daily operations, ensuring users can efficiently utilize their printer without delving into extensive documentation․
6․3 RFID Programming Guide
The RFID Programming Guide provides detailed instructions for configuring and optimizing RFID settings on the Zebra ZE500 printer․ It covers key parameters, troubleshooting RFID-related issues, and ensuring compliance with industry standards․ This guide is essential for users integrating RFID technology into their printing operations․ Available as a separate PDF document, it complements the main manual and Quick Reference Guide, offering specialized insights for advanced functionality and seamless RFID integration․

Additional Resources
Zebra offers additional resources, including OneCare services, software downloads, and warranty information, to support optimal use and maintenance of the Zebra ZE500 printer․
7․1 Zebra OneCare Services
Zebra OneCare Services provide comprehensive support for the Zebra ZE500, enhancing printer uptime and reducing unplanned repair costs․ These services include extended warranty options, priority technical support, and on-site maintenance, ensuring minimal downtime․ Additionally, OneCare offers remote monitoring and proactive alerts to address potential issues before they impact operations․ This service agreement is designed to maximize productivity and protect your investment, offering tailored solutions to meet specific business needs․
7․2 Software and Driver Downloads
Zebra offers downloadable software and drivers for the ZE500, ensuring compatibility and optimal performance․ These resources are available on Zebra’s official website and include printer utilities, firmware updates, and device drivers․ Regular updates enhance functionality and address potential issues․ Users can access the latest versions to maintain peak performance and troubleshoot common problems․ Genuine Zebra software ensures seamless integration with your ZE500 printer, providing reliable operation and high-quality printing results․
7․3 Warranty Information
Zebra provides comprehensive warranty coverage for the ZE500, ensuring protection against defects in materials and workmanship․ The warranty period varies depending on the product and region, offering repair or replacement options․ For detailed terms, visit Zebra’s official website or refer to the product documentation․ Extended warranty options like Zebra OneCare can enhance coverage, reducing downtime and ensuring uninterrupted operation․ Genuine Zebra support guarantees peace of mind and maximizes the printer’s lifespan․
Printing and Media Handling
The ZE500 supports thermal transfer and direct thermal printing, ensuring high-quality labels․ Proper media handling and alignment are crucial for optimal print performance and durability․
8․1 Loading Ribbon and Media
Loading ribbon and media in the Zebra ZE500 is a straightforward process․ For thermal transfer printing, install the ribbon by lifting the printhead and aligning the ribbon core with the spindle; Ensure the ribbon is taut and properly seated․ For media, feed the labels through the printer, adjusting guides to fit the label width․ Secure the media roll firmly to prevent shifting․ Always use genuine Zebra supplies for optimal performance․ Proper alignment ensures high-quality prints and extends printer lifespan․
8․2 Thermal Transfer Labels
Thermal transfer labels require a ribbon to produce images and are ideal for high-quality, durable printing․ They are suitable for applications needing long-lasting images, such as industrial labels and tags․ Use genuine Zebra supplies to ensure compatibility and optimal print quality․ The labels should be loaded correctly, with the printable side facing the printhead․ Proper alignment and tension are crucial to avoid misprints and damage․ Always refer to the Zebra ZE500 manual for specific guidelines on handling and loading thermal transfer labels for best results․
8․3 Direct Thermal Printing
Direct thermal printing uses heat to create images on heat-sensitive labels, eliminating the need for ribbons․ This method is cost-effective for short-term applications like shipping labels and receipts․ The Zebra ZE500 supports direct thermal printing with compatible labels, ensuring crisp and readable text․ Labels must be heat-sensitive and properly aligned to avoid damage․ Direct thermal labels are durable but may fade over time when exposed to sunlight or heat․ Always use genuine Zebra supplies for optimal print quality and printer performance․

Compliance and Regulatory Information
Zebra ZE500-4 and ZE500-6 comply with applicable directives and standards for ITE, ensuring safe and regulated operation in various environments, as detailed in the declaration of conformity․
9․1 Declaration of Conformity
Zebra Technologies Corporation declares that the ZE500-4 and ZE500-6 models comply with applicable directives and standards for ITE, including EMC Directive 2004/108/EC․ This declaration ensures the printer operates safely and efficiently, adhering to regulatory requirements․ The full declaration is provided in the manual, confirming compliance with environmental and safety standards․ Users can refer to the official Zebra website for the complete document, ensuring adherence to all legal and operational guidelines․
9․2 Applicable Directives and Standards
The Zebra ZE500-4 and ZE500-6 comply with Directive 2004/108/EC and ITE standards for heavy industry environments․ They meet essential safety and environmental regulations, ensuring reliable operation․ Detailed compliance information is available on Zebra’s official website and in the provided manuals for further reference․
9․4 Proprietary Information
This manual contains proprietary information of Zebra Technologies Corporation and its subsidiaries․ It is intended solely for the use of parties operating and maintaining the Zebra ZE500 printer․ Reproduction, distribution, or unauthorized use of this information without prior written consent is strictly prohibited․ All product names and numbers are trademarks of Zebra Technologies, emphasizing the exclusive rights to the content and technology provided․

Accessories and Supplies
Explore genuine Zebra supplies and recommended parts for the ZE500, ensuring optimal performance and compatibility with your print engine, including ribbons, labels, and maintenance kits․
10․1 Genuine Zebra Supplies
Genuine Zebra supplies are designed to ensure optimal performance and compatibility with your Zebra ZE500 printer․ These high-quality products, including thermal transfer ribbons, labels, and printheads, are engineered to meet strict Zebra standards, guaranteeing reliability and longevity․ Using genuine supplies prevents damage to your printer and ensures consistent, high-quality output․ They are available through authorized Zebra distributors and online retailers, with detailed product information accessible via the Zebra website․ Always choose genuine Zebra supplies to maintain your printer’s warranty and performance․
10․2 Recommended Print Engine Parts
For optimal performance, use genuine Zebra print engine parts, including printheads, rollers, and sensors, designed specifically for the Zebra ZE500․ These parts ensure compatibility, durability, and consistent print quality․ Regularly replacing worn components, such as the printhead or pinch roller, maintains your printer’s efficiency․ Refer to the Zebra website for a detailed list of recommended spare parts and maintenance schedules․ Genuine parts are available through authorized distributors to ensure warranty compliance and extend your printer’s lifespan․