The Norwegian Sun Deck Plan PDF offers a comprehensive layout of the ship‚ detailing staterooms‚ dining venues‚ pools‚ and entertainment options‚ helping passengers navigate effortlessly.
1.1 Overview of Norwegian Sun
Norwegian Sun‚ part of the Sun-Class fleet‚ is a 2000-built cruise ship last refurbished in 2018. With a capacity for 1‚936 passengers and 910 crew‚ it features 968 staterooms across 12 decks. The ship offers 16 dining options‚ 12 bars‚ two main pools‚ and a spa. Known for Freestyle Cruising‚ it provides flexibility in dining and entertainment. Family-friendly amenities include kids’ pools and youth centers‚ while adults can enjoy casinos‚ lounges‚ and sports facilities. Its deck plan PDF highlights wheelchair accessibility‚ ensuring inclusivity for all passengers.
1.2 Importance of Deck Plans for Cruise Passengers
Deck plans are essential for passengers to navigate the Norwegian Sun seamlessly. They provide a detailed layout of facilities‚ helping passengers locate dining venues‚ pools‚ and entertainment. The PDF format allows easy downloading and printing‚ ensuring accessibility. Symbols on the plan highlight wheelchair-accessible cabins and other key features. Passengers can use the deck plan to plan their day‚ whether relaxing by the pool or exploring recreational activities. It also aids in selecting the ideal cabin‚ ensuring a comfortable and enjoyable cruise experience tailored to individual preferences.
1.3 What to Expect in the Norwegian Sun Deck Plan PDF
The Norwegian Sun Deck Plan PDF offers a detailed overview of the ship’s layout‚ featuring 16 dining options‚ 12 bars‚ and various recreational facilities. It highlights stateroom categories‚ including family-friendly accommodations and accessible cabins. The PDF includes deck-by-deck breakdowns‚ showcasing pools‚ spas‚ fitness centers‚ and entertainment venues. passengers can explore public areas like the Pinnacle Lounge and sports facilities. Symbols indicate special features‚ such as wheelchair accessibility. This guide is a valuable resource for planning an unforgettable cruise‚ ensuring passengers make the most of their time on board the Norwegian Sun.

General Features of Norwegian Sun
Norwegian Sun features 16 dining options‚ 12 bars‚ and two main pools‚ along with a casino‚ spa‚ and fitness center. It offers 968 staterooms for 1936 passengers‚ served by 910 crew.
2.1 Ship Specifications and Capacity
The Norwegian Sun‚ built in 2000 and last refurbished in 2018‚ offers a capacity for 1‚936 passengers‚ with a maximum capacity of 2‚323. It features 968 staterooms.
The ship is served by 910 crew members‚ ensuring a high level of service. Staterooms range from Inside to Oceanview‚ Balcony‚ and Suites‚ with family-friendly options and accessibility features.
2.2 Class and Refurbishment Details
Norwegian Sun belongs to the Sun-class‚ alongside Norwegian Sky and Costa Victoria. It underwent a significant refurbishment in 2018 as part of Norwegian Edge‚ enhancing its modern appeal. The ship’s revitalization included upgrades to staterooms‚ dining venues‚ and public spaces‚ ensuring a refreshed and contemporary cruising experience. These updates reflect Norwegian’s commitment to delivering high-quality amenities and services‚ aligning with its Freestyle Cruising philosophy. The refurbishment has kept Norwegian Sun competitive‚ offering passengers an array of updated facilities and experiences.
2.3 Key Amenities and Facilities Onboard
Norwegian Sun features an impressive array of amenities‚ including 16 dining options‚ 12 bars and lounges‚ and two main pools with a kid’s pool. The ship also offers a casino‚ spa‚ and fitness center‚ catering to both relaxation and entertainment. Five hot tubs and a heated pool provide additional leisure options. Family-friendly facilities include kids and teen centers‚ ensuring fun for all ages. The onboard amenities reflect Norwegian’s commitment to providing a diverse and enjoyable experience‚ making the ship ideal for various types of cruisers.
Deck-by-Deck Breakdown
Explore Norwegian Sun’s 12 decks‚ featuring pools‚ dining‚ entertainment‚ and accommodations. Each deck is meticulously designed to offer a variety of activities and relaxation options for all passengers.
3.1 Deck 4: Layout and Facilities
Deck 4 on Norwegian Sun features a mix of public areas and staterooms‚ designed for convenience and accessibility. It includes the Splash Academy for kids‚ the Pinnacle Lounge‚ and a sushi bar. The Splashes children’s pool is also located here‚ along with hot tubs and shaded seating areas. Elevator access is available‚ except for Oslo Deck 6A‚ which is not reachable by elevator. Staterooms on this deck are ideal for families or passengers seeking proximity to key facilities‚ ensuring a seamless and enjoyable cruise experience.
3.2 Deck 5: Dining and Entertainment Options
Deck 5 on Norwegian Sun is a vibrant hub for dining and entertainment‚ offering a variety of options to suit every taste. The main dining room provides a formal dining experience‚ while specialty restaurants like the sushi bar and steakhouse offer unique culinary delights. Casual eateries‚ such as the buffet‚ cater to those seeking a relaxed meal. Entertainment options include live shows at the theater‚ a casino‚ and several lounges and bars. This deck is designed to keep passengers engaged and satisfied throughout their journey‚ blending fine dining with lively entertainment.
3.3 Deck 6: Recreation and Leisure Activities
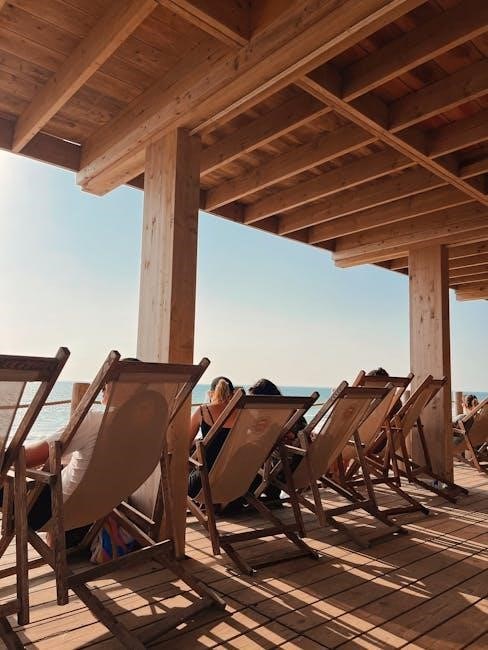
Deck 6 is dedicated to recreation and leisure‚ offering an array of activities for all ages. The main pool area features two pools and a children’s splash pool‚ surrounded by sun loungers and a bar. Nearby‚ the fitness center and spa provide opportunities for wellness and relaxation. Sports enthusiasts can enjoy tennis and basketball courts‚ while families can take advantage of kids’ and teens’ centers. With plenty of spaces to unwind‚ Deck 6 ensures that every passenger can find their perfect blend of activity and relaxation‚ making it a central hub for onboard enjoyment.
3.4 Deck 7: Accommodation and Suites
Deck 7 is primarily dedicated to passenger accommodations‚ offering a wide range of staterooms to suit every preference. From cozy inside cabins to spacious oceanview and balcony staterooms‚ Deck 7 provides comfortable lodging options. Family-friendly staterooms are also available‚ featuring additional bedding for children. Suites on this deck offer enhanced amenities and luxurious living spaces. All cabins are equipped with modern conveniences‚ including TVs‚ safes‚ and climate control. Deck 7 is centrally located‚ ensuring easy access to dining‚ entertainment‚ and recreational facilities‚ making it an ideal choice for passengers seeking both comfort and convenience during their voyage.
3.5 Deck 8: Balcony Staterooms and Public Areas
Deck 8 features an array of balcony staterooms‚ offering stunning ocean views and private outdoor spaces perfect for relaxation. This deck also boasts public areas designed for guest enjoyment‚ including lounges and recreational spaces. Passengers can unwind in the fresh sea air or take in panoramic vistas from the deck’s vantage points. Additionally‚ Deck 8 provides convenient access to key ship amenities‚ making it a popular choice for travelers seeking a blend of privacy and accessibility during their cruise experience. The layout ensures a seamless transition between personal and communal spaces‚ enhancing overall comfort and enjoyment.
3.6 Deck 9: Pools‚ Bars‚ and Lounges
Deck 9 is a hub for relaxation and entertainment‚ featuring two main pools and a kid’s pool‚ perfect for families. The deck is complemented by multiple hot tubs‚ offering a serene spot to unwind. Additionally‚ passengers can enjoy a variety of bars and lounges‚ including the Pinnacle Lounge and Sushi Bar‚ which provide refreshing cocktails and vibrant atmospheres. This deck is designed to cater to all tastes‚ whether you’re looking to soak up the sun‚ enjoy a drink‚ or simply take in the breathtaking ocean views. It’s a central spot for socializing and leisure‚ making it a favorite among cruisers.
3.7 Deck 10: SPA‚ Fitness Center‚ and More
Deck 10 is dedicated to wellness and relaxation‚ featuring a state-of-the-art Spa and Fitness Center. The Spa offers a wide range of treatments‚ including massages‚ facials‚ and body wraps‚ while the Fitness Center is equipped with modern workout equipment and offers fitness classes. Additionally‚ Deck 10 includes a heated pool and several hot tubs‚ providing a serene environment for passengers to unwind. The deck also boasts luxurious amenities‚ making it a perfect spot for those seeking pampering and rejuvenation during their voyage.
3.8 Deck 11: Sports and Recreational Facilities
Deck 11 is a hub for active passengers‚ offering a variety of sports and recreational facilities. It features a basketball court‚ tennis court‚ and mini-golf course‚ perfect for friendly competitions or casual play. Additionally‚ the deck includes a jogging track and a sunbathing area with loungers‚ offering stunning ocean views. The sports facilities cater to all ages‚ ensuring there’s something for everyone to enjoy and stay active while onboard. This deck is ideal for those looking to combine fun‚ fitness‚ and relaxation during their cruise.
3.9 Deck 12: Observation Areas and Entertainment
Deck 12 offers breathtaking observation areas where passengers can enjoy panoramic ocean views‚ perfect for relaxation or photography. Entertainment options include a vibrant theater hosting live shows and performances‚ as well as a casino for those eager to try their luck. There are also bars and lounges where guests can unwind with cocktails while taking in the scenery. This deck is designed to provide a mix of entertainment and tranquility‚ making it a focal point for both leisure and enjoyment during your Norwegian Sun cruise experience.
Stateroom Categories and Amenities
Norwegian Sun offers diverse stateroom categories‚ including Inside‚ Oceanview‚ Balcony‚ and Suites‚ each featuring modern amenities for comfort and relaxation during your voyage.
4.1 Types of Cabins: Inside‚ Oceanview‚ Balcony‚ and Suites
The Norwegian Sun offers a variety of cabin types to suit every preference. Inside cabins provide cozy‚ budget-friendly accommodations with all essential amenities. Oceanview cabins feature large windows offering stunning sea views. Balcony staterooms allow guests to enjoy private outdoor spaces with breathtaking vistas. For luxury seekers‚ suites offer expansive living areas‚ exclusive amenities‚ and premium services. Each cabin category is designed to ensure a comfortable and memorable stay aboard the Norwegian Sun.
4.2 Family-Friendly Accommodations
Norwegian Sun provides family-friendly accommodations designed for comfort and convenience. Family staterooms are spacious‚ accommodating up to five guests‚ with additional bedding options. These staterooms are strategically located near children’s facilities‚ ensuring easy access to kids’ clubs and recreational areas. Amenities include televisions‚ refrigerators‚ and ample storage‚ catering to families’ needs. The ship also offers panoramic oceanview and balcony options for families‚ providing stunning views while maintaining a home-away-from-home atmosphere. These accommodations ensure a delightful experience for families of all sizes.
4.3 Accessibility Features for Disabled Passengers
Norwegian Sun offers wheelchair-accessible staterooms with amenities tailored for disabled passengers. These cabins feature wider doorways‚ roll-in showers‚ and grab bars for added convenience. The ship also provides hearing-impaired staterooms equipped with special alert systems. Public areas‚ including pools and theaters‚ are designed to be accessible‚ ensuring all guests can enjoy the ship’s facilities. Norwegian Cruise Line is committed to inclusivity‚ offering a welcoming environment for passengers with disabilities. For detailed accessibility information‚ guests are encouraged to contact NCL directly to plan their accommodations and onboard experience seamlessly.

Dining and Entertainment Options
Norwegian Sun offers 16 dining options‚ including specialty restaurants and casual eateries‚ along with 12 bars and lounges. Entertainment facilities like theaters‚ casinos‚ and nightclubs ensure vibrant nightlife and live shows.
5.1 Dining Venues: Restaurants‚ Cafes‚ and Specialty Dining
Norwegian Sun features a diverse range of dining venues‚ including fine dining restaurants‚ casual cafes‚ and specialty eateries. Guests can enjoy a variety of cuisines‚ from gourmet seafood to Italian‚ steak‚ and Asian fusion. Specialty dining options include sushi bars‚ tapas restaurants‚ and authentic French bistros. The ship also offers buffet-style meals and poolside snack bars for convenient dining. With over 16 dining options‚ passengers have endless choices to satisfy their cravings‚ ensuring a culinary experience tailored to every taste and preference during their voyage.
5.2 Bars and Lounges: Cocktail Bars‚ Pubs‚ and Nightclubs
Norwegian Sun boasts an array of vibrant bars and lounges‚ offering something for every taste. From sophisticated cocktail bars like the Pinnacle Lounge to lively pubs such as the Sports Bar‚ guests can enjoy a wide range of beverages. The ship also features nightclubs like Dazzles‚ where passengers can dance the night away. Additionally‚ themed venues and specialty bars‚ such as the Sushi Bar‚ provide unique experiences. With over 12 options‚ the bars and lounges on Norwegian Sun cater to diverse preferences‚ ensuring a lively and memorable nightlife experience aboard the ship.
5.3 Entertainment Facilities: Theaters‚ Casinos‚ and Nightlife
Norwegian Sun offers a diverse range of entertainment facilities to cater to all preferences. The ship features state-of-the-art theaters hosting live performances‚ comedy shows‚ and musical productions. The casino provides a vibrant atmosphere with slots‚ poker‚ and table games‚ appealing to both casual and seasoned players. Nightlife thrives in venues like Dazzles nightclub and the Sun Club Casino‚ offering dancing and live music. These entertainment options ensure that passengers can enjoy a dynamic and engaging experience aboard the ship‚ making every evening memorable and fun-filled. The variety of activities guarantees something for everyone‚ from relaxation to exhilaration.
Recreational Activities and Facilities
Norwegian Sun offers pools‚ hot tubs‚ a fitness center‚ spa‚ and sports facilities like basketball and tennis courts‚ ensuring plenty of options for relaxation and active fun.
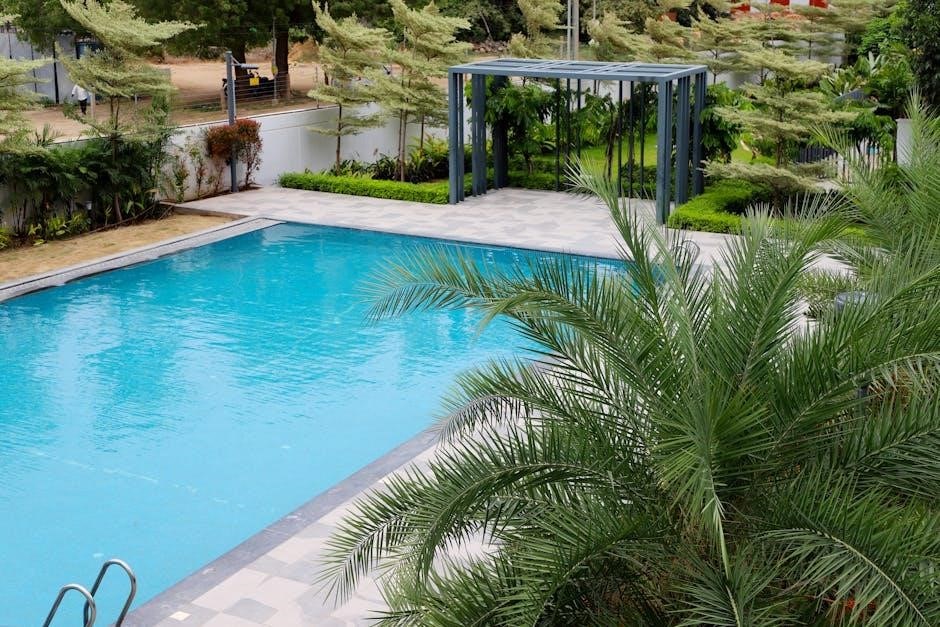
6.1 Pools and Hot Tubs
Norwegian Sun features two main pools and a children’s pool‚ perfect for family fun. Several hot tubs are strategically located across the decks‚ offering relaxation with stunning ocean views. The pools are surrounded by sun loungers‚ ideal for soaking up the sun. The children’s pool area is designed with splash pads and shallow waters‚ ensuring kids have a delightful time. Additionally‚ some hot tubs are heated for year-round comfort‚ providing a serene spot to unwind after a day of activities. These amenities cater to both relaxation and recreation‚ making them a highlight of the ship.
6.2 Fitness Center and Spa Services
Norwegian Sun’s fitness center is fully equipped with modern gym equipment‚ free weights‚ and cardio machines. The spa offers a range of treatments‚ including massages‚ facials‚ and body wraps. The thermal suite features saunas‚ steam rooms‚ and heated loungers for relaxation. Personal training sessions and group fitness classes‚ like yoga and Pilates‚ are available. The spa also provides beauty services‚ such as hairstyling and manicures. These facilities cater to guests seeking wellness and pampering‚ ensuring a rejuvenating experience during their cruise.
6.3 Sports Facilities: Basketball‚ Tennis‚ and More
Norwegian Sun features an array of sports facilities to keep guests active. The ship boasts a basketball court and tennis court‚ perfect for friendly matches or competitive play. Additionally‚ there are mini-golf courses and shuffleboard areas for casual fun. Jogging tracks and recreational spaces are available for those who prefer individual activities. These amenities ensure that passengers can stay fit and entertained while at sea. The sports facilities cater to all ages and skill levels‚ making them a great way to enjoy the outdoors and connect with fellow travelers during the voyage.
6.4 Kids and Teen Centers
Norwegian Sun offers dedicated spaces for younger passengers‚ ensuring family-friendly entertainment. The Kids’ Aqua Park and Splash Academy provide fun activities for children‚ while teen centers like Entourage cater to older kids with games and social spaces. These areas are designed to keep kids engaged and active‚ offering age-specific programs and supervision. Parents can enjoy peace of mind knowing their children are entertained in safe‚ well-equipped facilities. The ship’s focus on family fun makes it an excellent choice for cruises with children‚ blending relaxation with youthful adventure.
Downloading the Norwegian Sun Deck Plan PDF
The Norwegian Sun Deck Plan PDF can be downloaded from official sources like NCL’s website‚ allowing passengers to explore the ship’s layout and plan their cruise efficiently.
7.1 Sources for the Official Deck Plan PDF
The official Norwegian Sun Deck Plan PDF is available on Norwegian Cruise Line’s (NCL) website and trusted travel platforms like CruiseDeckPlans.com. These sources provide accurate‚ up-to-date layouts‚ ensuring passengers can explore the ship’s structure‚ cabin locations‚ and amenities in detail. The PDF includes deck-by-deck breakdowns‚ stateroom categories‚ and public area locations‚ making it an essential tool for planning. While third-party sites offer convenience‚ verifying with NCL ensures the most current information. Downloading from these sources guarantees access to a reliable and comprehensive guide for your cruise experience.
7.2 How to Use the Deck Plan for Planning Your Cruise
Using the Norwegian Sun Deck Plan PDF enhances cruise planning by allowing passengers to familiarize themselves with the ship’s layout. Identify stateroom locations‚ proximity to amenities‚ and dining options. Plan dining reservations and entertainment schedules by reviewing venue positions. Locate pools‚ spas‚ and recreational areas for leisure activities. The deck plan also helps in navigating efficiently during the cruise‚ ensuring no key experiences are missed. By understanding the ship’s structure beforehand‚ passengers can optimize their time and make informed decisions for a seamless and enjoyable journey. This tool is indispensable for first-time cruisers and seasoned travelers alike.

Comparisons with Sister Ships
The Norwegian Sun belongs to the Sun-class‚ alongside Norwegian Sky and Costa Victoria. While sharing similar features‚ Norwegian Sun boasts unique amenities and layout distinctions‚ enhancing its appeal.
8.1 Differences Between Norwegian Sun and Norwegian Sky
While both Norwegian Sun and Norwegian Sky belong to the Sun-class‚ they differ in layout and public areas. Norwegian Sun features 16 dining options‚ 12 bars‚ and 2 main pools‚ whereas Norwegian Sky has a slightly varied configuration. The deck plans reveal distinct stateroom categories and entertainment venues‚ with Norwegian Sun offering unique amenities like the Pinnacle Lounge and Sushi Bar. Refurbishments have also introduced differences in cabin designs and accessibility features. These variations make each ship distinctive‚ catering to different passenger preferences while maintaining the Sun-class signature style.
8.2 Unique Features of Norwegian Sun
Norwegian Sun stands out with its 16 dining options‚ 12 bars‚ and 2 main pools‚ offering a vibrant cruise experience. Its deck plan highlights the Pinnacle Lounge and Sushi Bar‚ providing unique entertainment and dining. The ship also features a casino‚ spa‚ and fitness center‚ along with a variety of staterooms‚ including family-friendly and accessible accommodations. Its recent refurbishment has enhanced amenities‚ ensuring modern comforts while maintaining the classic Sun-class charm. These features make Norwegian Sun a popular choice for travelers seeking diverse activities and luxurious relaxation at sea‚ tailored to meet the needs of all passengers.
Future Plans and Refurbishments
Norwegian Sun is set for upcoming renovations to enhance amenities and modernize its deck layout‚ ensuring a refreshed experience for future cruises while maintaining its classic charm.
9.1 Upcoming Renovations and Enhancements
Norwegian Sun is preparing for significant upgrades to enhance passenger experience. The renovations will focus on modernizing staterooms‚ expanding dining options‚ and refreshing public spaces. Sustainability improvements‚ such as energy-efficient systems‚ are also planned. The ship’s deck layout may see adjustments to accommodate new amenities‚ ensuring a seamless blend of comfort and innovation. These enhancements aim to uphold Norwegian Sun’s reputation for delivering exceptional Freestyle Cruising experiences while catering to evolving passenger preferences and environmental standards.
9.2 Impact of Refurbishments on Deck Layout
Refurbishments will likely lead to a reconfigured deck layout‚ optimizing space for new amenities. Public areas may be redesigned to improve flow‚ while staterooms could see updated interiors. Recreational facilities‚ such as pools and lounges‚ might be enhanced or relocated. Accessibility features could also be expanded to better accommodate all passengers. While changes aim to modernize the ship‚ Norwegian Cruise Line ensures minimal disruption to the overall functionality and charm of the Norwegian Sun‚ maintaining its signature Freestyle Cruising experience.
The Norwegian Sun Deck Plan PDF offers a detailed guide to the ship’s layout‚ helping passengers explore its amenities and plan their cruise efficiently for an unforgettable journey and make the most of their time onboard.
10.1 Final Thoughts on the Norwegian Sun Deck Plan
The Norwegian Sun Deck Plan PDF is an invaluable resource for passengers‚ offering a clear and detailed overview of the ship’s layout. It ensures that travelers can navigate effortlessly‚ locate amenities‚ and plan their itinerary with confidence. By providing insights into stateroom categories‚ dining venues‚ recreational facilities‚ and entertainment options‚ the deck plan enhances the overall cruise experience. Its accessibility features‚ such as wheelchair-accessible staterooms‚ cater to a diverse range of passengers. Whether you’re seeking relaxation or adventure‚ the Norwegian Sun Deck Plan PDF is a comprehensive guide to making the most of your time onboard.
10.2 Tips for Making the Most of Your Cruise Experience
To maximize your time on Norwegian Sun‚ review the deck plan PDF to familiarize yourself with key locations like dining venues‚ pools‚ and entertainment hubs. Plan ahead by booking popular restaurants and shows early. Explore all 16 dining options and 12 bars to experience the ship’s culinary diversity. Don’t miss unique features like the spa‚ fitness center‚ and recreational activities. Utilize the ship’s app for real-time updates and reservations. Consider family-friendly accommodations and accessibility features if needed. Finally‚ take advantage of shore excursions to fully immerse yourself in your destination.