
Screw measurement is a fundamental process ensuring compatibility and functionality. It involves measuring diameter, thread count, and length to identify size accurately for proper application.
1.1 Importance of Accurate Screw Measurement
Accurate screw measurement is crucial for ensuring proper fitment, durability, and functionality. Incorrect measurements can lead to loose joints, stripped threads, or even structural failure. Precise sizing ensures compatibility with materials and tools, optimizing performance and safety. Using resources like screw gauge charts and thread pitch gauges helps prevent errors and guarantees reliability in construction, engineering, and DIY projects. The consequences of mismeasurement can be costly, making accurate screw measurement a foundational skill in any project.
1.2 Brief History of Screw Standards and Measurement
The standardization of screw measurements evolved significantly during the Industrial Revolution, driven by the need for interchangeable parts. Early screws were handmade, leading to inconsistent sizes. The introduction of the Unified Screw Thread Standard (USTS) in the late 19th century unified screw measurements in the U.S. Later, the ISO metric system emerged, providing a global standard. These systems ensured compatibility and simplified manufacturing, paving the way for modern screw measurement guides and tools that cater to both imperial and metric systems worldwide.
Understanding Screw Size Components
Screw size components include diameter, measured across the threads; threads per inch (TPI); and length from head to tip. Understanding these ensures proper fit and function.
2.1 Screw Diameter Measurement
Measuring screw diameter accurately is crucial for compatibility. Use a screw gauge or micrometer to measure across the outer threads. For metric screws, diameter is in millimeters, while imperial uses fractions or decimals. Ensure the measurement is precise, as slight variations can affect fit. Proper alignment of the tool with the screw threads is essential to avoid errors. This measurement helps in identifying the correct screw size for specific applications, ensuring reliability and performance in various projects.
2.2 Thread Count (Threads Per Inch ‒ TPI)
Thread count, or threads per inch (TPI), measures the density of screw threads. It is calculated by counting the number of threads within a one-inch span. Common TPI ranges from 6 to 32 for imperial screws and 0.5 to 3 mm for metric. Higher TPI indicates finer threads, offering better engagement in materials like metal, while lower TPI is suitable for wood. Accurate TPI measurement ensures proper fit and functionality, as mismatched threads can lead to assembly issues or structural weakness;
2.3 Screw Length Measurement
Screw length is measured from the top of the head to the tip for flat or countersunk screws. For round, pan, or hex heads, measure from just below the head to the tip. Accurate length measurement is critical to ensure proper fit and functionality. Using a screw chart or guide can help convert lengths between imperial and metric systems. Correct measurement prevents issues like insufficient hold or over-penetration, ensuring structural integrity and safety in applications.
2.4 Head Type Identification
Identifying the screw head type is crucial for application suitability. Common head types include flat, round, pan, and hex. Flat heads are countersunk, sitting flush with the material. Round heads are visible and often decorative. Pan heads are flat with a rounded top, suitable for general use. Hex heads provide high torque resistance. Measure from the top of the head to the tip for flat or countersunk screws, and just below the head for round or hex types. Correct identification ensures proper functionality and aesthetic appeal in various projects.
2.5 Drive Type Recognition
Recognizing the screw drive type is essential for tool compatibility and proper installation. Common drive types include Phillips, flathead, hex (Allen), Torx, and square (Robertson). Phillips screws have a cross-shaped slot, reducing cam-out. Flathead screws use a flat tool, ideal for low-torque applications. Hex drives require an Allen wrench, offering high torque. Torx drives feature a star shape, minimizing slippage. Square drives provide superior torque and resistance to stripping. Correct tool selection prevents damage and ensures efficient fastening.
2.6 Material and Coating Considerations
Material and coating are critical for screw performance and durability. Common materials include steel, stainless steel, brass, and plastics, each offering unique strength, corrosion resistance, and weight properties. Coatings like zinc, galvanized, chrome, or epoxy enhance protection against rust and environmental factors. Specialized coatings, such as nylon or ceramic, provide additional resistance to wear and chemicals. Matching the screw material and coating to the application ensures optimal performance, longevity, and compatibility with surrounding materials, preventing premature failure or degradation.

Imperial vs. Metric Screw Measurement Systems
Imperial and metric systems differ in screw measurements. Imperial uses inches for diameter and threads per inch (TPI), while metric uses millimeters and thread pitch (distance between threads).
3.1 Understanding Imperial Screw Sizes
Imperial screw sizes are measured in inches and defined by three main components: diameter, threads per inch (TPI), and length. The diameter determines the screw’s size, TPI specifies how closely threads are spaced, and length measures from the head to the tip. Commonly, smaller diameters are referred to by gauge numbers, where higher numbers indicate thicker screws. For example, a #8 screw is thicker than a #6. This system is widely used in the U.S. and ensures compatibility across various applications, making it essential for accurate hardware selection and assembly. Proper measurement ensures the right fit and functionality.
3.2 Understanding Metric Screw Sizes
Metric screw sizes are measured in millimeters and defined by diameter, pitch (thread spacing), and length. The diameter is indicated by an “M” followed by a number, e.g., M5, representing a 5mm diameter. Pitch is the distance between threads, commonly 0.5 to 2.0mm. Length is measured from the head to the tip. Metric screws are standardized globally, ensuring consistency across applications. Proper measurement is crucial for compatibility and functionality, especially in international projects. Using tools like micrometers ensures accurate sizing, avoiding assembly issues. This system is widely adopted for its clarity and precision, making it essential for modern manufacturing and engineering.
3.3 Conversion Between Imperial and Metric Systems
Converting between imperial and metric screw measurements involves using the 25.4 mm per inch factor. Multiply imperial measurements by 25.4 to get metric equivalents. For example, 1/4 inch equals 6.35 mm. Conversely, divide metric measurements by 25.4 for imperial sizes. Conversion charts are useful for quick comparisons, especially for standard sizes. While exact conversions exist, some sizes may require approximation. Precision is crucial for compatibility in engineering applications.
Screw Thread Standards
Screw thread standards ensure consistency and compatibility in manufacturing. The Unified (inch) and ISO metric systems are primary standards, with others like DIN and JIS also recognized globally.
4.1 Unified Screw Thread Standard (Inch System)
The Unified Screw Thread Standard, also known as the Inch System, is a widely used standard for screw thread dimensions in the United States. It specifies major diameter, pitch, and thread angle to ensure compatibility. This standard is crucial for manufacturing, as it ensures screws from different producers can work seamlessly together. The system categorizes screws by gauge size, threads per inch (TPI), and length, making it easy to identify and use. Proper adherence to this standard is essential for maintaining product quality and functionality in various applications.
4.2 ISO Metric Screw Thread Standard
The ISO Metric Screw Thread Standard is the international system for metric screw threads, defined by ISO 724. It specifies the major diameter, pitch, and thread angle, ensuring global compatibility. Unlike the Inch System, it uses millimeters for measurements. This standard is widely adopted in manufacturing, particularly in automotive and aerospace industries, to ensure parts are interchangeable. Its clear specifications make it essential for maintaining consistency and quality in international markets and production processes.
4.3 Other Regional Screw Thread Standards
Beyond ISO and Unified standards, various regions have their own screw thread specifications. For example, countries like Japan and Germany have developed standards tailored to their industrial needs. These regional standards may differ in thread pitch, angle, and diameter, ensuring compatibility within specific applications and local manufacturing practices. Adhering to these standards is crucial for maintaining product quality and functionality, especially in global supply chains where parts must meet diverse regulatory requirements and industry expectations.

Specialized Screw Types
Specialized screws include wood, metal, self-tapping, and machine screws, each designed for specific applications. Their unique features, like thread type and head design, cater to different materials and uses.
5.1 Wood Screws vs. Metal Screws
Wood screws and metal screws differ in design and application. Wood screws feature a coarse thread and sharp point for easy penetration into wood, reducing splitting risk. Metal screws have finer threads for a secure hold in metal materials. Wood screws often have larger diameters and lengths, while metal screws prioritize thread count for strength. Understanding these differences aids in selecting the right screw type for specific projects, ensuring optimal performance and material compatibility.
5.2 Self-Tapping Screws
Self-tapping screws are designed to create their own threads when driven into materials like plastic, metal, or wood. They feature a sharp point and a unique tip that eliminates the need for pre-drilling. Available in thread-cutting and thread-forming types, they offer versatility for various applications. ideal for materials lacking strong hold, self-tapping screws provide convenience and efficiency, making them popular in industries like electronics and automotive. Their design ensures secure fastening without additional preparation, saving time and effort in manufacturing and DIY projects alike.
5.3 Machine Screws
Machine screws are fasteners with uniform thread sizes, typically measured using numbers 0 to 14. They are designed for use in pre-tapped holes and are commonly found in machinery, electronics, and assemblies. Available in various materials like steel, stainless steel, or brass, they offer durability and corrosion resistance. Drive types include hex, Phillips, or flat, catering to different tools. Machine screws are essential for secure, precise connections in industrial and mechanical applications, ensuring reliability and strength in assembled components.
Tools for Screw Measurement
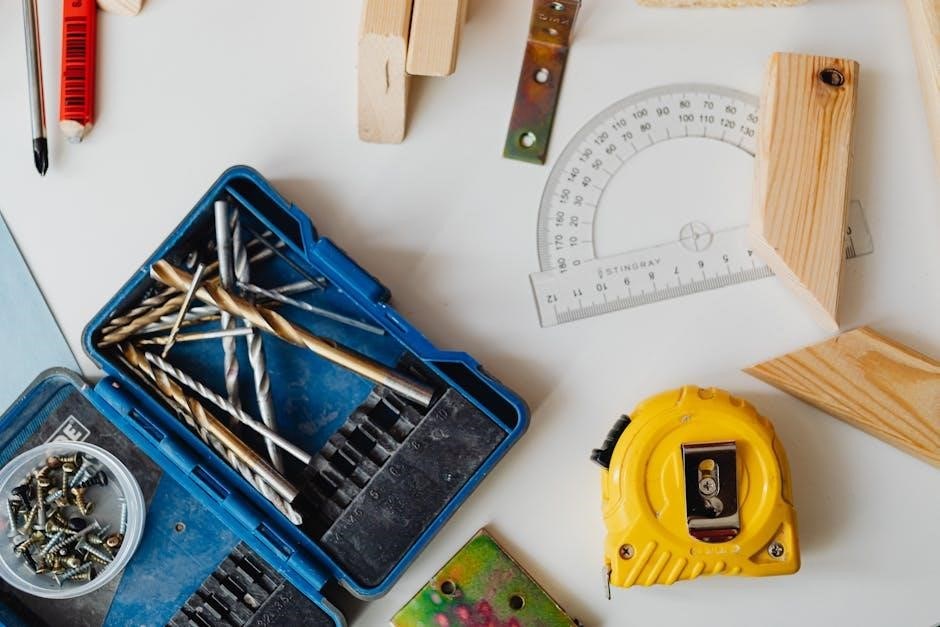
Tools for screw measurement include screw gauge charts, micrometers, and thread pitch gauges. These tools ensure accurate diameter, thread count, and length measurements, essential for proper screw identification and application.
6.1 Screw Gauge Chart
A screw gauge chart is a essential tool for accurately determining screw sizes. It helps convert measurements into standard gauge sizes, particularly useful for imperial system screws. The chart lists diameters and corresponding gauges, aiding in identifying screw sizes quickly. For example, a 1/16-inch screw corresponds to a gauge of 0. This tool is invaluable for both DIY enthusiasts and professionals, ensuring precise measurements and compatibility in various projects. Regular use enhances efficiency in screw selection and application across different materials and tasks.
6.2 Micrometer for Precision Measurement
A micrometer is a precision instrument used for accurate screw measurements. It measures the screw’s diameter with high accuracy, typically to 0.001 inches. Available in digital or mechanical versions, micrometers ensure precise readings for both imperial and metric screws. To measure, place the screw between the micrometer’s anvil and spindle, gently tighten, and record the reading. This tool is essential for professionals requiring exact measurements, ensuring compatibility and fitment in critical applications. Regular calibration is necessary to maintain accuracy and reliability in measurements.
6.3 Thread Pitch Gauge
A thread pitch gauge is a tool used to measure the distance between screw threads, known as the pitch. It consists of multiple blades with varying thread pitches, allowing users to identify the correct pitch by fitting the blade snugly into the threads. This tool is essential for ensuring compatibility between screws and threaded components. Proper use involves aligning the blade with the screw threads and checking for a smooth fit. Regularly using a pitch gauge helps prevent assembly errors and ensures accurate screw measurements. It is a must-have for professionals and DIYers alike, providing reliable results in both imperial and metric systems. Always store the gauge in a protective case to maintain its accuracy and longevity. Using a thread pitch gauge is a straightforward process that requires attention to detail to avoid measurement errors. It is particularly useful when working with precision machinery or in environments where exact thread specifications are critical. By incorporating a thread pitch gauge into your toolkit, you can ensure consistent and accurate screw measurements, reducing the risk of mismatches and improving overall project quality. This simple yet effective tool is indispensable for anyone working with screws and threaded fasteners, offering a quick and reliable way to determine thread pitch. Its compact design makes it easy to carry and use in various settings, from workshops to construction sites. Whether you’re a seasoned professional or a hobbyist, a thread pitch gauge is an essential asset for achieving precise and professional results in your projects. It complements other measurement tools, such as micrometers and screw gauges, by focusing specifically on thread pitch, a critical aspect of screw compatibility and functionality. By mastering the use of a thread pitch gauge, you can enhance your efficiency and accuracy when working with screws, ensuring that every project meets the highest standards of quality and performance. This tool is a testament to the importance of precision in measurement, providing a reliable solution for identifying thread pitch with ease and confidence. Its widespread use across industries underscores its versatility and effectiveness in addressing a fundamental aspect of screw measurement. As a result, it remains a cornerstone in the toolkit of anyone involved in manufacturing, engineering, or construction, where accurate screw specifications are paramount. The thread pitch gauge exemplifies the evolution of measurement tools, combining simplicity with precision to meet the demands of modern applications. Its enduring relevance highlights the importance of understanding and accurately measuring screw threads, a skill that is essential for achieving success in a wide range of projects. By investing in a high-quality thread pitch gauge, you invest in the success and longevity of your work, ensuring that every screw used meets the required specifications for optimal performance. This tool is a valuable resource for anyone seeking to improve their screw measurement techniques, offering a practical and efficient way to determine thread pitch with confidence and accuracy. Its continued use and development reflect the ongoing commitment to precision and excellence in industries where screw measurements are critical; In summary, a thread pitch gauge is an indispensable tool for anyone working with screws, providing a reliable and efficient way to measure thread pitch and ensure compatibility. Its importance cannot be overstated, as it directly impacts the quality and integrity of the final product. By incorporating a thread pitch gauge into your workflow, you can elevate your workmanship and achieve professional-grade results in every project. This tool is a shining example of how attention to detail and precise measurement can make a significant difference in the outcome of any task involving screws and threaded components. It is a testament to the power of precision and the importance of using the right tools for the job. With a thread pitch gauge, you can measure with confidence, knowing that your screws will fit perfectly and perform as intended. This level of accuracy is what sets professionals apart and ensures the success of their projects. In a world where precision matters, a thread pitch gauge is an essential ally, providing the accuracy needed to achieve exceptional results. Its role in screw measurement is irreplaceable, making it a vital component of any toolkit. Whether you’re working on a small DIY project or a large-scale industrial application, a thread pitch gauge is a tool you can rely on to deliver accurate and consistent results. Its simplicity belies its importance, as it addresses a critical aspect of screw compatibility that cannot be overlooked. By using a thread pitch gauge, you can avoid costly errors and ensure that your work meets the highest standards of quality and precision. This tool is a must-have for anyone serious about achieving professional-grade results in their projects, offering a practical solution to the challenge of accurate thread measurement. Its widespread adoption across various industries is a testament to its effectiveness and reliability. As you continue to refine your screw measurement skills, a thread pitch gauge will remain an essential tool in your arsenal, helping you achieve the precision and accuracy required for success. In conclusion, a thread pitch gauge is more than just a tool; it is a key to unlocking the full potential of your projects, ensuring that every screw used is measured with the utmost precision and care. Its importance cannot be overstated, as it plays a pivotal role in achieving the desired outcomes in your work. By mastering the use of a thread pitch gauge, you can take your screw measurement skills to the next level, delivering results that are nothing short of exceptional. This tool is a true asset for anyone committed to excellence in their craft, providing a reliable and efficient way to measure thread pitch with unparalleled accuracy. Its impact on the quality of your work will be evident, as it helps you achieve the perfect fit and functionality in every application. In the world of screw measurement, a thread pitch gauge is an indispensable ally, offering the precision and reliability needed to succeed in even the most demanding projects. Its continued use and appreciation reflect the enduring importance of accurate measurement in achieving professional-grade results; By incorporating a thread pitch gauge into your workflow, you can elevate your workmanship and ensure that every screw you use is measured with the highest degree of accuracy. This tool is a true testament to the power of precision and the importance of using the right tools for the job. With a thread pitch gauge, you can measure with confidence, knowing that your screws will fit perfectly and perform as intended. This level of accuracy is what sets professionals apart and ensures the success of their projects. In a world where precision matters, a thread pitch gauge is an essential ally, providing the accuracy needed to achieve exceptional results. Its role in screw measurement is irreplaceable, making it a vital component of any toolkit. Whether you’re working on a small DIY project or a large-scale industrial application, a thread pitch gauge is a tool you can rely on to deliver accurate and consistent results. Its simplicity belies its importance, as it addresses a critical aspect of screw compatibility that cannot be overlooked. By using a thread pitch gauge, you can avoid costly errors and ensure that your work meets the highest standards of quality and precision. This tool is a must-have for anyone serious about achieving professional-grade results in their projects, offering a practical solution to the challenge of accurate thread measurement. Its widespread adoption across various industries is a testament to its effectiveness and reliability. As you continue to refine your screw measurement skills, a thread pitch gauge will remain an essential tool in your arsenal, helping you achieve the precision and accuracy required for success. In conclusion, a thread pitch gauge is more than just a tool; it is a key to unlocking the full potential of your projects, ensuring that every screw used is measured with the utmost precision and care. Its importance cannot be overstated, as it plays a pivotal role in achieving the desired outcomes in your work. By mastering the use of a thread pitch gauge, you can take your screw measurement skills to the next level, delivering results that are nothing short of exceptional. This tool is a true asset for anyone committed to excellence in their craft, providing a reliable and efficient way to measure thread pitch with unparalleled accuracy. Its impact on the quality of your work will be evident, as it helps you achieve the perfect fit and functionality in every application. In the world of screw measurement, a thread pitch gauge is an indispensable ally, offering the precision and reliability needed to succeed in even the most demanding projects. Its continued use and appreciation reflect the enduring importance of accurate measurement in achieving professional-grade

Best Practices for Measuring Screws
Use a screw gauge or micrometer for precise diameter and pitch measurements. Count threads per inch accurately for size identification. Always measure from tip to head for length.
7.1 Measuring Screw Diameter
Measuring screw diameter accurately is crucial for identifying size and ensuring compatibility. Use a screw gauge chart or micrometer to measure the distance between outer threads. For precision, measure across the thread tips, ensuring the tool is perpendicular to the screw. Digital micrometers are ideal for small diameters, while screw gauges simplify quick measurements. Always measure in multiple locations to confirm consistency. Accurate diameter measurement prevents mismeasurement and ensures proper fit in applications. Regularly calibrate tools to maintain precision.
7.2 Counting Threads Per Inch
Counting threads per inch (TPI) determines the screw’s thread density. Use a thread pitch gauge by aligning the screw with the gauge’s marked spaces. Match the thread spacing to find TPI. For precise counting, measure over a set number of threads and divide by the distance. Alternatively, a micrometer can measure the distance between threads to calculate TPI. Ensure accuracy by measuring multiple thread spans to confirm consistency. Correct TPI measurement is vital for selecting compatible hardware and ensuring proper assembly performance.
7.3 Measuring Screw Length
Measuring screw length requires precision to ensure proper fitment. Use a ruler or caliper to measure from the top of the head to the tip for flat or countersunk screws. For round, pan, or hex heads, measure from just below the head to the tip. Ensure the screw is straight during measurement to avoid inaccuracies. Double-checking the measurement is essential for accuracy. This method ensures compatibility and functionality in various applications, from woodworking to machinery, where precise screw length is critical for performance and safety.
Screw Measurement Safety Tips
Handle small screws carefully to avoid loss or injury. Use protective eyewear when measuring to prevent debris from causing harm. Ensure tools are calibrated for accuracy.
8.1 Handling Small Screws Safely
Handling small screws requires care to prevent loss or injury. Use a well-lit workspace and magnetic tray to keep screws organized. Avoid handling screws near edges or fragile surfaces. Wear gloves if screws have sharp edges. Store screws in labeled containers to prevent mixing. Use tweezers for precise handling to reduce the risk of dropping. Keep work area clean to avoid misplacement. Ensure proper ventilation if using coatings or materials that emit fumes. Always maintain focus to prevent accidents during measurement or handling.
8.2 Avoiding Damage to Screw Threads
To prevent damage to screw threads, use proper techniques during measurement and handling. Always ensure the screw is clean and free from debris. Avoid using screwdrivers or tools that can slip and scratch the threads. Apply gentle pressure when tightening or loosening to prevent stripping. Use thread gauges or pitch gauges to verify compatibility without causing wear. Store screws in protective containers to avoid abrasion. Never overtighten, as this can deform the threads. Regularly inspect tools for damage to ensure they won’t harm the screws during use.
Common Mistakes in Screw Measurement
Common errors include misidentifying screw diameter, incorrectly counting threads per inch, and mismeasuring screw length, which can lead to compatibility issues and project delays if not addressed.
9.1 Misidentifying Screw Diameter
Misidentifying screw diameter is a common mistake that can lead to compatibility issues. Accurately measuring the distance between outer threads is crucial. Using improper tools or techniques often causes errors. Worn or damaged threads can make precise measurement challenging. Always use a screw gauge chart or micrometer for accuracy. Double-check measurements, especially when converting between imperial and metric systems. Incorrect diameter identification can result in screws that do not fit properly, potentially causing project failure or requiring costly corrections. Attention to detail is essential to avoid this mistake.
9.2 Incorrect Counting of Threads Per Inch
Incorrectly counting threads per inch (TPI) is a frequent error. It often occurs due to improper use of thread pitch gauges or miscounting over a measured distance. To avoid this, always measure a fixed distance, such as one inch, and count the threads within it. Using a thread pitch gauge can simplify the process by matching the thread spacing to a known standard. Misidentifying TPI can lead to selecting the wrong screw size, causing assembly issues or structural weaknesses. Ensure accuracy to maintain reliability and safety in applications. Proper technique prevents costly mistakes and ensures optimal performance.
9.3 Mismeasuring Screw Length
Mismeasuring screw length is a common oversight that can lead to poor fitment or structural issues. Always measure from the top of the head to the tip for flat screws or just under the head for rounded types. Using a ruler or caliper ensures accuracy. Misalignment or partial embedding can result from incorrect measurements, causing instability or damage. Double-checking the length against the application requirements is crucial for reliability and safety. Precision in measurement prevents costly rework and ensures optimal performance in all applications.
Accurate screw measurement ensures proper fitment and functionality. Use screw gauges and calipers for precision. Always double-check measurements and consult charts if unsure for reliable results.
10.1 Key Takeaways for Accurate Screw Measurement
Measuring screws accurately involves assessing diameter, thread count, and length. Use screw gauges for diameter and thread pitch, calipers for length, and charts for size verification. Ensure to measure from the screw’s tip to the head base for length, especially for flat or countersunk screws. Always reference standardized screw charts to confirm measurements and ensure compatibility with the intended application. Regularly check tools for calibration to maintain precision and avoid measurement errors.
10.2 Resources for Further Learning
For deeper understanding, explore ANSI/ASME standards like B1.1-1989 for thread specifications. Utilize screw measurement guides from reputable sources, such as those detailing imperial and metric conversions. Websites like Engineers Edge offer detailed charts and technical notes. Additionally, resources like the “Kreg Pocket Hole Jig” guide provide practical applications. Specialized suppliers, such as Nettlefolds, offer insights into vintage and specific screw types. These resources collectively enhance your knowledge of screw measurement and application.