Welcome to the Kenmore Mini Ultra Sewing Machine Manual! This guide provides essential instructions for setting up, operating, and maintaining your machine effectively.
1.1 Overview of the Manual’s Purpose and Structure
This manual is designed to guide users in understanding and utilizing the Kenmore Mini Ultra Sewing Machine effectively. It serves as a comprehensive resource, covering setup, operation, and maintenance. The manual is structured into logical sections, starting with an introduction, followed by key features, setup instructions, threading, bobbin winding, basic sewing operations, troubleshooting, maintenance, advanced techniques, and additional resources. Each section is detailed to ensure users can navigate the machine’s functions effortlessly. The purpose is to empower users with knowledge, enabling them to sew efficiently and resolve common issues. By following this structured approach, users can maximize their sewing experience and extend the machine’s lifespan. This manual is essential for both beginners and experienced sewists.
1.2 Important Safety Precautions
For safe operation of the Kenmore Mini Ultra Sewing Machine, follow these guidelines. Always unplug the machine when not in use or during maintenance. Keep loose clothing and long hair tied back to avoid entanglement. Never sew over fingers or operate the machine near children. Avoid sewing when fatigued or distracted. Use only genuine Kenmore parts and accessories to ensure compatibility and safety. Keep the machine on a stable, flat surface to prevent tipping. Regularly inspect the power cord and plug for damage. Do not attempt to sew inflammable materials or use the machine in hazardous environments. Adhere to these precautions to ensure a safe and enjoyable sewing experience.
Key Features of the Kenmore Mini Ultra Sewing Machine
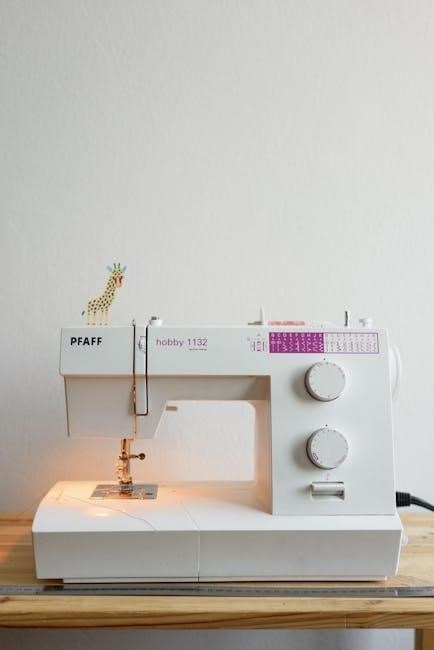
The Kenmore Mini Ultra Sewing Machine is compact, lightweight, and versatile, featuring a full rotary hook for smooth stitching. Its intuitive design is perfect for small tasks, ideal for both beginners and experienced sewists.
2.1 Mechanical Operation and Design
The Kenmore Mini Ultra Sewing Machine features a compact, lightweight design with a durable metal frame, ensuring stability during operation. It operates using a full rotary hook system, which provides smooth and consistent stitching. The machine includes a manual handwheel for easy control and a mechanical stitch selector, allowing users to choose between various stitch options. The presser foot and needle plate are designed for easy fabric handling, while the bobbin system is straightforward to wind and install. Its mechanical operation ensures reliability and simplicity, making it accessible for both beginners and experienced sewists. The machine’s small size makes it portable, perfect for small sewing projects and everyday use.
2.2 Available Stitch Options and Functions
The Kenmore Mini Ultra Sewing Machine offers a variety of stitch options to accommodate different sewing needs. It includes a straight stitch for basic sewing, a reverse stitch for reinforcing seams, and decorative stitches for embellishing fabrics. Additionally, the machine features a stretch stitch, ideal for sewing elastic or knitted materials. The stitch length and width are adjustable, allowing for precise control over your sewing projects. Other functions include a manual tension dial for threading and a bobbin winding system that ensures proper thread delivery. These features make the machine versatile for both simple and creative sewing tasks, catering to beginners and experienced sewists alike. Its compact design does not compromise on functionality, delivering reliable performance for various fabric types and projects.
Setting Up Your Kenmore Mini Ultra Sewing Machine
Unpack and inspect your machine, locate all parts, and familiarize yourself with its components. Follow the manual for proper setup to ensure smooth operation.
3.1 Unpacking and Initial Inspection
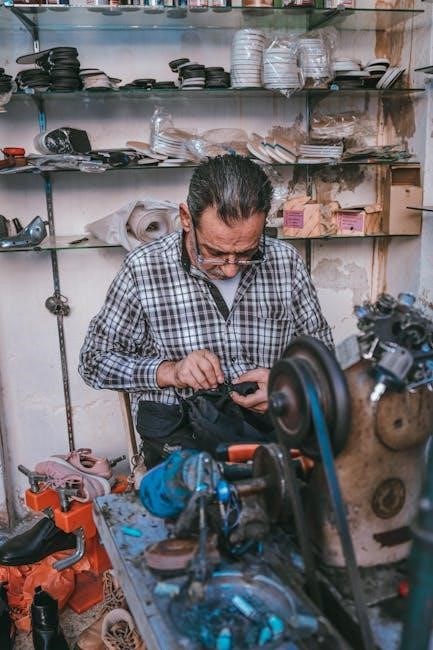
Begin by carefully unpacking your Kenmore Mini Ultra Sewing Machine from its box. Inspect the machine for any visible damage or scratches. Ensure all accessories, such as the bobbin winder, mini screwdriver, and rubber ring, are included. Familiarize yourself with the machine’s exterior, noting the location of the handwheel, stitch selector, and presser foot. Before use, check for loose parts or debris from shipping. Refer to the manual’s diagrams to identify each component accurately. This step ensures a smooth setup process and helps prevent potential issues during operation. Always handle the machine with care to maintain its functionality and longevity.
3.2 Locating and Identifying Machine Parts
Refer to your Kenmore Mini Ultra Sewing Machine Manual to identify key components. Locate the handwheel, used for manual control, and the stitch selector, which determines stitch patterns. The presser foot and needle plate are essential for fabric guidance. Find the bobbin winder and spool pins for threading. Identify the tension discs and take-up lever for thread adjustment. Familiarize yourself with the thread guide and winding spindle for proper setup. Understanding each part’s location and function ensures efficient operation. Use the manual’s diagrams to match labels with physical components for accurate identification and troubleshooting.
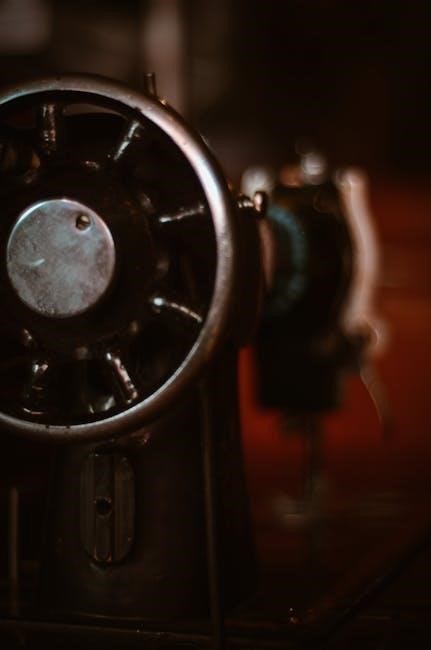
3.3 Handwheel and Stitch Selector Overview
The handwheel on the Kenmore Mini Ultra Sewing Machine allows manual control of the needle’s movement, ensuring precise stitching. Locate it on the machine’s right side. The stitch selector is a dial or button that lets you choose from various stitch patterns, such as straight, zigzag, or decorative options. Turn or press the selector to cycle through available stitches. Proper use of these components ensures smooth operation. Always refer to the manual for specific guidance on adjusting settings. Understanding how to use the handwheel and stitch selector is crucial for achieving desired results in your sewing projects. Familiarize yourself with their functions to enhance your sewing experience.
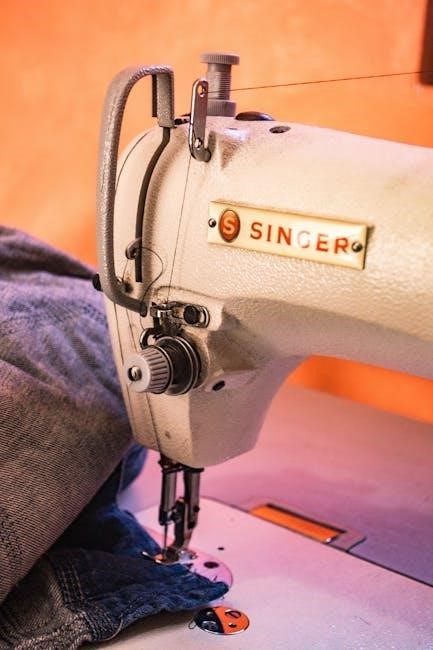
Threading the Kenmore Mini Ultra Sewing Machine
Threading the Kenmore Mini Ultra involves guiding thread from the spool through the tension disc, take-up lever, and needle. Proper alignment ensures smooth stitching and prevents issues.
4.1 Step-by-Step Guide to Threading the Machine
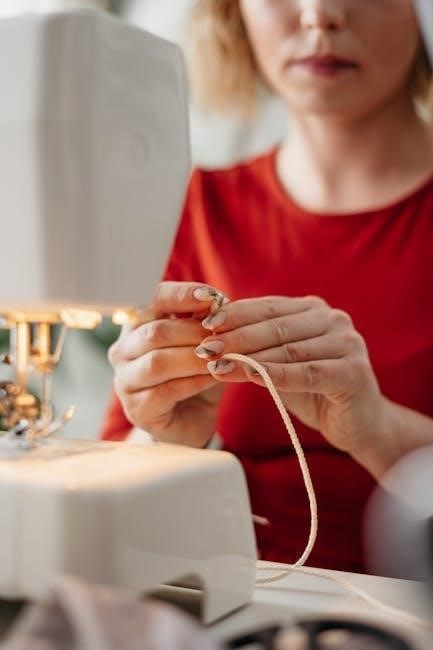
Threading the Kenmore Mini Ultra sewing machine requires careful attention to detail. Start by pulling the thread from the spool and guide it through the tension disc. Next, loop the thread around the take-up lever and pass it through the thread guide. Ensure the thread is seated properly in the needle bar groove before inserting it into the needle eye. Gently pull the thread to remove any slack. Finally, test the thread tension by gently tugging on it. Proper threading ensures smooth stitching and prevents common issues like thread breakage or uneven tension. Always refer to the manual for visual guidance if needed.
4.2 Adjusting Thread Tension for Optimal Sewing
Proper thread tension is crucial for achieving consistent stitches on the Kenmore Mini Ultra sewing machine. To adjust the tension, locate the tension disc and gently turn the tension knob. Loosen the knob to reduce tension or tighten it to increase tension. Test the thread by sewing a straight line on a scrap fabric. If the stitch is uneven, adjust the tension accordingly. Ensure the bobbin thread is also properly tensioned by checking the bobbin case. Refer to the manual for specific guidelines, as incorrect tension can cause fabric puckering or thread breakage. Always test adjustments on scrap fabric before sewing your final project.
Bobbin Winding and Installation
Wind the bobbin by pulling the handwheel out and drawing thread from the spool, guiding it around the thread guide. Secure the thread and wind slowly. Install the bobbin by placing it in the bobbin case, ensuring the thread flows smoothly through the tension spring. Proper installation ensures even stitching and prevents machine issues.
5.1 Proper Technique for Winding the Bobbin
Properly winding the bobbin is crucial for smooth sewing. Begin by pulling the handwheel out to disengage the needle mechanism. Place the thread on the spool pin and draw it through the thread guide. Wrap the thread around the bobbin in a consistent, even layer, ensuring it aligns with the bobbin’s edge. Secure the thread end to prevent tangling. Wind slowly, maintaining steady tension to avoid overfilling. Stop when the bobbin is about 80% full to allow room for the bobbin case. Trim the excess thread and ensure the bobbin rotates smoothly. Always check your machine’s manual for specific guidance, as slight variations may apply.
5.2 Installing the Bobbin in the Machine
After winding the bobbin, insert it into the bobbin case. Place the bobbin into the case, ensuring the notch aligns with the case’s guide. Secure the bobbin by gently pulling the thread to seat it properly. Insert the bobbin case into the machine’s bobbin compartment, making sure it clicks into place. Close the compartment and pull the thread gently to ensure it’s not tangled. Finally, test the machine by sewing a few stitches to confirm the bobbin is installed correctly and the thread flows smoothly. Always refer to your Kenmore Mini Ultra manual for specific alignment details to ensure optimal performance.
Basic Sewing Operations
Master basic sewing operations with ease. This section covers essential steps for threading, bobbin setup, and adjusting thread tension for smooth fabric handling and seamless stitching.
6.1 Selecting the Right Stitch for Your Fabric
Selecting the right stitch is crucial for achieving professional results. The Kenmore Mini Ultra Sewing Machine offers various stitch options, including straight, zigzag, and decorative stitches. For delicate fabrics like silk or cotton, a straight stitch is ideal. Heavier fabrics, such as denim or canvas, benefit from a stronger, wider zigzag stitch. Stretchy materials like knits require a stretch stitch to maintain flexibility. Always refer to the manual for specific stitch recommendations based on fabric type. Adjusting stitch length and width ensures optimal results. Proper stitch selection prevents fabric damage and enhances the durability of your sewing projects. This feature makes the machine versatile for diverse sewing needs. Use the stitch selector dial to choose the perfect stitch for your project.
6.2 Using the Presser Foot and Needle Plate
The presser foot and needle plate are essential for smooth sewing. The presser foot holds fabric firmly, ensuring even feeding. Always lower it before sewing to maintain control. The needle plate has markings to guide fabric alignment for straight stitching. For zippers or thick seams, use the adjustable presser foot height. Clean the needle plate regularly to prevent thread buildup. Proper presser foot usage prevents fabric slippage and ensures consistent stitch quality. Refer to the manual for specific presser foot types, like the zigzag foot, suited for various fabrics and projects. Correct alignment with the needle plate ensures accurate stitching and avoids machine damage. Proper use enhances sewing precision and overall machine performance. Keep these components clean and well-maintained for optimal results. This ensures your sewing projects are professional and long-lasting. Always follow manual guidelines for presser foot and needle plate care. Proper use extends machine longevity and improves stitching accuracy. Regular cleaning prevents thread jams and ensures smooth operation. Use the correct presser foot for your fabric type to achieve the best results. Adjustments may be needed for different materials, as outlined in the manual. This ensures consistent stitching and prevents fabric damage. Always refer to the manual for specific instructions on presser foot and needle plate usage tailored to your sewing needs. Proper maintenance ensures reliable performance and extends the machine’s lifespan. This section provides a comprehensive guide to using these critical components effectively, ensuring professional results in your sewing projects. By following these guidelines, you can achieve precise stitching and maintain your machine in excellent condition. Always prioritize proper presser foot and needle plate usage for optimal sewing outcomes. This ensures your Kenmore Mini Ultra Sewing Machine operates efficiently and delivers high-quality results. Regular cleaning and correct usage prevent common issues and prolong the machine’s durability. Refer to the manual for detailed steps and troubleshooting tips to keep your machine in top condition. Proper care and use of these components are vital for achieving professional sewing results; This section emphasizes the importance of presser foot and needle plate maintenance and usage, ensuring your sewing experience is smooth and productive. Always follow the manual’s recommendations for these parts to maximize your machine’s performance and longevity. Proper techniques outlined here will help you master the basics of sewing with your Kenmore Mini Ultra machine. By adhering to these guidelines, you can tackle a variety of projects with confidence and precision. Keep your machine in excellent working order by paying attention to these essential components. This section provides the knowledge you need to use your presser foot and needle plate effectively, ensuring every stitch is perfect. Always refer back to the manual for specific instructions and troubleshooting tips to keep your machine running smoothly. Proper use of these parts is key to achieving professional results and extending the life of your Kenmore Mini Ultra Sewing Machine. Follow these guidelines to ensure optimal performance and enjoy a seamless sewing experience. This comprehensive guide helps you understand the importance of presser foot and needle plate care and usage, enabling you to create beautiful, durable sewing projects. Always prioritize proper techniques to get the most out of your machine. This section is your go-to resource for mastering the presser foot and needle plate, ensuring every stitch is flawless. Regular maintenance and correct usage will keep your machine performing at its best. Refer to the manual for detailed instructions and troubleshooting tips to address any issues that arise. By following these guidelines, you’ll be able to use your Kenmore Mini Ultra Sewing Machine with confidence and achieve professional results. Proper care and usage of the presser foot and needle plate are essential for maintaining your machine’s performance and extending its lifespan. Always follow the manual’s recommendations to ensure optimal results and keep your machine in excellent condition. This section provides valuable insights into using these critical components effectively, helping you master the basics of sewing with your Kenmore Mini Ultra machine. By adhering to these guidelines, you can tackle a wide range of projects with precision and confidence. Keep your machine in top shape by paying attention to the presser foot and needle plate, ensuring every stitch is perfect. This comprehensive guide is your key to unlocking the full potential of your Kenmore Mini Ultra Sewing Machine, helping you create beautiful and durable sewing projects. Always refer to the manual for specific instructions and troubleshooting tips to keep your machine running smoothly. Proper care and use of these parts are vital for achieving professional results and extending the life of your machine. Follow these guidelines to ensure optimal performance and enjoy a seamless sewing experience. This section emphasizes the importance of presser foot and needle plate maintenance and usage, ensuring your sewing experience is smooth and productive. By following the manual’s recommendations, you can master the basics of sewing and create stunning projects with ease. Always prioritize proper techniques to get the most out of your Kenmore Mini Ultra Sewing Machine. This section provides the knowledge you need to use your presser foot and needle plate effectively, ensuring every stitch is perfect. Regular maintenance and correct usage will keep your machine performing at its best, allowing you to achieve professional results consistently. Refer to the manual for detailed steps and troubleshooting tips to address any issues that arise. By following these guidelines, you’ll be able to use your Kenmore Mini Ultra Sewing Machine with confidence and achieve professional results. Proper care and usage of the presser foot and needle plate are essential for maintaining your machine’s performance and extending its lifespan. Always follow the manual’s recommendations to ensure optimal results and keep your machine in excellent condition. This section provides valuable insights into using these critical components effectively, helping you master the basics of sewing with your Kenmore Mini Ultra machine. By adhering to these guidelines, you can tackle a wide range of projects with precision and confidence. Keep your machine in top shape by paying attention to the presser foot and needle plate, ensuring every stitch is perfect. This comprehensive guide is your key to unlocking the full potential of your Kenmore Mini Ultra Sewing Machine, helping you create beautiful and durable sewing projects. Always refer to the manual for specific instructions and troubleshooting tips to keep your machine running smoothly. Proper care and use of these parts are vital for achieving professional results and extending the life of your machine. Follow these guidelines to ensure optimal performance and enjoy a seamless sewing experience. This section emphasizes the importance of presser foot and needle plate maintenance and usage, ensuring your sewing experience is smooth and productive. By following the manual’s recommendations, you can master the basics of sewing and create stunning projects with ease. Always prioritize proper techniques to get the most out of your Kenmore Mini Ultra Sewing Machine. This section provides the knowledge you need to use your presser foot and needle plate effectively, ensuring every stitch is perfect. Regular maintenance and correct usage will keep your machine performing at its best, allowing you to achieve professional results consistently. Refer to the manual for detailed steps and troubleshooting tips to address any issues that arise. By following these guidelines, you’ll be able to use your Kenmore Mini Ultra Sewing Machine with confidence and achieve professional results. Proper care and usage of the presser foot and needle plate are essential for maintaining your machine’s performance and extending its lifespan. Always follow the manual’s recommendations to ensure optimal results and keep your machine in excellent condition. This section provides valuable insights into using these critical components effectively, helping you master the basics of sewing with your Kenmore Mini Ultra machine. By adhering to these guidelines, you can tackle a wide range of projects with precision and confidence. Keep your machine in top shape by paying attention to the presser foot and needle plate, ensuring every stitch is perfect. This comprehensive guide is your key to unlocking the full potential of your Kenmore Mini Ultra Sewing Machine, helping you create beautiful and durable sewing projects. Always refer to the manual for specific instructions and troubleshooting tips to keep your machine running smoothly. Proper care and use of these parts are vital for achieving professional results and extending the life of your machine. Follow these guidelines to ensure optimal performance and enjoy a seamless sewing experience. This section emphasizes the importance of presser foot and needle plate maintenance and usage, ensuring your sewing experience is smooth and productive. By following the manual’s recommendations, you can master the basics of sewing and create stunning projects with ease. Always prioritize proper techniques to get the most out of your Kenmore Mini Ultra Sewing Machine. This section provides the knowledge you need to use your presser foot and needle plate effectively, ensuring
Troubleshooting Common Issues
Troubleshoot common issues like thread breakage or tension problems by checking the manual. Ensure proper threading and adjust tension as needed. Clean the machine regularly to avoid jams.
7.1 Diagnosing Thread Breakage and Tension Problems
Thread breakage and tension issues are common challenges. Start by inspecting the thread for visible damage or tangles. Ensure the spool is correctly placed and the thread guides are properly aligned. Check the tension disc and take-up lever for proper adjustment. If the thread is too tight or too loose, it can cause frequent breakage. Refer to the manual for specific tension settings. Also, verify that the bobbin is wound evenly and seated correctly. Clean the machine’s tension discs and thread paths regularly to prevent debris buildup. If issues persist, consult the troubleshooting section or contact Kenmore support for assistance.
- Inspect thread for damage or tangles.
- Ensure proper spool placement and thread guide alignment.
- Adjust tension settings as recommended in the manual.
- Check bobbin winding and installation.
- Clean tension discs and thread paths.
Regular maintenance can help prevent these issues. Always refer to the manual for specific guidance tailored to your Kenmore Mini Ultra Sewing Machine model.
7.2 Resolving Bobbin Winding and Installation Issues
Bobbin-related problems can disrupt your sewing workflow. Begin by ensuring the bobbin is wound correctly—use the bobbin winder and guide the thread smoothly. Avoid overfilling, as this can cause the bobbin to jam. If the bobbin doesn’t spin evenly, check for thread tangling or improper winding. During installation, make sure the bobbin is seated securely in the bobbin case and that the thread tail is properly positioned. Consult the manual for specific alignment and tension settings. If issues persist, gently clean the bobbin area to remove any debris. Always refer to the Kenmore Mini Ultra Sewing Machine manual for detailed instructions to ensure proper bobbin function and prevent further complications.
- Wind the bobbin smoothly without overfilling.
- Ensure the bobbin is seated correctly in the machine.
- Check for thread tangles or improper winding.
- Clean the bobbin area regularly.
- Refer to the manual for specific guidance.
Proper bobbin care and installation are crucial for seamless sewing experiences with your Kenmore Mini Ultra Sewing Machine.
Maintenance and Care
Regularly clean the machine to remove dust and debris. Oil moving parts as recommended to ensure smooth operation. Proper maintenance extends the machine’s lifespan and performance.
8.1 Cleaning the Machine Regularly
Regular cleaning is essential to maintain your Kenmore Mini Ultra Sewing Machine’s performance and longevity. Turn off and unplug the machine before cleaning. Remove the needle plate and use a soft brush to sweep away lint and debris from the bobbin area and stitch plate. Gently wipe the exterior with a damp cloth, avoiding harsh chemicals. Inspect and clean the tension discs and take-up lever regularly. Use compressed air to remove dust from tight spaces. Cleaning after each project prevents lint buildup and ensures smooth operation. Always refer to the manual for specific cleaning instructions tailored to your machine. Regular maintenance keeps your sewing machine in optimal condition.
8.2 Oiling and Lubricating Moving Parts
Regular oiling and lubrication are crucial to ensure the smooth operation of your Kenmore Mini Ultra Sewing Machine. Locate the oil ports, typically near the handwheel or bobbin area, and apply a few drops of high-quality sewing machine oil. Gently turn the handwheel to distribute the oil evenly across moving parts. Avoid over-lubricating, as excess oil can attract dust and cause maintenance issues. Use only the type of oil recommended in the manual to prevent damage. Inspect and clean old oil residue before applying new oil. Lubricate every 50 hours of use or as needed. Proper lubrication extends the machine’s lifespan and maintains its performance. Always refer to the manual for specific oil application guidelines.
Advanced Features and Techniques
Explore advanced sewing techniques with decorative stitches and buttonhole sewing. These features enhance your projects, offering precision and creativity for various fabrics and designs.
9.1 Exploring Decorative Stitches and Patterns
The Kenmore Mini Ultra Sewing Machine offers a variety of decorative stitches and patterns to enhance your sewing projects. These stitches allow you to add intricate designs and embellishments to fabrics, making your creations stand out. From delicate floral motifs to geometric patterns, the machine provides options suitable for different fabrics and occasions. To access these stitches, simply use the stitch selector dial to choose your desired pattern. The machine also includes a guide that illustrates each stitch type, ensuring you can easily identify and utilize them. Experimenting with these decorative features can help you achieve professional-looking results and expand your creative possibilities in sewing.
9.2 Mastering Buttonhole Sewing
The Kenmore Mini Ultra Sewing Machine simplifies buttonhole sewing with its automatic buttonhole foot. This feature ensures precise stitching for professional-looking results. To sew a buttonhole, mark the fabric where you want it, then attach the buttonhole foot. Select the buttonhole stitch and let the machine guide the fabric smoothly. The machine automatically sews the forward and reverse stitches, creating a perfect buttonhole. For customization, you can adjust the size and density of the stitches. Always refer to the manual for specific settings and troubleshooting tips. With practice, you’ll master sewing buttonholes effortlessly, enhancing garments and projects with ease and precision.
Resources and Support
Access the official Kenmore Mini Ultra Sewing Machine Manual online for detailed instructions. Visit Sears Parts Direct for replacement parts, diagrams, and customer support resources.
10.1 Accessing the Official Kenmore Manual Online
To access the Kenmore Mini Ultra Sewing Machine Manual, visit the official Sears Parts Direct website. Enter your machine’s model number, such as 385.11206300, in the search bar to retrieve the manual. The PDF manual is available for download and includes detailed instructions for setup, operation, and maintenance. It covers topics like threading, bobbin winding, and troubleshooting. Ensure you have the correct model number for accurate results. This resource is essential for understanding your machine’s features and resolving any issues efficiently. Always refer to the official source for the most reliable information.
10.2 Finding Replacement Parts and Accessories
To find replacement parts and accessories for your Kenmore Mini Ultra Sewing Machine, visit the Sears Parts Direct website. Enter your machine’s model number, such as 385.11206300, to search for compatible parts. The website offers a wide range of components, including bobbin winders, presser feet, and stitch plates. You can also find accessories like screwdrivers and rubber rings specifically designed for your machine. Ensure compatibility by verifying the model number before making a purchase. For assistance, contact Sears customer support or refer to the official Kenmore manual for part diagrams. Additionally, third-party sellers may offer compatible parts, but always choose reputable sources to ensure quality and authenticity.